
4-cylinder engine
Remove the V-belts or poly V-belts (chapter "Generator").
Remove the crankshaft pulley after loosening the Allen bolts (not the central bolt!).
Remove the timing belt guard.
Loosen the timing belt (see "Timing Belt Tension") and remove it.
Put on a new timing belt. If the position of the crankshaft and camshaft timing pulleys has not been changed, it is possible that the valve timing has not yet been knocked down. But to be more sure, you need to check this before final assembly.
Rotate the camshaft timing pulley so that the mark on the pulley is under the arrow on the rear of the timing belt guard.
If this requires turning the camshaft, this can only be done if none of the pistons are in the TDC position, otherwise the valves or piston crowns may be damaged.
Place the toothed belt on the crankshaft and intermediate shaft gears.
Secure the crankshaft V-belt pulley with just one bolt. Make sure it is positioned correctly: depending on the engine version, either the locking pin must engage in the pulley or the pulley mounting holes must be positioned asymmetrically. In this case, all mounting holes will be in the same plane as the crankshaft holes.
Turn the crankshaft so that the marking on the V-belt pulley points upward.
Align the marking on the intermediate shaft gear with the mark on the V-belt drive pulley.
Place the toothed belt, making sure that the position of the various gears does not change.
Tighten the timing belt.
Remove the distributor cap and check whether the distributor rotor points to the mark on the edge of the distributor housing
Otherwise, loosen the lock screw.
Turn the ignition distributor so that the rotor and the mark are aligned, it may be necessary to remove the ignition distributor and reinstall it (Chapter "Ignition system").
Retighten the locking screws.
Turn the crankshaft completely twice and check the valve timing again.
Before installing the lower part of the toothed belt guard, remove the crankshaft V-belt pulley again.
Tighten the pulley to 20 Nm (correct installation, see previous text).
Adjust the ignition.
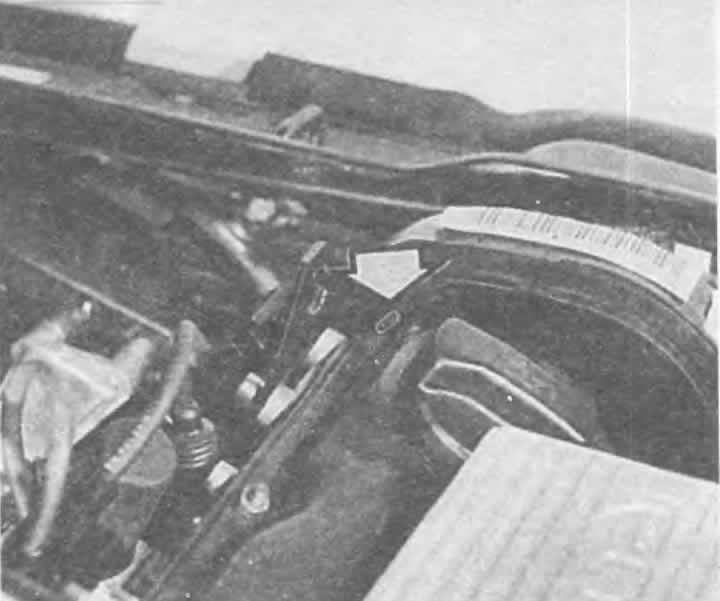
In a 5-cylinder engine, the TDC mark of the camshaft of the first cylinder is located on the back side of the toothed pulley. The back of the toothed belt guard is provided with a slot (arrow), through which you can check whether the mark is exactly near the top edge of the cylinder head cover.
5-cylinder engine
If you only need to remove the timing belt from the camshaft gear to replace the cylinder head, you can do without special tools. You just need to select the necessary operations from the description.
Set the piston in the first cylinder to TDC of the ignition timing, see above in this chapter.
Remove the front upper cross member of the engine compartment (Chapter "Body elements").
Loosen the radiator mount on the right side in the direction of vehicle movement, tilt it forward and support it. This will give you freedom of action during subsequent dismantling.
Unscrew the fan with a viscous coupling; for this you will need a special so-called fork wrench (chapter "Cooling system").
Remove the V-belt (chapter "Generator").
Remove the timing belt guard.
Loosen the timing belt (see "Timing Belt Tension") and remove it.
Install counter support 2084 on the crankshaft pulley (with damper), loosen the central bolt using extension 2079.
Remove the pulley with the toothed belt.
Mark the direction of the toothed belt for installation. Maintain the direction for used belts.
Installation: Place the timing belt on the removed timing pulley.
Install the crankshaft toothed pulley together with the toothed belt onto the crankshaft. Make sure that the toothed belt is not pinched.
Install counter support 2084 on the crankshaft pulley (with Damper), tighten the central bolt using extension 2079 (350 Nm).
Check the TDC position of the camshaft and crankshaft again.
On the reverse side of the crankshaft toothed pulley, align the mark with the upper left edge of the cylinder head cover (watch it through a small slit). When the camshaft rotates, no piston should be in the TDC position, otherwise the valves or piston crowns may be damaged.
Crankshaft: align the TDC mark on the flywheel with the mark in the observation hole of the clutch housing. Or use the installation marking on the pulley.
Place the timing belt on the camshaft, tension roller and water pump, without changing the position of the camshaft and crankshaft.
Tighten the toothed belt
Turn the crankshaft 2 revolutions and check the valve timing again.
Check the position of the ignition distributor as described for the 4-cylinder engine.
Set the ignition.
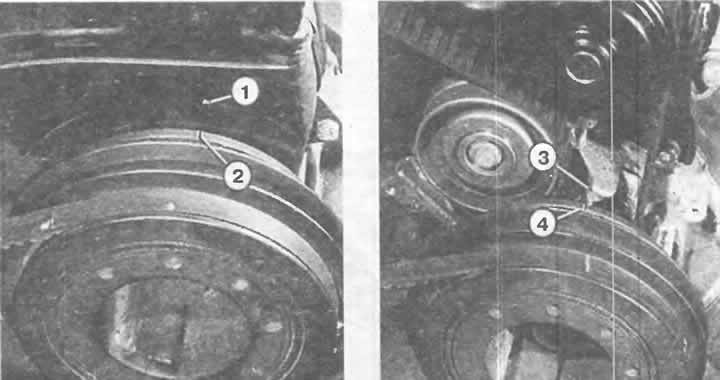
In a 5-cylinder engine, the TDC marks are also located on the crankshaft pulleys. Positions (1) and (2) show the marks with the toothed belt guard installed, positions (3) and (4) show the TDC position with the toothed belt guard removed.
6-cylinder engine
Here you will find a description of the work, however, at home nothing can be done without special tools.
Remove the V-belt together with the tensioner (chapter "Generator").
Remove the timing belt guard on both sides (see in this chapter above).
Turn the crankshaft to the TDC position of the ignition moment of the first cylinder. The marks on the crankshaft pulley and the protective cover of the toothed belt must be aligned, the large holes of the locking plates on the camshaft gears must be directed towards each other towards the middle of the engine.
Unscrew the ignition timing sensor from the cylinder block and screw in the special tool "crankshaft locking tool 3242" instead. The tool must fit into the rear hole of the crankshaft. Tighten slightly.
Remove the crankshaft poly V-belt pulley and unscrew the toothed belt protective cover from below.
Mark the direction of the toothed belt for subsequent assembly. Maintain the direction of the belt for belts that have already been used.
Install the special tool "camshaft locking tool 3243" on the camshaft locking plates.
Loosen the camshaft gear bolts approximately three turns.
Remove special tool 3243.
Remove both camshaft gears from the cones. Use a paw-type puller to do this. Install the grips on the back of the timing belt gear; the bolt remains as it was (loosened by three turns).
After the preliminary work, you can begin adjustment.
If the timing belt needs to be replaced, it is done immediately.
For further work, you need to put on a toothed belt.
Reinstall the special tool "Camshaft Locking Tool 3243" on the camshaft locking plates.
Check the special tools again for correct installation.
The camshaft gears must be placed on the cone in such a way that they can rotate with the shaft, but do not swing from side to side (the bolt is tightened by hand).
Now tighten the toothed belt (description see above in this chapter).
Tighten the camshaft gears to 70 Nm.
Remove special tools.
Reinstall the removed parts.