
Table of contents: Removal the timing belt cover ↓ Checking the condition of the timing… ↓ Checking the timing belt tension ↓ Tensioning the timing belt ↓ Replacing the timing belt, adjusting… ↓ Can I do this myself? ↓
The valves are driven, as already mentioned, by a toothed belt. It turns the camshaft half a turn of the crankshaft. The toothed belt also drives: the water pump (models with 5 and 6 cylinder engines) and intermediate shaft (models with 4-cylinder engines).
In a 6-cylinder engine, the timing belt protective cover is also secured with fastening brackets (arrows). To remove the right half of the protective cover, you must also remove the poly V-belt tension roller (large Allen bolt).
Removal the timing belt cover
4-cylinder engine: Press out the two fastening brackets at the top of the casing.
Remove the top part of the casing.
When installing, make sure that the lower edge of the casing is correctly inserted into the upper part, otherwise the casing will not hold.
Usually it is enough to remove the top part of the casing. If you need to remove the bottom part as well:
Shine V-belt (see chapter "Generator")
Unscrew the V-belt drive pulleys on the crankshaft and water pump.
Loosen and remove the lock bolts and nuts from the lower part of the timing belt cover.
When installing, the V-belt pulley bolts must be tightened to a torque of 20 Nm, and the nuts and bolts of the toothed belt cover to a torque of 10 Nm.
5-cylinder engine: Press the two fastening brackets on the top of the casing.
Remove the upper part of the timing belt cover.
Unscrew and remove the locking bolts from the lower part of the casing.
When installing, tighten all bolts to a torque of 10 Nm.
6-cylinder engine: remove the poly V-belt and also the tension roller for the poly V-belt (chapter "Generator").
Remove one tension clamp from the top and bottom of each half of the timing belt casing
Carefully remove the casing from the remaining fasteners.
Checking the condition of the timing belt
Remove the timing belt cover.
There should be no cracks or traces of grease on the toothed belt.
The side surfaces of the teeth must be intact and without signs of wear.
In order to visually check the belt along its entire length for integrity, you should crank the engine as described earlier.
A damaged timing belt must be replaced!
Checking the timing belt tension
The belt tension is checked on Audi models in the following locations.
On a 4-cylinder engine, the timing belt cover is removed after loosening both mounting brackets (arrows).
Removing the timing belt guard of a 5-cylinder engine after loosening both fastening brackets (arrows).
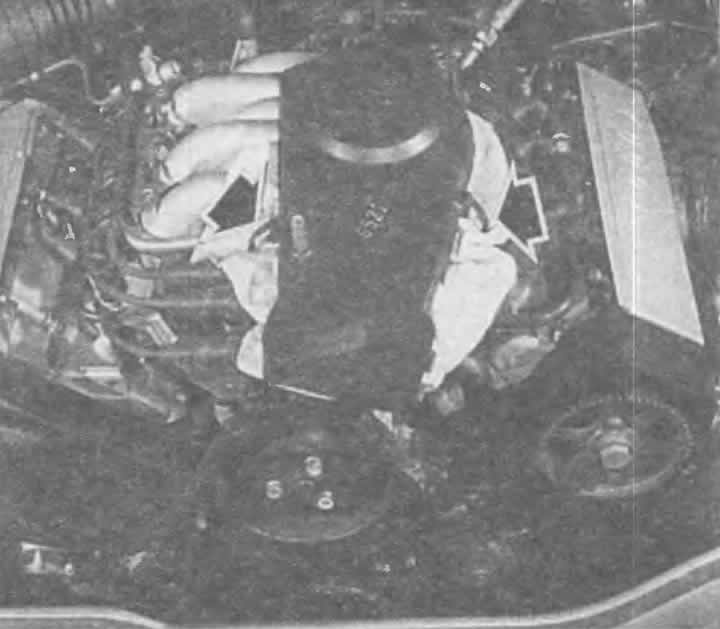
The toothed belt (2) of a 4-cylinder engine is tensioned correctly if it can be turned 90 degrees between the gears of the toothed belt of the camshaft (1) and the intermediate shaft (the intermediate shaft is not visible in the picture).
4-cylinder engine: between the camshaft and intermediate shaft gears.
5-cylinder engine: between the camshaft gear and the coolant pump.
6-cylinder engine: between the camshaft gear and the upper idler roller.
A cold toothed belt can be twisted (bent) by 90° under normal tension (right angle) only with the thumb and index finger.
Note: A whistling noise after starting a cold engine, which gets louder at higher engine speeds, indicates that the timing belt is too tight.
Tensioning the timing belt
The timing belt tension can only be adjusted when the engine is cold.
First, you must remove the timing belt protective cover.
When working with a 4-cylinder engine, a special wrench is used in the workshop, for example, the Matra V 159.
Loosen the clamp bolt on the timing belt tension roller.
Turning the tension roller counterclockwise with a wrench tightens the timing belt.
Tighten the clamping bolt to 20 Nm.
Without a wrench, you need to do the following: insert a strong screwdriver into one of the holes of the camshaft toothed pulley, turn it slightly to the left so that the toothed belt loosens.
Now you need to loosen the clamp bolt and place a small screwdriver at an angle to the place shown in the bottom picture on the next page. In this way, you can rotate the eccentric of the tension roller until the desired tension of the toothed belt is established. Naturally, during this procedure, you need to hold the camshaft firmly. Then tighten the clamp bolt and check the tension of the toothed belt again.
When working on a 5-cylinder engine, slightly loosen the tensioner mounting bolts.
To tension the timing belt, rotate the tensioner with a hex key to a torque of 25 Nm (with a torque wrench) clockwise.
Keep the tensioner in this position and tighten the bolts again to 10 Nm.

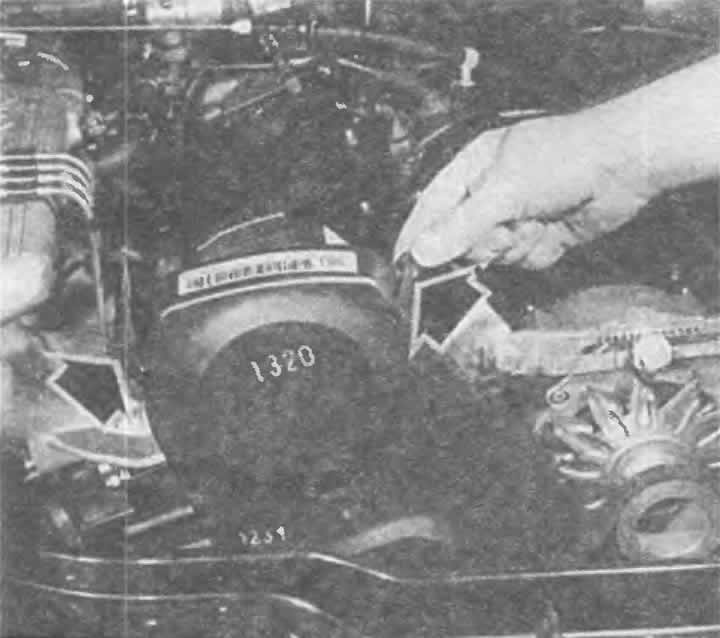
Checking the timing belt tension of a 5-cylinder engine (illustration on the left) and a 6-cylinder engine (illustration on the right) is done in the same way as already described in the caption to the illustration showing a 4-cylinder engine. The toothed belts must be tensioned so that they can be turned 90°. The illustrations show the places where the belt tension must be checked.
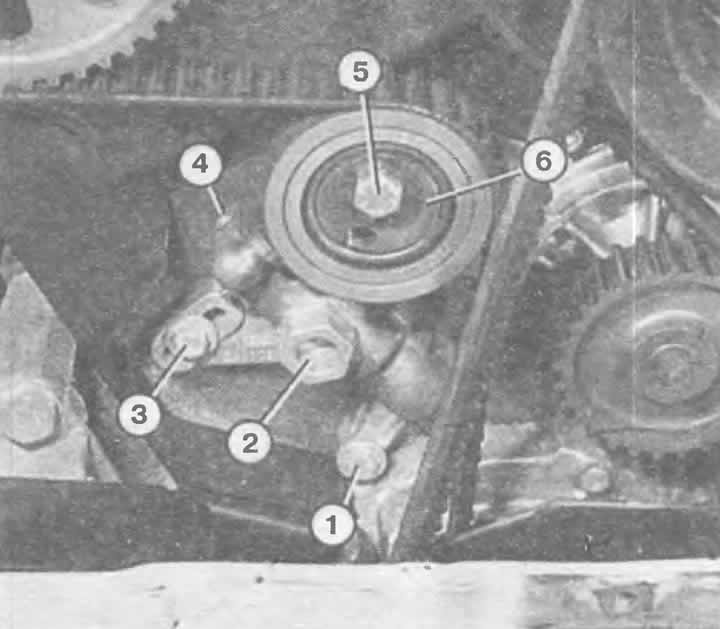
Shown here is a temperature sensitive tensioner pulley for a 5-cylinder engine. The numbers represent:
1 and 3 - mounting bolts;
2 - a hexagon into which the key is inserted when tensioning the toothed belt;
4 - thermoelement;
5 — mounting bolt for tension roller (6).
6-cylinder engine: remove the poly V-belt and the poly V-belt tensioner.
Loosen the clamp bolt (with an 8 mm socket wrench) on the tension roller.
Using an 8mm Allen key, turn the tension roller to the right until the correct timing belt tension is established.
Keep the tension roller in this position
Using a second 8 mm Allen key, tighten the tension roller clamping bolt (45 Nm).
All engine types: turn the crankshaft one revolution and check the timing belt tension again (see previous section).
Replacing the timing belt, adjusting the valve timing
Description of the operations for replacing the toothed belt is necessary not only for the work on the replacement itself, but also when removing and installing the cylinder head, for which it is necessary to remove the toothed belt.
Installing a timing belt logically includes adjusting the valve timing. But to avoid any misconceptions: the valve timing does not change during wear. It is adjusted only once, if the timing belt has been removed before.
Note: The valve timing mechanism and crank mechanism work in concert (see beginning of chapter) only if the valve timing is set correctly. Incorrect valve timing results in low engine power and in extreme cases can even cause serious engine damage when the piston bottom hits valves that are not closed in time. Different engine types have different adjustments.
Can I do this myself?
Complete replacement of the timing belt in 5- and 6-cylinder engines is only possible with the use of special tools. Therefore, unfortunately, this work is not for home conditions.
When working on a 5-cylinder engine, to remove the timing belt, it is necessary to remove the damper at the front of the crankshaft and then reinstall it, which is only possible with a special extension (2079) for the torque wrench and a counter-stop (2084).
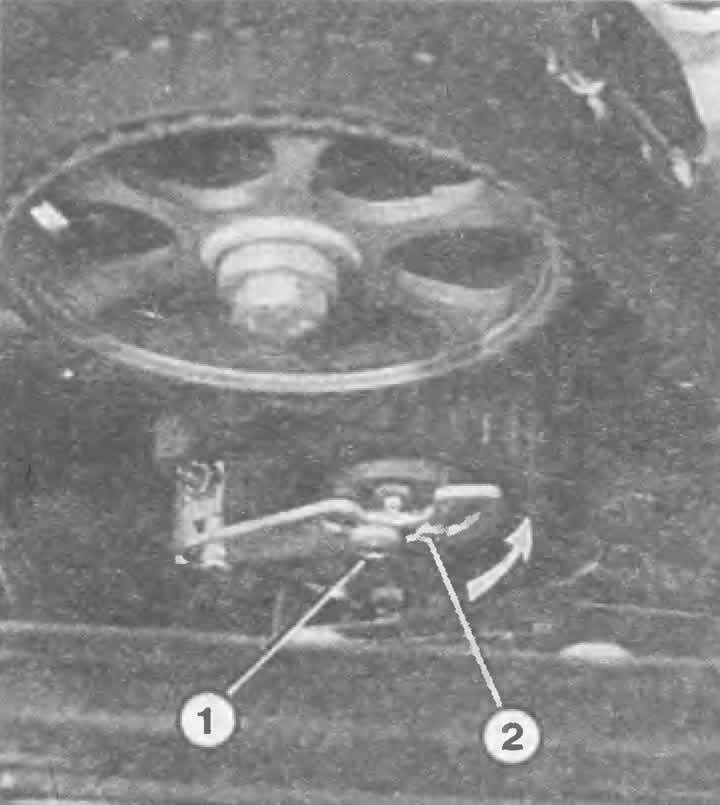
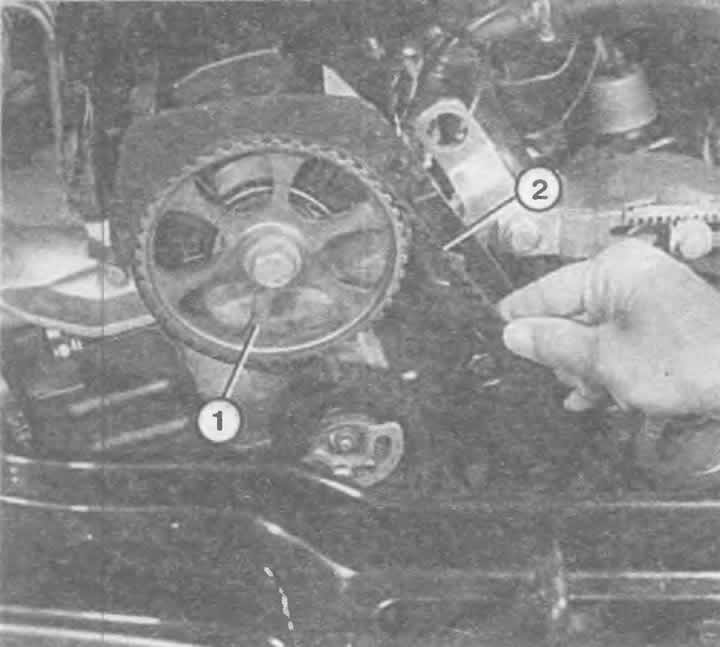
On the left is the timing belt tension roller of a 4-cylinder engine. Designations:
1 - clamp bolt;
2 - here you can install the tool for tensioning the toothed belt. The arrow shows the direction of rotation for tensioning the belt.
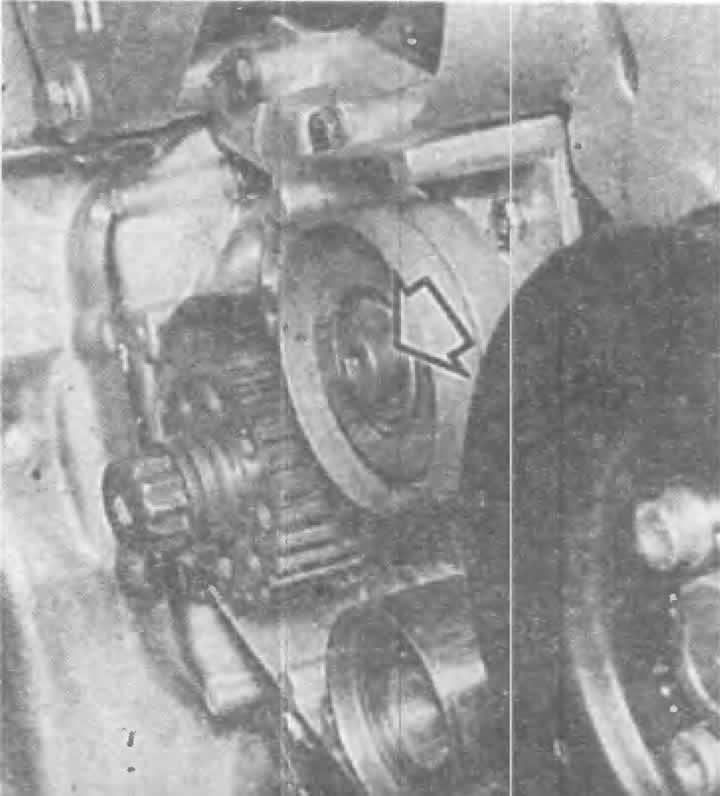
Right: The tensioner pulley (arrow) of the 6-cylinder engine is hidden on the right front of the cylinder block.
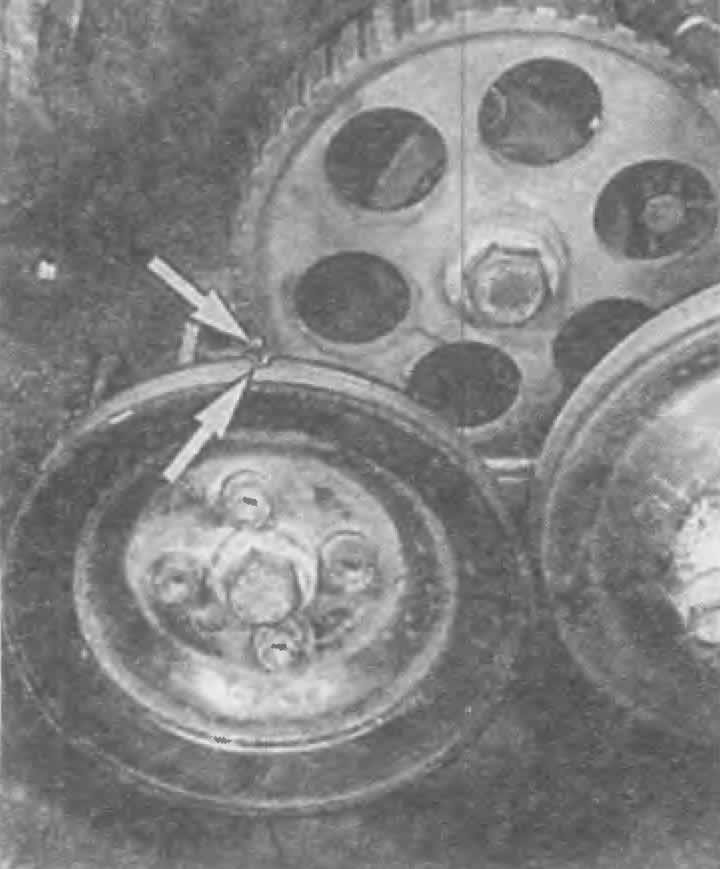
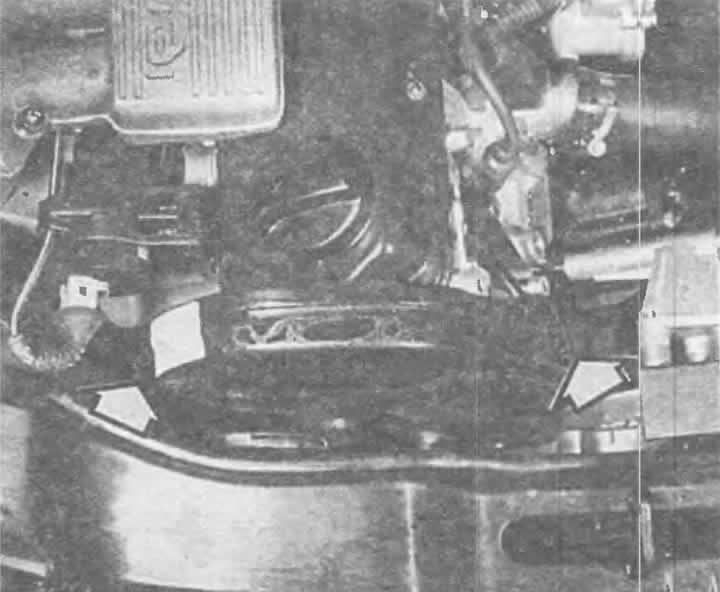
Left: When working with a 4-cylinder engine, when installing the timing belt, the marking on the intermediate shaft gear and the mark on the V-belt pulley (marked with arrows in the illustration) must be in the same plane (in a row).
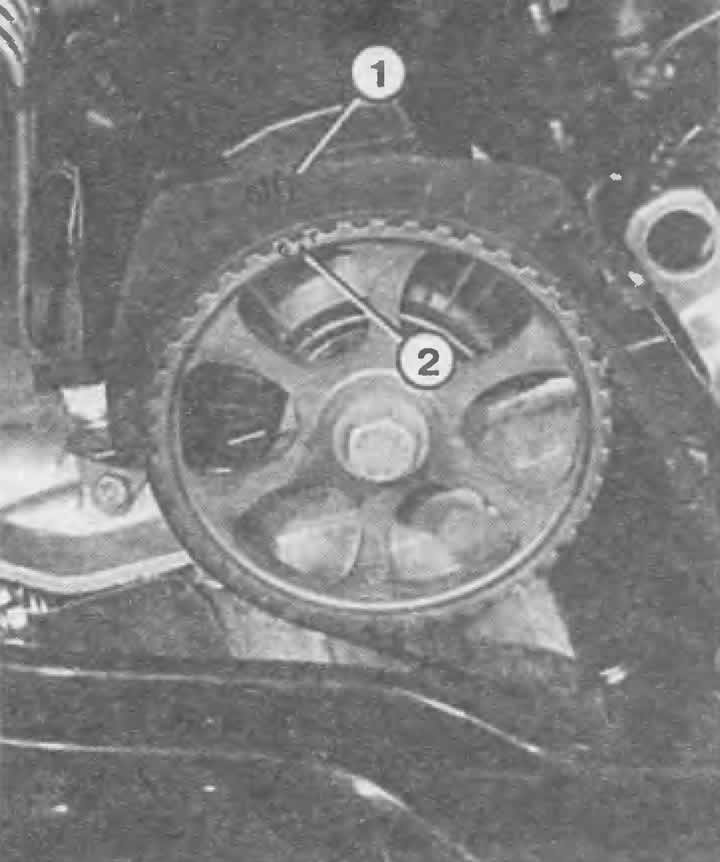
Right: The markings on the timing belt pulley (2) must simultaneously match the arrow mark (1) on the rear of the timing belt guard.
When replacing only the cylinder head, the belt remains attached to the bottom of the crankshaft gear, so no special tools are required.
When working with a 6-cylinder engine to regulate the valve timing (what is needed after replacing the timing belt and removing the cylinder heads) the camshafts and crankshaft must be secured with special tools (tools 3242 and 3243) exactly at TDC position.
Working with a 4-cylinder engine is not a problem. No special tools are required to replace the timing belt.
[The original article is available on the online resource: AUDImanual]