
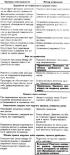
Doors, locks and windows of the car Audi 100 C3, petrol
Removal and installation of the sunroof
Withdrawal Unscrew the handle mounting bolts. Pull out and disconnect the cover and plastic frame. Remove the cable tensioner. Slide the front guide as far as...
Withdrawal Unscrew the handle mounting bolts. Pull out and disconnect the cover and plastic frame. Remove the cable tensioner. Slide the front guide as far as...

Removal and installation of an upholstery of a door
Remove the inside lock button. Remove the lining of the inner handle of the lock. Remove the trim for the power window handle. Unscrew the central fastening...
Remove the inside lock button. Remove the lining of the inner handle of the lock. Remove the trim for the power window handle. Unscrew the central fastening...
Removal and installation of doors
Remove lining. Disconnect the electrical wires and take them out. Unscrew the bolts from the door suspension hinges. Remove door. Installing the door is done...
Remove lining. Disconnect the electrical wires and take them out. Unscrew the bolts from the door suspension hinges. Remove door. Installing the door is done...

Sunroof details
Sunroof details: 1 - front drainage tube; 2 - flexible cable sheath; 3 - fixing pads; 4 - guide assembly with rollers and cable (replaced as a set); 5 - hatch...
Sunroof details: 1 - front drainage tube; 2 - flexible cable sheath; 3 - fixing pads; 4 - guide assembly with rollers and cable (replaced as a set); 5 - hatch...

Front door details
Front door details: 1 - left mechanical window regulator 443 837 399 (right 443 837 400); 2 - power window regulator, left 443 837 397 (right 443 837 398); 4 -...
Front door details: 1 - left mechanical window regulator 443 837 399 (right 443 837 400); 2 - power window regulator, left 443 837 397 (right 443 837 398); 4 -...

Tailgate details
tailgate details: 1 - left mechanical window regulator 443 839 399 (right 443 839 400); 2 - power window regulator, left 443 839 397 (right 443 839 398); 4 -...
tailgate details: 1 - left mechanical window regulator 443 839 399 (right 443 839 400); 2 - power window regulator, left 443 839 397 (right 443 839 398); 4 -...

Door lock mechanism
Door lock mechanism: 1 - outer left handle 443 839 205 V (right 443 839 206 V); 2 - lining 443 837 239; 3 - lock cylinder 443 837 217 C; 4 - gasket 443 837...
Door lock mechanism: 1 - outer left handle 443 839 205 V (right 443 839 206 V); 2 - lining 443 837 239; 3 - lock cylinder 443 837 217 C; 4 - gasket 443 837...

Door and hinge details
Door and hinge details: 1 - front left door 443 831 051 A (right 443 831 015 A); 2 - door opening limiter 443 837 249 V; 3 - rubber seal 443 831 721 A; 5 -...
Door and hinge details: 1 - front left door 443 831 051 A (right 443 831 015 A); 2 - door opening limiter 443 837 249 V; 3 - rubber seal 443 831 721 A; 5 -...

Car body glazing
Body glazing: 1 - windshield rubber seal 443 853 299; 2 - windshield 443 845 099 C with glued sun protection film 443 845 099 E; 3 - rear window sedan 443 845...
Body glazing: 1 - windshield rubber seal 443 853 299; 2 - windshield 443 845 099 C with glued sun protection film 443 845 099 E; 3 - rear window sedan 443 845...

Removal and installation of a windshield
Note. Installation of a triplex windshield requires the use of a special tool kit provided by the manufacturer. Withdrawal Remove the interior rearview mirror....
Note. Installation of a triplex windshield requires the use of a special tool kit provided by the manufacturer. Withdrawal Remove the interior rearview mirror....

Trunk and luggage compartment details
Trunk and luggage compartment details: 1 - trunk lid 443 827 023 E; 2 - loop left 443 827 299 C (right 443 827 300 C); 3 - spring 443 827 511 V; 4, 5 - lock...
Trunk and luggage compartment details: 1 - trunk lid 443 827 023 E; 2 - loop left 443 827 299 C (right 443 827 300 C); 3 - spring 443 827 511 V; 4, 5 - lock...

Rear door lock details
Rear door lock details: 1, 8 - lock right 445 827 506 (left 445 827 505); 2.7 - loop 445 827 518; 3 - gasket 361 827 527; 4 - bar 445 827 565 V; 5 - draft left...
Rear door lock details: 1, 8 - lock right 445 827 506 (left 445 827 505); 2.7 - loop 445 827 518; 3 - gasket 361 827 527; 4 - bar 445 827 565 V; 5 - draft left...
Rear window heating element repair
Using a tester or test lamp, make sure that voltage is applied to the contacts «+» And «—» rear window heating element. If necessary, visually check the...
Using a tester or test lamp, make sure that voltage is applied to the contacts «+» And «—» rear window heating element. If necessary, visually check the...
Removing and installing the trunk lid (tailgate)
Disconnect the taillight electrical wires and disconnect the connectors. Loosen the four nuts securing the trunk lid one by one (tailgate) to the hinges and...
Disconnect the taillight electrical wires and disconnect the connectors. Loosen the four nuts securing the trunk lid one by one (tailgate) to the hinges and...
This section is available on russian, bulgarian, belarusian, ukrainian, serbian, croatian, romanian, polish, slovak, hungarian
Similar sections of other Audi car models:
Body: Doors, covers and windows Audi A3 Type 8L (1996-2003)
Body: Doors, locks and windows Audi A4 B5 (1994-2001)
Body: Doors, locks and windows Audi A6 C5 Allroad (1999-2005)
Body: Doors, locks and windows Audi A2 (1999-2005)
Body: Doors, covers and windows Audi A3 Type 8L (1996-2003)
Body: Doors, locks and windows Audi A4 B5 (1994-2001)
Body: Doors, locks and windows Audi A6 C5 Allroad (1999-2005)
Body: Doors, locks and windows Audi A2 (1999-2005)
Share information:
- General information
- User manual
- Power unit
- Engine repair
- Ignition system
- Fuel system (gasoline)
- Fuel system (diesel)
- Lubrication system
- Cooling system
- Exhaust system
- Transmission
- Clutch
- Car gearbox
- Drive shafts
- Chassis
- Car suspension
- Steering
- Wheels and tires
- Brake system
- Body
- Ventilation and heating
- Body repair
- Electrical equipment
- Power devices
- Lighting and appliances
- Electrical circuits
- General information
- Operation and maintenance
- Power unit
- Engine repair
- Exhaust system
- Cooling system
- Supply system
- Air filter
- Mono-Motronic injection system
- Digifant injection system
- KE-III-Jetronic and KE-Motronic
- MPI and MPFI injection system
- Transmission
- Clutch
- Car gearbox
- Chassis
- Suspension and steering
- Brake system
- Wheels and tires
- Body
- Exterior
- Interior
- Electrical equipment
- Fuses and relays
- Power devices
- Ignition system
- Lighting and signaling
- Equipment and devices
- Electrical circuits
- General information
- User manual
- Maintenance
- Specifications
- Power unit
- Engines 4-cylinder
- Engines 5-cylinder
- Diesel engine
- Cooling system
- Power system (carburetor)
- Power system (injector)
- Fuel system (diesel)
- Transistor ignition system
- Electronic ignition system
- Transmission
- Clutch
- 4 speed gearbox 014
- 5 speed gearbox 013 and 093
- 5 speed gearbox 016 and 012
- Shift mechanism KP 016
- Automatic transmission
- Front wheel drive
- Chassis
- Front suspension
- Rear suspension
- Steering
- Brake system
- Body
- Body elements
- Electrical equipment
- Lighting and appliances
- Power devices
- Electrical circuits
- General information
- Maintenance and operation
- 4 cylinder engine
- Engine repair
- Cooling and lubrication system
- Supply system
- Ignition system
- 5 cylinder engine
- Engine repair
- Cooling and lubrication system
- Supply system
- Ignition system
- Transmission
- Clutch and drive shafts
- 4 speed gearbox 014
- 5 speed gearbox 013 and 093
- 5 speed gearbox 016 and 012
- Automatic gearbox
- Chassis
- Steering
- Front suspension
- Rear suspension
- Brake system
- Body
- Body elements
- Doors, locks and windows
- Body repair
- Electrical equipment
- Equipment and devices
- Power devices
- Electrical circuits
- General information
- User manual
- Maintenance
- Troubleshooting
- Power unit
- Engine in a car
- Engine removed
- Cooling system
- Fuel system
- Exhaust system
- Starting and charging
- Preheating
- Transmission
- Clutch
- Mechanical gearbox
- Automatic gearbox
- Drive shafts
- Chassis
- Brake system
- Suspension
- Steering
- Body
- Exterior
- Interior
- Electrical equipment
- Equipment and devices
- Electrical circuits
AudiManual.ru © 2017-2024 · Mobile version · Feedback · Sitemap: EN BG BY UA RS HR RO PL SK HU · Site search · News and articles
80 B2 · 80 B3 petrol · 80 B3 · 80 B4 · 100 C3 diesel · 100 C3 petrol · 100 C3 · 100 C4 petrol · 100 C4 · A3 Type 8L · A4 B5 petrol · A4 B5 · A4 B6 petrol · A4 B6 · A6 C4 · A6 C5 · A6 C5 Allroad · A8 D2 · Audi A2 ·
80 B2 · 80 B3 petrol · 80 B3 · 80 B4 · 100 C3 diesel · 100 C3 petrol · 100 C3 · 100 C4 petrol · 100 C4 · A3 Type 8L · A4 B5 petrol · A4 B5 · A4 B6 petrol · A4 B6 · A6 C4 · A6 C5 · A6 C5 Allroad · A8 D2 · Audi A2 ·