
Table of contents: Removal ↓ Installation ↓ Cleaning stains from paintwork and… ↓ Checking the tightness of the… ↓
Note: Installation of a triplex windshield requires the use of a special set of tools, provided by the manufacturer.
Removal
Remove the interior rearview mirror.
Use a lever to lift the side pillar trim of the opening.
Using a lever, remove the locking ring from the ceiling.
Remove the windshield wiper arms.
Lift up the edge of the glass seal.
Cutting the windshield seal. Position of the cutting string
Using piano wire, cut the rubber seal around the entire perimeter of the glass.
Remove the glass from the opening using two suction cups.
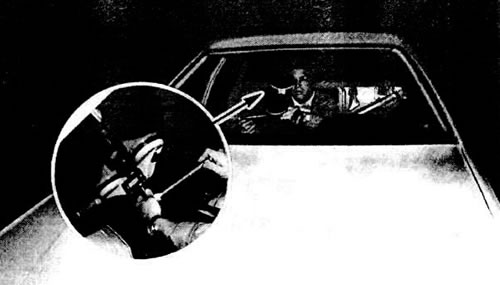
Installing a suction cup on the windshield
Remove dirt from the perimeter of the glass, being careful not to scratch the black film visible from the outside.
Note: When cutting the rubber windshield seal, do not allow the string to move back and forth to avoid breaking it.
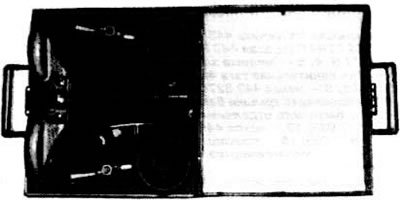
Windshield Removal Tool Kit
Installation
Wipe the glass around the perimeter at a width of approximately 5 mm with a lint-free clean cloth soaked in solvent.
Place a new rubber seal on the glass.
Place a strand of glue no more than 22 mm wide into the glass opening.
Glue six spacers onto the seal.
Load the sealant gun with a capsule heated to approximately 50-60°C and apply the sealant in a continuous strip into the seal groove.
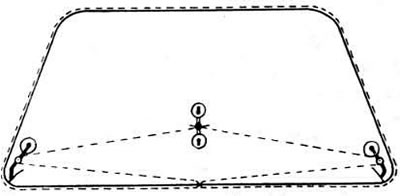
Using suction cups, install the glass into the opening, ensuring that it is centered: the location of the rubber guides should provide a 5 mm gap between the seal and the opening.
Note: The windshield centering struts can be left in place, but the rear window struts must be removed 4 hours after installation.
Cleaning stains from paintwork and plastic parts
Cleaning should be done with a soft, lint-free cloth dampened with solvent (white spirit). Paint and varnish coatings should be pre-wiped with a dry soft cloth, and stains that form on plastic parts should be removed 2-3 hours after installing the glass.
Checking the tightness of the windshield installation in the opening
Removed using a plastic pillar trim lever.
Remove the ceiling lock with a lever.
Lift up the edge of the seal and stick it with adhesive tape around the entire perimeter of the glass.
Check the tightness of the glass by pouring water on the outer surface.
Dry the leak areas with a jet of compressed air and clean them from dirt.
Apply sealant to areas where leaks have been identified.
(This article was copied from the website «AudiManual.ru»)