
Table of contents: Removal the protective edging ↓ Removal the rain and light sensor… ↓ Unlocking the clamp ↓ Installation ↓ Replacing the rain and light sensor… ↓
Note: On vehicles with lane assist, the video camera must be calibrated.
 1. Windscreen. Distance to roof, dimension "a" = 2 mm. Align side gap, dimension "c"; 2. Glue roller. Observe the minimum curing time. Dimension "b" = 17 mm±2 mm. Dimension "c" = 8 mm±2 mm. Dimension "d" = 12 mm±2 mm; 3. Slotted trim. Not a spare part. When removing the glass, it is necessary to pull the cutting wire under the butt trim; 4. Waterproof pad; 5. Edging frame of the water drain box cover. Not a spare part. For new glass, remove the protective edging first before installing the water drain box cover; 6. Cover of the water drainage box. Insert into the fixing strip only after the curing time of the glass adhesive has passed (3 hours)
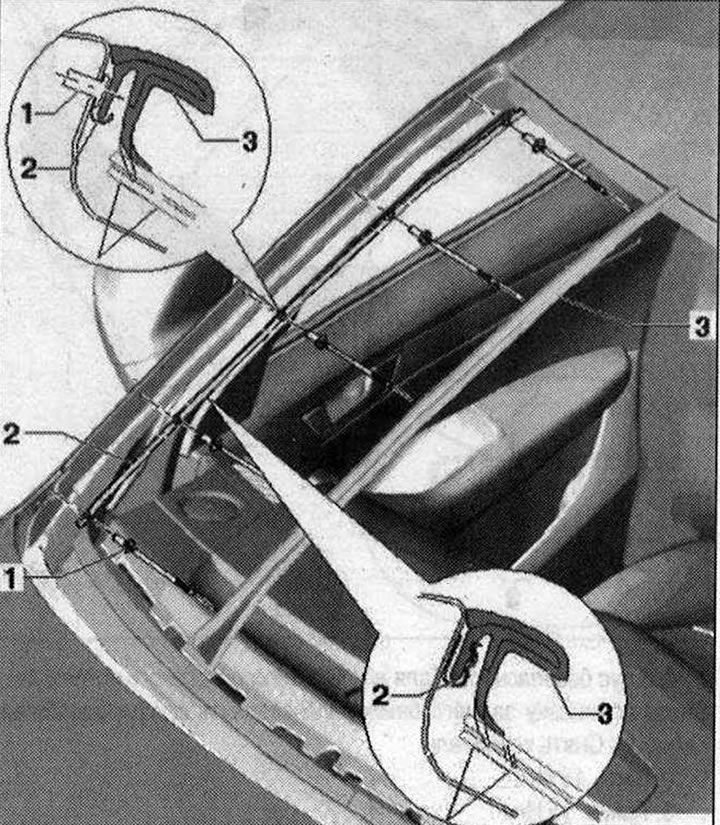
Removal the waterproof cover 1. Blind rivet. 5x. Installation of rivets on the guide starts from the top; 2. Guide. To remove, drill out the heads of the rivets "4" and knock out the rivets; 3. Waterproof pad. Press firmly into the guide from top to bottom. Observe the tolerances for protrusion at the junction with the "A-pillar"
Removal the protective edging
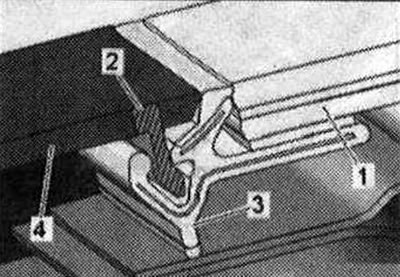
Before installing the water drain box cover "4" on the new windshield "1", it is necessary to first remove the protective edging "2" from the edging frame "3".
Removal the rain and light sensor "G397"
When removing the rain and light sensor "G397" the film is removed, when reinstalling it it should be replaced.
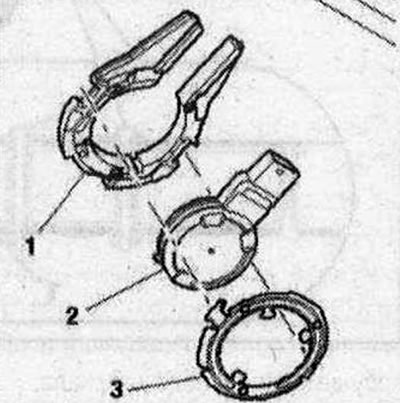
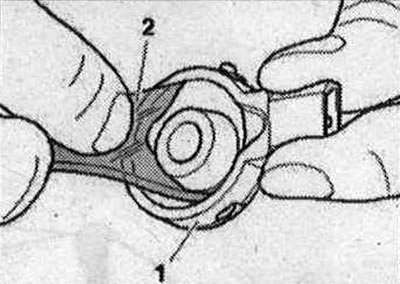
Outside mirror removed. Mounting plate "1". Rain and light sensor "G397" "2". Clamp "3".
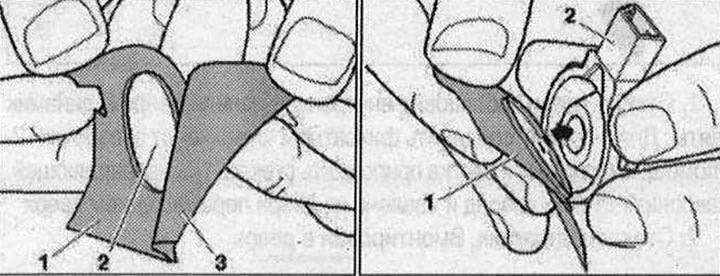
Unlocking the clamp
Disconnect the electrical connector. Press the clamp "2", for example, with a small screwdriver "arrows" outward. Remove the clamp "2" from the mirror base "1".
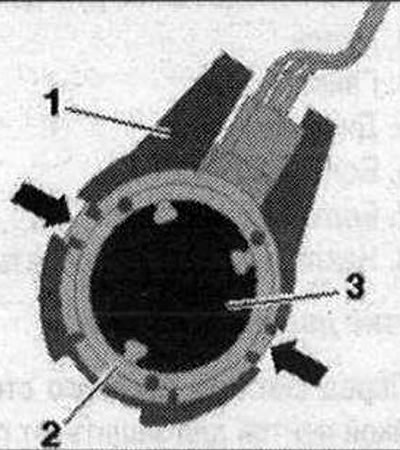
Remove the rain and light sensor "G397" "3" from the mirror base. The sensor film will remain stuck to the windshield. If the old glass is being installed, remove the sensor film from the glass without leaving any residue. Clean the surface with cleaner D 009 401 04.
Installation
When installing the previous rain and light sensor "G397", the sensor film must be replaced. If necessary, remove the remaining sensor film from the rain and light sensor "G397". Carefully remove the sensor film "2" from the rain and light sensor "G397" "1". Clean the surface with cleaner D 009 401 04.
There should be no film residue on the sensor surface. Remove the silicone paper "3" from the sensor film "2". The transparent protective film "1" is initially left on the sensor film as an aid.
Place the sensor film using the transparent protective film "1" on the rain and light sensor "G397" "2".
As shown in the figure, press the sensor film through the protective film "1" without forming bubbles to the rain and light sensor "G397-2".
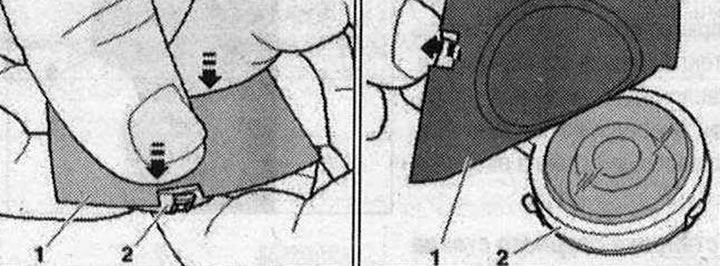
After this, remove the transparent protective film "1" from the sensor film "2".
Spray the entire surface of the sensor film "1" with cleaner D 009 401 04 and insert the rain and light sensor "G397" into the mirror base. For the rain and light sensor "G397" to function properly, there must be no foreign inclusions or bubbles on the contact surface with the windshield. Install the sensor mounting bracket onto the mirror base.
Replacing the rain and light sensor "G397"
The sensor is replaced according to the above description. If necessary, completely remove the film residues of the previous rain and light sensor "G397" from the windshield. Clean the mating surface with the windshield using cleaner D 009 401 04. Slightly squeeze the surfaces of the "arrow" on the cap "1" and remove from the rain and light sensor "G397" "2".
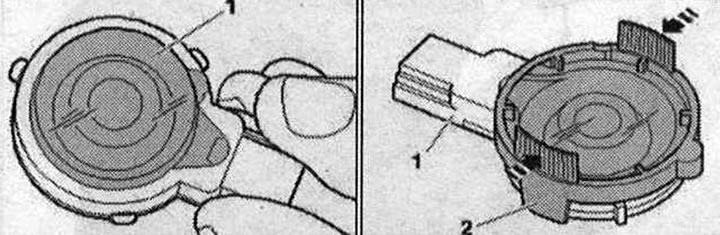
Spray the entire surface of the sensor film "1" with cleaner D 009 401 04 and insert the rain and light sensor "G397" into the mirror base.
Install the rain and light sensor "G397" on the windshield without forming bubbles and press the fasteners on the mirror base. For the rain and light sensor "G397" to work perfectly, there should be no foreign inclusions or bubbles on the contact surface with the windshield.