
Table of contents: Front door glass installation diagram ↓ Removal the door glass ↓ Glass detachment ↓ Installing door glass ↓ Removal door glass with tinted glass ↓ Installing door glass ↓
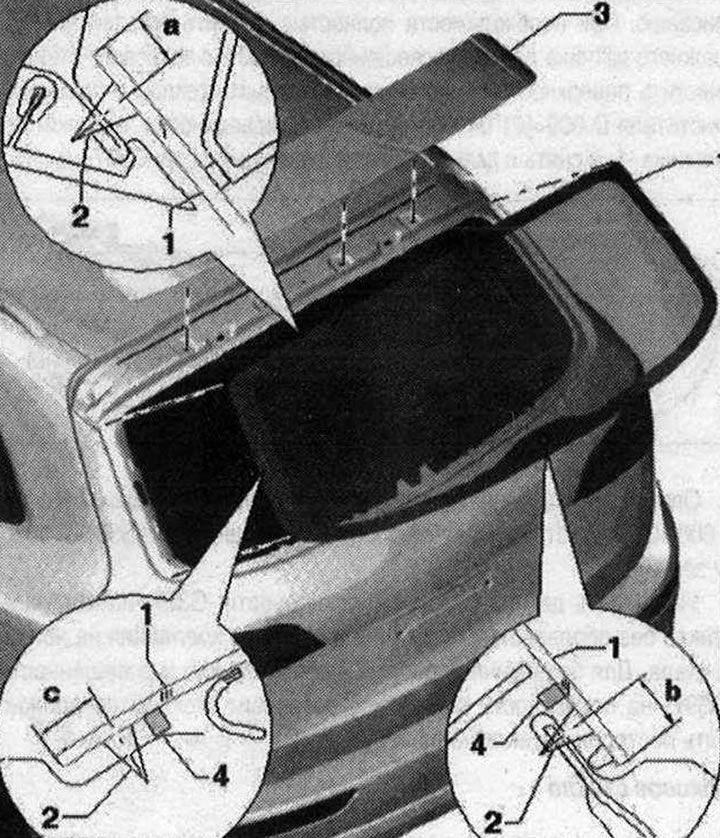
Rear window 1. Rear window; 2. Glue roller. Consider the different distance to the edge of the glass. Distance "a" = 11 mm. Dimension "b" = 12.5 mm. Dimension "c" = 15.5 mm; 3. Roof spoiler; 4. Adhesive guard profile. It is necessary to stick it before applying the adhesive near the rear window heating busbars. Place the inner edge of the adhesive guard profile on the outer edge of the rear window heating busbar and press. The adhesive must not come into contact with the rear window heating busbar
Front door glass installation diagram
The window regulator must be installed before the glass is mounted.
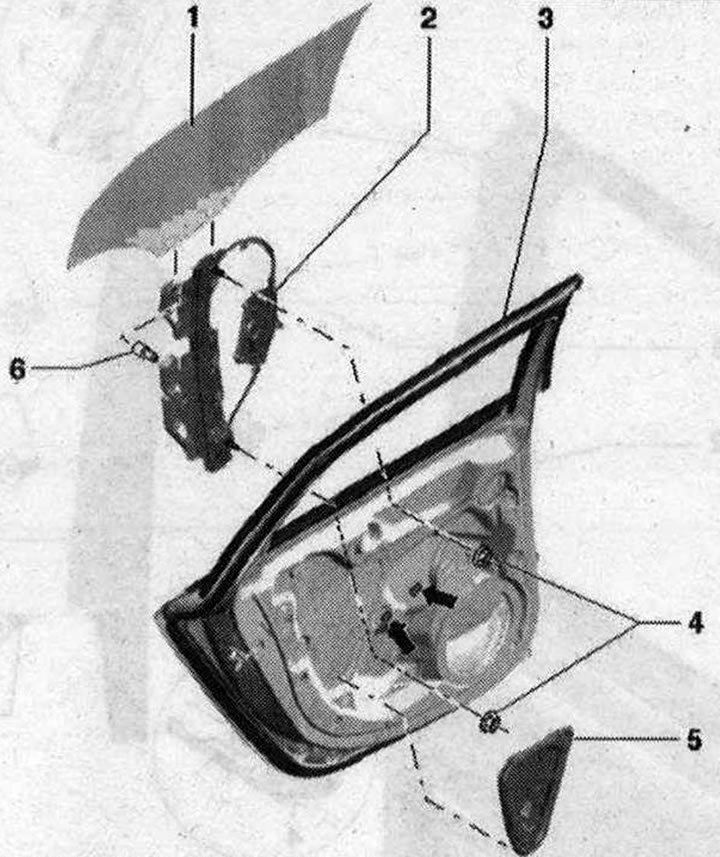
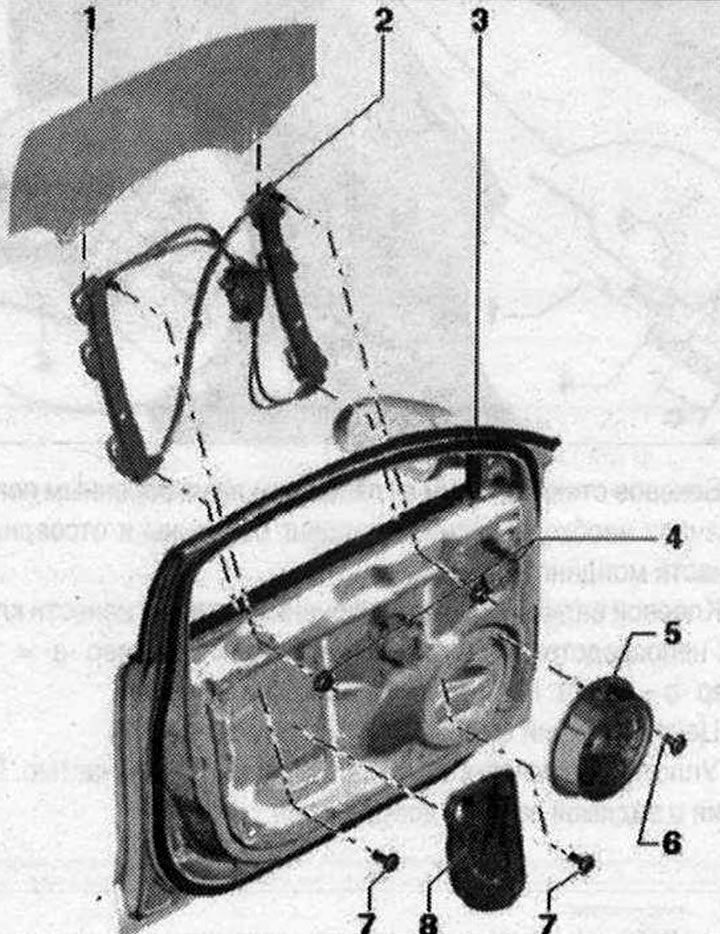 1. Door glass; 2. Window lifter. Do not remove the door glass to remove it.; 3. Door; 4. Nut. 6 Nm; 5. Speaker. Removed; 6. Bolt 1.5 Nm; 7. Bolt. 6 Nm; 8. Overlay. Unlock
Removal the door glass
Before removing the door glass, cover the "B-pillar" trim with adhesive tape to protect it from damage.
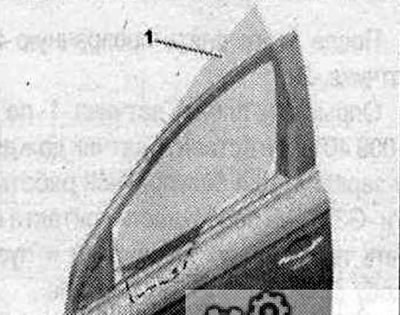
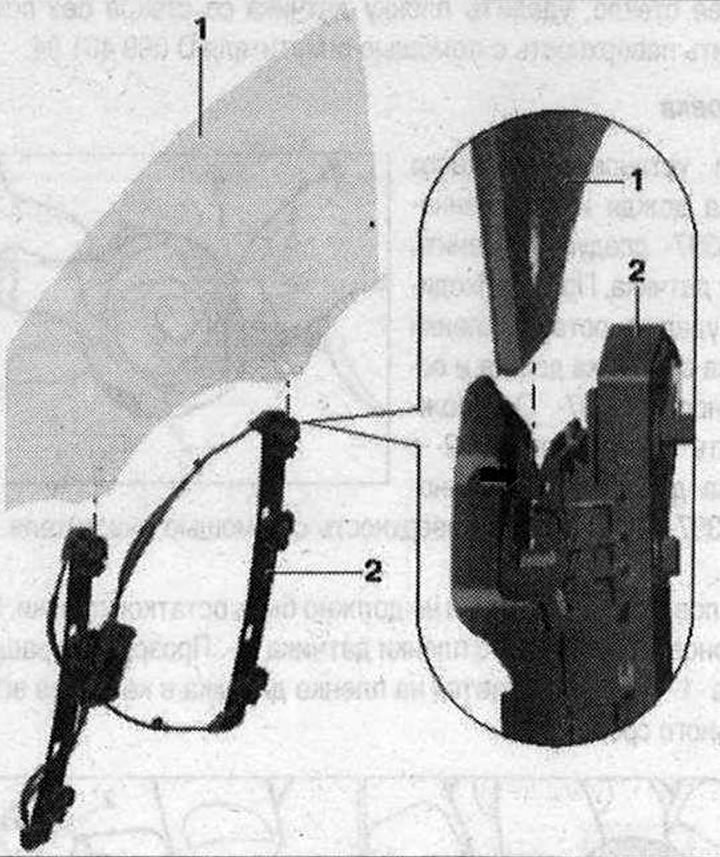 1. Door glass. The inner door panel trim and speaker have been removed. To remove, detach the "arrow" clips from the star -2 using a screwdriver and slightly lift the glass "1" in the guide. Tilt the glass forward and remove it from the door by moving it upwards; 2. Window lifter. Built into the door
Glass detachment
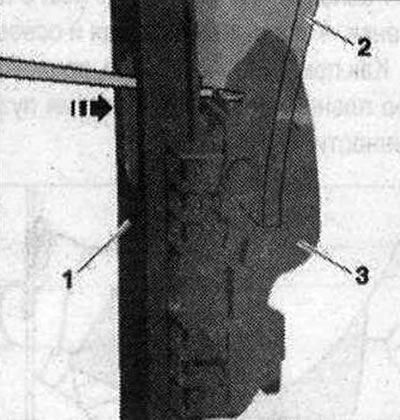
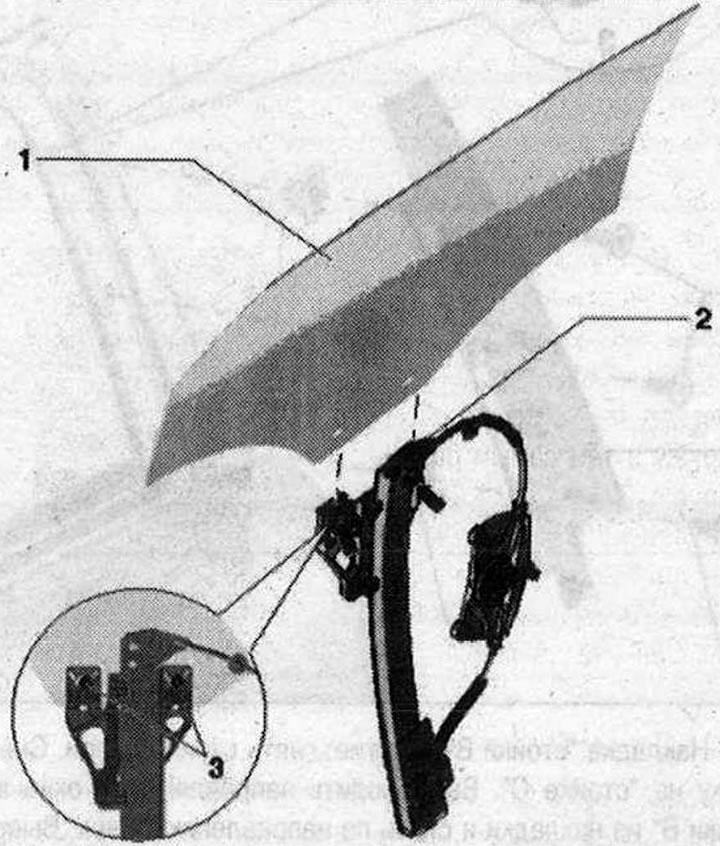
Lower the glass. Using, for example, a screwdriver, press the star "3" outward through the groove in the glass guide "1" and through the hole in the door glass "2" and thereby unlock it. Remove the glass upwards from the star. Tilt the glass forward at an angle and pull it upwards with the glass guide.
Installing door glass
Insert door glass "1" at an angle forward into the door glass guide. Align the glass in the guides at the front and back and lower it down. Press the glass down into the star. In this case, the star is attached to the door glass.
Rear door glass installation diagram 1. Door glass; 2. Window lifter. Built into the door.; 3. Door; 4. Nut. 6 N·m; 5. Overlay. Removed; 6. Fingers. 2-piece with clamping pin
Removal the door glass 1. Door glass. Door trim removed. Door glass frame trim removed. "C-pillar" trim removed. Inner door panel trim removed. Window lifter motor removed. Bring door glass to installation position and insert special tool. Tilt glass slightly back into door and lift up; 2. Window lifter; 3. Fingers (from 2 parts)
Removing door glass with standard glass
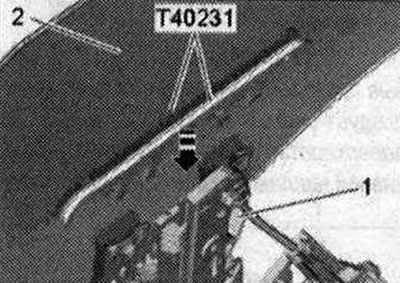
Remove the door trim. Remove the inner glass clamping strip. Remove the inner door panel trim. Install the dismantling tool "T40231" on both sides of the door glass and press it down near the fastening to the window regulator "1". Due to this, the fastening is pressed against the window regulator so that the door glass can be removed with an upward movement together with the locking pins. With an upward movement, remove the door glass "2" from the fastening and remove it from the door.
Removal door glass with tinted glass
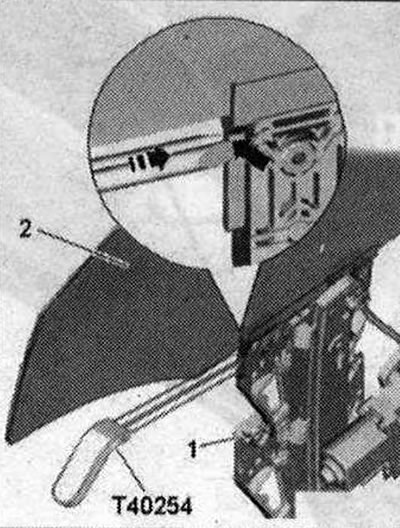
Insert the "T40254" puller in the direction of the arrow in the radius of the "arrow" from the adapter. Due to this, the fastening is pressed against the window lifter so that the door glass can be removed by moving it upwards together with the locking pins in the adapter.
Installing door glass
For new standard door glass, first press the locking pins in. Insert the locking pins "2" into the center of the door glass "1" and press the locking pin flush.
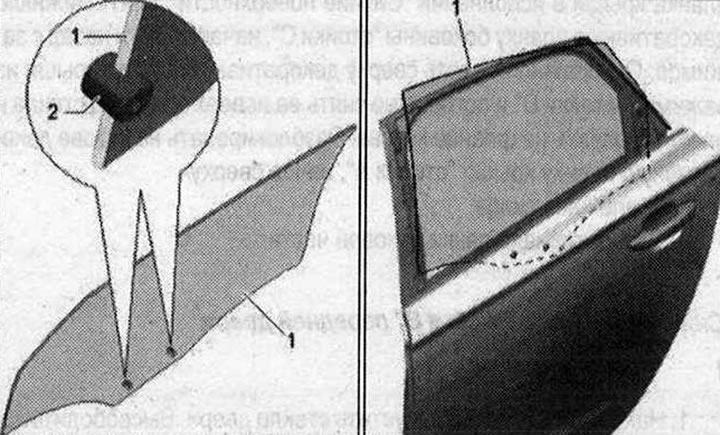
Insert door glass "1" at an angle backwards into the door glass guide.
Align the door glass in the glass guides and move it down, making sure that the door glass fits precisely into the fastening at the front and back. Press the glass down into the window lifter fastening. The locking pins will click into place.
The original version is on the portal: AUDIMANUAL.ru