



Car front suspension Audi Q5 (8R)

Lifting the wheel support of an unloaded vehicle with screw springs
Note: All bolts on chassis components with silent blocks must be tightened with the suspension in a static position (the car is not loaded). Silent blocks have...
Note: All bolts on chassis components with silent blocks must be tightened with the suspension in a static position (the car is not loaded). Silent blocks have...

Subframe, crosspiece, stabilizer, connecting rod, subframe shield
I 1. Subframe; 2/8. Bolt. 9 Nm; 3/5/9/10. Bolt. 20 Nm; 4/6/7/11. The subframe shield is installed depending on the engine model; 12/15/20. Bolt; 13. Engine...
I 1. Subframe; 2/8. Bolt. 9 Nm; 3/5/9/10. Bolt. 20 Nm; 4/6/7/11. The subframe shield is installed depending on the engine model; 12/15/20. Bolt; 13. Engine...

Removal the cross-connection of the subframe stretchers
Remove sound insulation. Applies to vehicles with hydraulic power steering: Unscrew bolt "1" of the power steering line bracket. Unscrew bolts "arrow" and...
Remove sound insulation. Applies to vehicles with hydraulic power steering: Unscrew bolt "1" of the power steering line bracket. Unscrew bolts "arrow" and...

Removal the stabilizer
Remove the sound insulation. Disconnect the bolt connection "2" on the left and right. Unscrew the nuts "1" on the left and right and remove the clamps "3"....
Remove the sound insulation. Disconnect the bolt connection "2" on the left and right. Unscrew the nuts "1" on the left and right and remove the clamps "3"....

Removal the connecting rod
Note: In model year 2010, the aluminum tie rods were gradually replaced by plastic tie rods. The installation of different tie rods on one axle is not...
Note: In model year 2010, the aluminum tie rods were gradually replaced by plastic tie rods. The installation of different tie rods on one axle is not...

Removal the subframe shield
Remove the cross connection of the stretchers. Unscrew the bolts "arrows". Remove the subframe shield "1" inward. Installation Installation in reverse order....
Remove the cross connection of the stretchers. Unscrew the bolts "arrows". Remove the subframe shield "1" inward. Installation Installation in reverse order....

Electronic damping control system
I 1. Charisma "E592" switching module. Installation location: Charisma "592" switching module is installed in the front panel; 2. Used electronic damping...
I 1. Charisma "E592" switching module. Installation location: Charisma "592" switching module is installed in the front panel; 2. Used electronic damping...

Spring strut with upper support, shock absorber fork, upper control arm, tension rod
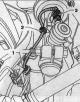
I 1. Nut. 20 Nm; 2. Stretching; 3. Nut. 2 Nm.; 4. Bolt 20 Nm; 5. Additional rigidity element on the left; 6. Nut. 50 Nm + 90° further. Replace each time it is...
I 1. Nut. 20 Nm; 2. Stretching; 3. Nut. 2 Nm.; 4. Bolt 20 Nm; 5. Additional rigidity element on the left; 6. Nut. 50 Nm + 90° further. Replace each time it is...
Removal the spring strut with the upper support
Remove the wheel. Remove the additional stiffener. Remove the water tank cover. Only for vehicles with electronic damping control: Unlock and remove connector...
Remove the wheel. Remove the additional stiffener. Remove the water tank cover. Only for vehicles with electronic damping control: Unlock and remove connector...

Removal the shock absorber fork
Remove the wheel. Remove the sound insulation. On a car with a ground clearance sensor, unscrew nut "2". Disconnect bolt connection "2". Disconnect bolt...
Remove the wheel. Remove the sound insulation. On a car with a ground clearance sensor, unscrew nut "2". Disconnect bolt connection "2". Disconnect bolt...

Removal the upper control arm
Remove the wheel. Turn the hub so that one of the holes for the wheel bolt is at the top. Attach the support "T10149" "1" with the wheel mounting bolt to the...
Remove the wheel. Turn the hub so that one of the holes for the wheel bolt is at the top. Attach the support "T10149" "1" with the wheel mounting bolt to the...

Removal stretch marks
Remove the brace with additional rigidity elements: unscrew nuts "2", "5" and bolts "3" on the right and left and remove brace "1". Remove the additional...
Remove the brace with additional rigidity elements: unscrew nuts "2", "5" and bolts "3" on the right and left and remove brace "1". Remove the additional...

Support arm, ball joint, guide arm, vehicle level sensor
I 1. Bolt. Replace each time it is removed; 2. Guide lever. Various designs with standard or hydraulic silent block; 3. Nut. 70 Nm + turn further by +180°....
I 1. Bolt. Replace each time it is removed; 2. Guide lever. Various designs with standard or hydraulic silent block; 3. Nut. 70 Nm + turn further by +180°....

Removal the support arm
Remove the wheel. Remove the sound insulation. On a car with a ground clearance sensor, unscrew the nut "2". Disconnect the bolt connection "3". Loosen nut "1"...
Remove the wheel. Remove the sound insulation. On a car with a ground clearance sensor, unscrew the nut "2". Disconnect the bolt connection "3". Loosen nut "1"...

Removal the suspension joint
Removing the transverse arm. Unscrew bolt "1". Place sealing washer or similar seal "2" into the groove of the wheel bearing housing (the sealing washer or...
Removing the transverse arm. Unscrew bolt "1". Place sealing washer or similar seal "2" into the groove of the wheel bearing housing (the sealing washer or...

Removal the guide lever
Note: In the 2010 model year, the standard silent block guide arms were gradually replaced by hydraulic silent block guide arms. The installation of different...
Note: In the 2010 model year, the standard silent block guide arms were gradually replaced by hydraulic silent block guide arms. The installation of different...

Body level sensor
Vehicles with electronically controlled damping and/or gas discharge lamps are equipped with dynamic headlight range control as standard. The damping control...
Vehicles with electronically controlled damping and/or gas discharge lamps are equipped with dynamic headlight range control as standard. The damping control...

Wheel bearing housing, hub unit
I 1. Nut. 40 Nm. Replace each time when removed; 2. Upper front suspension arm; 3. Suspension arm at the top rear; 4. Bolt. Replace each time it is removed; 5....
I 1. Nut. 40 Nm. Replace each time when removed; 2. Upper front suspension arm; 3. Suspension arm at the top rear; 4. Bolt. Replace each time it is removed; 5....

Removal the wheel bearing housing
Note: Two different wheel bearing housings were installed as standard, they differ in the thickness of the steering pendulum arm. When replacing the wheel...
Note: Two different wheel bearing housings were installed as standard, they differ in the thickness of the steering pendulum arm. When replacing the wheel...

Removal the hub assembly
Removing the drive shaft. Insert both upper arm joint pins "2" into the hub bearing housing and insert bolt "1". This step of the work must be completed to...
Removing the drive shaft. Insert both upper arm joint pins "2" into the hub bearing housing and insert bolt "1". This step of the work must be completed to...

Drive shaft
If the drive shaft threaded connection on the wheel side is loose, do not allow the hub bearings to be loaded. If the hub bearings are subjected to the dead...
If the drive shaft threaded connection on the wheel side is loose, do not allow the hub bearings to be loaded. If the hub bearings are subjected to the dead...

Disassembly and assembly of a hammered tripod joint
Disassembly and assembly of the hammered tripod joint AAR 2600 i or 3300 i Disassembling the tripod joint AAR 2600 i or 3300 i Clamp the drive shaft in a vice...
Disassembly and assembly of the hammered tripod joint AAR 2600 i or 3300 i Disassembling the tripod joint AAR 2600 i or 3300 i Clamp the drive shaft in a vice...

Repair of outer CV joint
Repair of outer CV joint with diameter 88 mm/100 mm Remove the outer CV joint. Clamp the drive shaft in a vice with protective jaw pads. Open both clamps and...
Repair of outer CV joint with diameter 88 mm/100 mm Remove the outer CV joint. Clamp the drive shaft in a vice with protective jaw pads. Open both clamps and...
This section is available on russian, bulgarian, belarusian, ukrainian, serbian, croatian, romanian, polish, slovak, hungarian
Similar sections of other Audi car models:
Chassis: Front suspension Audi 80 B2 (1979-1986)
Chassis: Front suspension Audi 100 C3 (1982-1990)
Chassis: Front suspension Audi A3 Type 8L (1996-2003)
Chassis: Front suspension Audi A4 B8 (2007-2015)
Chassis: Front suspension Audi A6 C5 (1997-2004)
Chassis: Front suspension Audi 80 B2 (1979-1986)
Chassis: Front suspension Audi 100 C3 (1982-1990)
Chassis: Front suspension Audi A3 Type 8L (1996-2003)
Chassis: Front suspension Audi A4 B8 (2007-2015)
Chassis: Front suspension Audi A6 C5 (1997-2004)
Share information:
- General information
- Operating instructions
- Maintenance
- Power unit
- Diesels 3.0 l (BUG, BUN, CAS)
- Diesels 3.0 l (CATA, CCMA)
- Diesels 3.0 l (CJGA/CJGC)
- Diesels 4.2 l (BTR, CCFA/CCFC)
- Cooling system
- Fuel and exhaust system
- Engine management system
- Starting and charging
- Transmission
- Automatic gearbox
- Drive shafts
- Chassis
- Brake system
- Front suspension
- Rear suspension
- Steering system
- Body
- Air conditioner
- Exterior
- Interior
- Electrical equipment
- Equipment and devices
- Electrical circuits
- General information
- User manual
- Power unit
- Petrol engine 2.0 l
- Petrol engine 3.2 l
- Fuel system (petrol)
- Diesel 2.0 liter (CA)
- Diesel 2.0 liter (CG/CJ/CM)
- Diesel engine 3.0 l
- Fuel system (diesel)
- Transmission
- Manual gearbox 0B1
- Manual gearbox 0B2
- Automatic gearbox 0B5
- Automatic gearbox 0B6
- Chassis
- Front suspension
- Rear suspension
- Brake system
- Steering
- Body
- Exterior
- Interior
- Doors, locks and windows
- Safety system
- Ventilation and heating
- Electrical equipment
- Power devices
- Equipment and devices
- Lighting and alarm
- Audio system
- Electrical circuits