



Car rear suspension Audi Q5 (8R)

Subframe, stabilizer, connecting rod
I 1. Bolt. 70 Nm + turn further by +180°. Replace each time when removing. Tighten only when the vehicle is in a no-load position; 2. Mounting bracket; 3. Rear...
I 1. Bolt. 70 Nm + turn further by +180°. Replace each time when removing. Tighten only when the vehicle is in a no-load position; 2. Mounting bracket; 3. Rear...

Removal the subframe with attachments
It is necessary to take into account that when performing further work requiring loosening the threaded connection of the drive shaft/wheel hub, the car must...
It is necessary to take into account that when performing further work requiring loosening the threaded connection of the drive shaft/wheel hub, the car must...

Replacing the silent block and hydraulic silent block of the subframe
If a silent block is damaged, the silent block on the opposite side should also be replaced. Before replacing a faulty silent block, the remaining silent...
If a silent block is damaged, the silent block on the opposite side should also be replaced. Before replacing a faulty silent block, the remaining silent...

Replacing the front silent block of the rear axle main transmission
Install the car on a lift. Remove the coil springs. To replace the silent block, lower the front part of the subframe. There is no need to remove the subframe....
Install the car on a lift. Remove the coil springs. To replace the silent block, lower the front part of the subframe. There is no need to remove the subframe....

Replacing the rear silent block of the rear axle main gear
Remove the rear final drive. Unscrew the nuts of both end muffler brackets to the beginning of the thread. Install a powertrain lift with a universal gearbox...
Remove the rear final drive. Unscrew the nuts of both end muffler brackets to the beginning of the thread. Install a powertrain lift with a universal gearbox...

Removal the connecting rod with the stabilizer
Before starting work, measure the distance "a" from the center of the wheel to the lower edge of the wheel arch with the vehicle standing on its wheels....
Before starting work, measure the distance "a" from the center of the wheel to the lower edge of the wheel arch with the vehicle standing on its wheels....

Upper wishbone, tie rod, coil spring, lower wishbone, ride height sensor
Upper wishbone, tie rod, coil spring, lower wishbone, ride height sensor 1. Bolt. 70 Nm + turn further by +180°. Replace each time when removing. Tighten only...
Upper wishbone, tie rod, coil spring, lower wishbone, ride height sensor 1. Bolt. 70 Nm + turn further by +180°. Replace each time when removing. Tighten only...

Removal the lower control arm
Before starting work, measure the distance "a" from the center of the wheel to the lower edge of the wheel arch, while the wheels are still on the car. Install...
Before starting work, measure the distance "a" from the center of the wheel to the lower edge of the wheel arch, while the wheels are still on the car. Install...

Removal the upper control arm
Since the internal threaded connection "1" is inaccessible, the wishbone can only be removed with the subframe removed. Before starting work, measure the...
Since the internal threaded connection "1" is inaccessible, the wishbone can only be removed with the subframe removed. Before starting work, measure the...

Removal the tie rod
Before starting work, measure the distance "a" from the center of the wheel to the lower edge of the wheel arch, while the wheels are still on the car. Install...
Before starting work, measure the distance "a" from the center of the wheel to the lower edge of the wheel arch, while the wheels are still on the car. Install...

Removal the coil spring
Before removing and installing the coil spring, the spring compression system must be re-equipped. VAS 6274 with the help of the additional kit "VAS 6274/1"...
Before removing and installing the coil spring, the spring compression system must be re-equipped. VAS 6274 with the help of the additional kit "VAS 6274/1"...

Body level sensor
Vehicles with electronic damping control and/or gas discharge lamps are equipped with dynamic headlight range control as standard. The damping control system...
Vehicles with electronic damping control and/or gas discharge lamps are equipped with dynamic headlight range control as standard. The damping control system...

Replacing the ground clearance sensor with the subframe installed
Remove the wheel. Disconnect connector "3". Unscrew bolt "1". Unscrew bolts "2". Be careful not to damage the mounting plate. Remove the vehicle's ground...
Remove the wheel. Disconnect connector "3". Unscrew bolt "1". Unscrew bolts "2". Be careful not to damage the mounting plate. Remove the vehicle's ground...

Steering knuckle, wheel bearing module, shock absorber, front-wheel drive vehicles
Steering knuckle, wheel bearing module, shock absorber, front-wheel drive vehicles 1. Protective cap; 2. Nut. 35 Nm. Replace each time when removed; 3. Bolt....
Steering knuckle, wheel bearing module, shock absorber, front-wheel drive vehicles 1. Protective cap; 2. Nut. 35 Nm. Replace each time when removed; 3. Bolt....

Removal the hub bearing housing
Remove the rear wheel. Unlock and remove the electrical plug connection "2" on the rear speed sensor. Unscrew bolt "1" and remove the holder with wires from...
Remove the rear wheel. Unlock and remove the electrical plug connection "2" on the rear speed sensor. Unscrew bolt "1" and remove the holder with wires from...

Removal the wheel bearing assembly
Remove the rear wheel. Lightly tap the sealing cap loose on the hub cap puller "VW 637/2". Remove the sealing cap using the hub cap puller "VW 637/2". Loosen...
Remove the rear wheel. Lightly tap the sealing cap loose on the hub cap puller "VW 637/2". Remove the sealing cap using the hub cap puller "VW 637/2". Loosen...

Removal the drive shaft
Loosen the bolts securing the drive shaft to the wheel hub. Remove the wheel. Remove the coil spring. Remove the exhaust system resonator. Remove the rear main...
Loosen the bolts securing the drive shaft to the wheel hub. Remove the wheel. Remove the coil spring. Remove the exhaust system resonator. Remove the rear main...
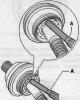
Removal an outer CV joint with a diameter of 89 or 94 mm
Clamp the drive shaft in a vice with protective jaw pads. Loosen the clamps. Move the joint boot back. Remove the CV joint from the drive shaft using mandrel...
Clamp the drive shaft in a vice with protective jaw pads. Loosen the clamps. Move the joint boot back. Remove the CV joint from the drive shaft using mandrel...

Removal an inner CV joint with a diameter of 100 or 107 mm
Clamp the drive shaft in a vice with protective jaw pads. Knock off the cover using a copper or brass mandrel. Knock off the cap using a copper or brass...
Clamp the drive shaft in a vice with protective jaw pads. Knock off the cover using a copper or brass mandrel. Knock off the cap using a copper or brass...

Disassembly and assembly of CV joints
Disassembly The joint hub and the joint cage are matched as a pair and must be marked before removal. Do not interchange the positions of the raceways. Rotate...
Disassembly The joint hub and the joint cage are matched as a pair and must be marked before removal. Do not interchange the positions of the raceways. Rotate...

Tire Pressure Monitoring System (TPMS)
If the vehicle is equipped with a tire pressure indicator, this is indicated by the corresponding kit code on the vehicle data plate or in the ELSA system, in...
If the vehicle is equipped with a tire pressure indicator, this is indicated by the corresponding kit code on the vehicle data plate or in the ELSA system, in...

Tire pressure sensor
Tire pressure sensor 1. Front left wheel pressure sensor "G222", front right wheel "G223", rear left wheel "G224" or rear right wheel "G225". Replace the valve...
Tire pressure sensor 1. Front left wheel pressure sensor "G222", front right wheel "G223", rear left wheel "G224" or rear right wheel "G225". Replace the valve...

Removal the tire pressure sensor
Unscrew the union nut "1". Remove the pressure sensor "2" from the rim base. Installation Always replace damaged sensors. When using used tire pressure...
Unscrew the union nut "1". Remove the pressure sensor "2" from the rim base. Installation Always replace damaged sensors. When using used tire pressure...

Dynamic steering
In standard steering systems, there is a direct mechanical connection between the steering wheel and the steering gear. This results in a clearly defined...
In standard steering systems, there is a direct mechanical connection between the steering wheel and the steering gear. This results in a clearly defined...
Adaptive Cruise Control (ACC)
The sensor for the automatic distance control and the distance control control unit "J428" are installed in the same housing. If the sensor/control unit is...
The sensor for the automatic distance control and the distance control control unit "J428" are installed in the same housing. If the sensor/control unit is...

Details and units of the automatic distance control sensor
Details and units of the automatic distance control sensor "G550" 1. Fastening nut; 2. The threaded bushing is pressed into the side member; 3. Holder; 4. Bolt...
Details and units of the automatic distance control sensor "G550" 1. Fastening nut; 2. The threaded bushing is pressed into the side member; 3. Holder; 4. Bolt...

Lane Keeping Assist
The lane assist helps the driver to stay in the lane. If the system is switched on and the car approaches a recognized dividing line and there is a possibility...
The lane assist helps the driver to stay in the lane. If the system is switched on and the car approaches a recognized dividing line and there is a possibility...
This section is available on russian, bulgarian, belarusian, ukrainian, serbian, croatian, romanian, polish, slovak, hungarian
Similar sections of other Audi car models:
Chassis: Rear suspension Audi 80 B2 (1979-1986)
Chassis: Rear suspension Audi 100 C3 (1982-1990)
Chassis: Rear suspension Audi A3 Type 8L (1996-2003)
Chassis: Rear suspension Audi A4 B8 (2007-2015)
Chassis: Rear suspension Audi A6 C5 (1997-2004)
Chassis: Rear suspension Audi 80 B2 (1979-1986)
Chassis: Rear suspension Audi 100 C3 (1982-1990)
Chassis: Rear suspension Audi A3 Type 8L (1996-2003)
Chassis: Rear suspension Audi A4 B8 (2007-2015)
Chassis: Rear suspension Audi A6 C5 (1997-2004)
Share information:
- General information
- Operating instructions
- Maintenance
- Power unit
- Diesels 3.0 l (BUG, BUN, CAS)
- Diesels 3.0 l (CATA, CCMA)
- Diesels 3.0 l (CJGA/CJGC)
- Diesels 4.2 l (BTR, CCFA/CCFC)
- Cooling system
- Fuel and exhaust system
- Engine management system
- Starting and charging
- Transmission
- Automatic gearbox
- Drive shafts
- Chassis
- Brake system
- Front suspension
- Rear suspension
- Steering system
- Body
- Air conditioner
- Exterior
- Interior
- Electrical equipment
- Equipment and devices
- Electrical circuits
- General information
- User manual
- Power unit
- Petrol engine 2.0 l
- Petrol engine 3.2 l
- Fuel system (petrol)
- Diesel 2.0 liter (CA)
- Diesel 2.0 liter (CG/CJ/CM)
- Diesel engine 3.0 l
- Fuel system (diesel)
- Transmission
- Manual gearbox 0B1
- Manual gearbox 0B2
- Automatic gearbox 0B5
- Automatic gearbox 0B6
- Chassis
- Front suspension
- Rear suspension
- Brake system
- Steering
- Body
- Exterior
- Interior
- Doors, locks and windows
- Safety system
- Ventilation and heating
- Electrical equipment
- Power devices
- Equipment and devices
- Lighting and alarm
- Audio system
- Electrical circuits