
Table of contents: Installation ↓ Mounting position of the upper… ↓
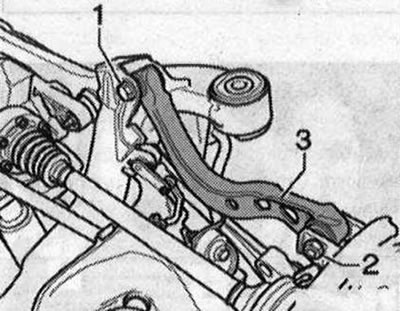
Since the internal threaded connection "1" is inaccessible, the wishbone can only be removed with the subframe removed. Before starting work, measure the distance "a" from the center of the wheel to the lower edge of the wheel arch while the wheels are still on the car. Place the car on a lift. Remove the wheels. Remove the subframe. Mark, for example with a felt-tip pen, the position of the eccentric bolt "2" relative to the wheel bearing housing. Disconnect the screw connections "1" and "2". Remove the upper wishbone "3".
Installation
Replace bolts and self-locking nuts.
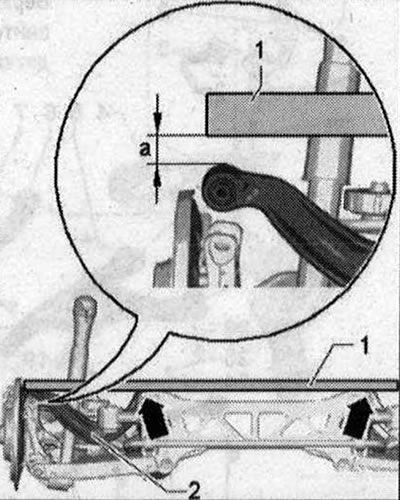
Mounting position of the upper wishbone on the subframe
Screw the upper cross arm "3" to the threaded connection "1" by hand. Place a flat iron strip or straight bar "1" evenly on the upper cross arm "arrow". Install the upper cross arm "2" so that the dimension is equal to a = 8 mm ±1 mm between the bar "1" and the stamped corner of the upper cross arm "2".
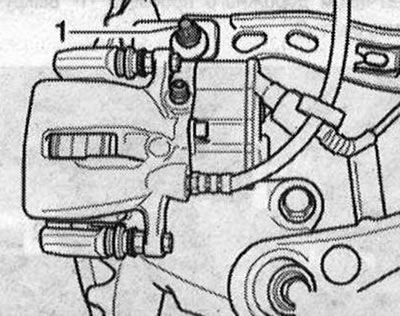
Tighten the upper wishbone threaded connection "3" in this position on the subframe. Screw the hub bearing housing to the wishbone and tighten the new nut to a torque of 20 Nm. Observe the installation position of the eccentric washer "2". Install the subframe. Unscrew the bolt connection "1". Raise the wheel support in the position of the vehicle's unladen weight and tighten the bolt connection "1".
Tighten the wheel. Adjust the wheel alignment angles.
The original article is available on the website audimanual