



External elements of car body Audi Q5 (8R)

Radiator frame, service position
Note: For the service position, do not disconnect or open lines or circuits, such as engine cooling, air conditioning, etc. When installing the radiator frame,...
Note: For the service position, do not disconnect or open lines or circuits, such as engine cooling, air conditioning, etc. When installing the radiator frame,...

Radiator frame mounting diagram with attachments
Radiator frame mounting diagram with attachments 1. Bolt. 55 N·m. 3 pcs. on each side; 2. Safety bar. Fixed with bolt "7" on the radiator frame. When...
Radiator frame mounting diagram with attachments 1. Bolt. 55 N·m. 3 pcs. on each side; 2. Safety bar. Fixed with bolt "7" on the radiator frame. When...

Additional amplifiers
Additional amplifiers 1. Bolt 20 Nm; 2. Rights amplifier.; 3. Nut. 20 Nm; 4. Stretching; 5. Left amplifier.
Additional amplifiers 1. Bolt 20 Nm; 2. Rights amplifier.; 3. Nut. 20 Nm; 4. Stretching; 5. Left amplifier.

Wing assembly diagram
1. Wing. Removal: remove the water collection channel. Remove the water drainage box lining. Remove the front bumper. Remove the headlight. Remove the wheel...
1. Wing. Removal: remove the water collection channel. Remove the water drainage box lining. Remove the front bumper. Remove the headlight. Remove the wheel...

Removal the hood
Removal the trunk lid 1. Hood. A second mechanic is required to support and hold the hood for removal and installation. Removal: Remove the gas strut from the...
Removal the trunk lid 1. Hood. A second mechanic is required to support and hold the hood for removal and installation. Removal: Remove the gas strut from the...

Removal the bonnet gas strut
1. Gas strut. To remove, slightly lift the spring stopper "arrow" and remove the gas-filled shock absorber from the bolt with a ball head. When installing,...
1. Gas strut. To remove, slightly lift the spring stopper "arrow" and remove the gas-filled shock absorber from the bolt with a ball head. When installing,...

Removal the bonnet seal
I 1. Seal of the water drainage box. To remove, remove the body flange from the side in a rearward direction. Starting from the side, insert into the sealing...
I 1. Seal of the water drainage box. To remove, remove the body flange from the side in a rearward direction. Starting from the side, insert into the sealing...

Scheme of installation of cable with hood lock shell
Scheme of installation of cable with hood lock shell 1. Trunk lid lock. Move the hood up or down to adjust it; 2. Hood lock cable. Removal: disconnect the...
Scheme of installation of cable with hood lock shell 1. Trunk lid lock. Move the hood up or down to adjust it; 2. Hood lock cable. Removal: disconnect the...

Removal the drive lever cover
Removal the drive lever cover 1. Lower trim of the "A-pillar"; 2. Drive lever cover. Before dismantling, remove only the cable traction in the clutch in the...
Removal the drive lever cover 1. Lower trim of the "A-pillar"; 2. Drive lever cover. Before dismantling, remove only the cable traction in the clutch in the...

Trunk lid
Trunk lid 1. Trunk lid lock. 21 Nm. Disconnect and remove electrical connectors and hose; 2. Gas strut. The damping element must be located on the body side;...
Trunk lid 1. Trunk lid lock. 21 Nm. Disconnect and remove electrical connectors and hose; 2. Gas strut. The damping element must be located on the body side;...

Adjusting the trunk door
Adjusting the trunk door All dimensions are given in mm and with an error of 0.5 mm Size "A" = 4.5 mm. Size "B" = 4.5 mm. Size "C" = 5.0 mm. Size "D" = 4.5 mm....
Adjusting the trunk door All dimensions are given in mm and with an error of 0.5 mm Size "A" = 4.5 mm. Size "B" = 4.5 mm. Size "C" = 5.0 mm. Size "D" = 4.5 mm....

Electric motor for remote opening of the trunk lid «V139»
Electric motor for remote opening of the trunk lid "V139" Loosen the combination nuts, the lock bracket "2" with the closer motor "1" should still be able to...
Electric motor for remote opening of the trunk lid "V139" Loosen the combination nuts, the lock bracket "2" with the closer motor "1" should still be able to...

Mounting position of adjustable buffer
Mounting position of adjustable buffer 3. Adjustable bumper on the body. The adjustable bumper is attached to the body with screws. When installing, tighten...
Mounting position of adjustable buffer 3. Adjustable bumper on the body. The adjustable bumper is attached to the body with screws. When installing, tighten...

Removal the gas strut of the trunk lid
Removal the gas strut of the trunk lid 1. Gas strut. To remove, open and support the cover. Lift the retaining spring "2" with a screwdriver as shown in the...
Removal the gas strut of the trunk lid 1. Gas strut. To remove, open and support the cover. Lift the retaining spring "2" with a screwdriver as shown in the...

Removal the trunk lid hinge
On vehicles with an electric trunk lid drive, the lid drive units must first be removed. When installing, observe the bolt tightening sequence. Removal the...
On vehicles with an electric trunk lid drive, the lid drive units must first be removed. When installing, observe the bolt tightening sequence. Removal the...

Removal the trunk door lock
Removal the trunk door lock 1. Cover lock trim. When installed, the trim should click into place in the lock. To install, place the trim on the cover lock; 2....
Removal the trunk door lock 1. Cover lock trim. When installed, the trim should click into place in the lock. To install, place the trim on the cover lock; 2....

Removal the tailgate seal
Removal the tailgate seal 1. Tailgate seal. Removal: open and support the lid. Remove the lid spoiler. Disconnect the gas strut from the body side from the...
Removal the tailgate seal 1. Tailgate seal. Removal: open and support the lid. Remove the lid spoiler. Disconnect the gas strut from the body side from the...

Trunk lid engine parts and components
Trunk lid engine parts and components 1. Motor in the tailgate control unit "V375" on the left for the tailgate. The rear roof panel trim has been removed....
Trunk lid engine parts and components 1. Motor in the tailgate control unit "V375" on the left for the tailgate. The rear roof panel trim has been removed....

Fuel tank hatch
Note: After removal, the fuel tank cap must be replaced. Fuel tank hatch 1. Cable traction for emergency opening. Insert the cable traction through the hole in...
Note: After removal, the fuel tank cap must be replaced. Fuel tank hatch 1. Cable traction for emergency opening. Insert the cable traction through the hole in...

Front bumper
Bumper trim 1. Bumper trim. Pay attention to the difference in design. Before painting and installing the "S-line" bumper, only the transport jumper should be...
Bumper trim 1. Bumper trim. Pay attention to the difference in design. Before painting and installing the "S-line" bumper, only the transport jumper should be...

Safety beam
Caution! On vehicles with adaptive cruise control (ACC), additionally consider the following. If the safety bar has been removed and reinstalled or changes...
Caution! On vehicles with adaptive cruise control (ACC), additionally consider the following. If the safety bar has been removed and reinstalled or changes...

Rear bumper
Caution! On vehicles with lane change assist, please note the following: If the removed rear bumper is reinstalled or modifications are made to it, the lane...
Caution! On vehicles with lane change assist, please note the following: If the removed rear bumper is reinstalled or modifications are made to it, the lane...

Removal the safety bar
Removal the safety bar 1. Safety bar (for vehicles without a towing hitch). Remove the rear bumper trim. Unscrew the bolts, holding the nuts "3". Remove the...
Removal the safety bar 1. Safety bar (for vehicles without a towing hitch). Remove the rear bumper trim. Unscrew the bolts, holding the nuts "3". Remove the...

Removal the towing hitch
Removal the TSU 1. TSU with crossbar. Removal: remove the rear bumper trim. Remove the eyes. Unscrew the side trim of the trunk on the left and right in the...
Removal the TSU 1. TSU with crossbar. Removal: remove the rear bumper trim. Remove the eyes. Unscrew the side trim of the trunk on the left and right in the...

Windshield
Note: On vehicles with lane assist, the video camera must be calibrated. 1. Windscreen. Distance to roof, dimension "a" = 2 mm. Align side gap, dimension "c";...
Note: On vehicles with lane assist, the video camera must be calibrated. 1. Windscreen. Distance to roof, dimension "a" = 2 mm. Align side gap, dimension "c";...

Side glass
Side glass 1. Side glass. On cars with glossy paintwork, you must first remove the side molding and detach the roof molding in this area; 2. Glue bead. Apply a...
Side glass 1. Side glass. On cars with glossy paintwork, you must first remove the side molding and detach the roof molding in this area; 2. Glue bead. Apply a...

Rear window
Rear window 1. Rear window; 2. Glue roller. Consider the different distance to the edge of the glass. Distance "a" = 11 mm. Dimension "b" = 12.5 mm. Dimension...
Rear window 1. Rear window; 2. Glue roller. Consider the different distance to the edge of the glass. Distance "a" = 11 mm. Dimension "b" = 12.5 mm. Dimension...

Decorative roof strip
Note: Please note the differences in design. The decorative roof strips are not riveted to the body and must be pulled down to remove them. The decorative roof...
Note: Please note the differences in design. The decorative roof strips are not riveted to the body and must be pulled down to remove them. The decorative roof...

Removal the «B-pillar» trim
Removal the "B-pillar" trim of the front door I 1. "B-pillar" trim. Lower the door glass. Release the window guide in the "B-pillar" area from the trim and...
Removal the "B-pillar" trim of the front door I 1. "B-pillar" trim. Lower the door glass. Release the window guide in the "B-pillar" area from the trim and...

Removal the «rack C» cover
Removing the rear door C-pillar trim The glass frame trim is removed. Unscrew the bolt and insert the trim slightly downwards, then remove it from the window...
Removing the rear door C-pillar trim The glass frame trim is removed. Unscrew the bolt and insert the trim slightly downwards, then remove it from the window...

Removal the outer front glass pressure plate
After removal with the door glass installed, the pressure plate must be replaced. It can be removed without destruction only after removing the door glass and...
After removal with the door glass installed, the pressure plate must be replaced. It can be removed without destruction only after removing the door glass and...

Installation diagram of the external and internal rear glass clamping strip
Installation diagram of the external and internal rear glass clamping strip 1. Door; 2. External glass clamping strip. Must be replaced after installation; 3....
Installation diagram of the external and internal rear glass clamping strip 1. Door; 2. External glass clamping strip. Must be replaced after installation; 3....

Replacing the outer threshold trim
The threshold trim is secured to the threshold with adhesive tape. Removal without damage is not provided. 1. Door seal; 2. Rear sill trim. Removal: Heat the...
The threshold trim is secured to the threshold with adhesive tape. Removal without damage is not provided. 1. Door seal; 2. Rear sill trim. Removal: Heat the...

Removal door butt plates
The bonding surfaces on the body must be free of dust and grease. Clean the bonding surfaces with a cleaning agent "D 009 401 04". Heat the bonding surfaces...
The bonding surfaces on the body must be free of dust and grease. Clean the bonding surfaces with a cleaning agent "D 009 401 04". Heat the bonding surfaces...

Sealing the threshold
Sealing the threshold 1. Lower longitudinal beam; 2. Threshold seal. To remove, pull the seal off the threshold from the clips, starting from the front. Remove...
Sealing the threshold 1. Lower longitudinal beam; 2. Threshold seal. To remove, pull the seal off the threshold from the clips, starting from the front. Remove...

Wheel arch liners
The bonding surfaces on the body must be free of dust and grease. Clean the bonding surfaces with a cleaning agent "D 009 401 04". Heat the bonding surfaces...
The bonding surfaces on the body must be free of dust and grease. Clean the bonding surfaces with a cleaning agent "D 009 401 04". Heat the bonding surfaces...
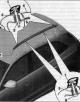
Roof rails
When reinstalling, replace all roof rail seals. When reusing, screw in nuts and bolts with threaded varnish only. 1. Roof rails. Removal: Lower the roof panel....
When reinstalling, replace all roof rail seals. When reusing, screw in nuts and bolts with threaded varnish only. 1. Roof rails. Removal: Lower the roof panel....

Outside mirror
1. Mirror glass; 2/11. Bolt. 1.5 Nm; 3. Bolt; 4. Direction indicator lamp in the outside mirror on the driver's side "L131"; 5. Outside mirror housing; 6. Lane...
1. Mirror glass; 2/11. Bolt. 1.5 Nm; 3. Bolt; 4. Direction indicator lamp in the outside mirror on the driver's side "L131"; 5. Outside mirror housing; 6. Lane...

Radiator grille
Radiator grille 1. Radiator grille. To remove, unscrew the bolts on the left and right of the grille. Unlock the grille along the "arrows" at the bottom and...
Radiator grille 1. Radiator grille. To remove, unscrew the bolts on the left and right of the grille. Unlock the grille along the "arrows" at the bottom and...

Front wheel spoiler
Front wheel spoiler 1. Clamping pin; 2. Noise insulation screen, front; 3. Bracket. Put it on the sound insulation; 4. Wheel spoiler. Unscrew the mudguard...
Front wheel spoiler 1. Clamping pin; 2. Noise insulation screen, front; 3. Bracket. Put it on the sound insulation; 4. Wheel spoiler. Unscrew the mudguard...

Roof spoiler
Roof spoiler 1. Roof spoiler. Removal: the trunk lid trim is removed. Disconnect the antenna and brake light connectors. Remove the antenna amplifier. Unscrew...
Roof spoiler 1. Roof spoiler. Removal: the trunk lid trim is removed. Disconnect the antenna and brake light connectors. Remove the antenna amplifier. Unscrew...

Bottom lining
Front noise insulation 1. Soundproofing casing. Removal: the front wheel spoiler is removed. Unscrew bolts "1" and "2", as well as the bolts on the bottom of...
Front noise insulation 1. Soundproofing casing. Removal: the front wheel spoiler is removed. Unscrew bolts "1" and "2", as well as the bolts on the bottom of...

Removal the front wheel arch liner
Removal the front wheel arch liner 1. Mudguard. Removal: remove the axle joint trim. Turn the front wheel, respectively, until it stops. Unscrew the bolts...
Removal the front wheel arch liner 1. Mudguard. Removal: remove the axle joint trim. Turn the front wheel, respectively, until it stops. Unscrew the bolts...

Removal the rear wheel arch liner
Removal the rear wheel arch liner 1. Rear mudguard. Removal: Rear wheel removed. Unscrew outer bolts. Unlock clamps of fastening bolts. Remove mudguard...
Removal the rear wheel arch liner 1. Rear mudguard. Removal: Rear wheel removed. Unscrew outer bolts. Unlock clamps of fastening bolts. Remove mudguard...

Emblems on the body
Emblem dimensions The bonding surfaces on the body must be free of dust and grease. Clean the bonding surfaces with a cleaning agent "D 009 401 04". Heat the...
Emblem dimensions The bonding surfaces on the body must be free of dust and grease. Clean the bonding surfaces with a cleaning agent "D 009 401 04". Heat the...
This section is available on russian, bulgarian, belarusian, ukrainian, serbian, croatian, romanian, polish, slovak, hungarian
Similar sections of other Audi car models:
Body: Exterior Audi 80 B3 (1986-1991, petrol)
Body: Exterior Audi 100 C3 (1982-1990, diesel)
Body: Exterior (external elements) Audi A3 Type 8L (1996-2003)
Body: Exterior Audi A4 B7 (2004-2008)
Body: Exterior (external elements) Audi A6 C4 (1994-1997)
Body: Exterior (external elements) Audi A8 D2 (1994-2002)
Body: Exterior Audi A2 (1999-2005)
Body: Exterior Audi 80 B3 (1986-1991, petrol)
Body: Exterior Audi 100 C3 (1982-1990, diesel)
Body: Exterior (external elements) Audi A3 Type 8L (1996-2003)
Body: Exterior Audi A4 B7 (2004-2008)
Body: Exterior (external elements) Audi A6 C4 (1994-1997)
Body: Exterior (external elements) Audi A8 D2 (1994-2002)
Body: Exterior Audi A2 (1999-2005)
Share information:
- General information
- Operating instructions
- Maintenance
- Power unit
- Diesels 3.0 l (BUG, BUN, CAS)
- Diesels 3.0 l (CATA, CCMA)
- Diesels 3.0 l (CJGA/CJGC)
- Diesels 4.2 l (BTR, CCFA/CCFC)
- Cooling system
- Fuel and exhaust system
- Engine management system
- Starting and charging
- Transmission
- Automatic gearbox
- Drive shafts
- Chassis
- Brake system
- Front suspension
- Rear suspension
- Steering system
- Body
- Air conditioner
- Exterior
- Interior
- Electrical equipment
- Equipment and devices
- Electrical circuits
- General information
- User manual
- Power unit
- Petrol engine 2.0 l
- Petrol engine 3.2 l
- Fuel system (petrol)
- Diesel 2.0 liter (CA)
- Diesel 2.0 liter (CG/CJ/CM)
- Diesel engine 3.0 l
- Fuel system (diesel)
- Transmission
- Manual gearbox 0B1
- Manual gearbox 0B2
- Automatic gearbox 0B5
- Automatic gearbox 0B6
- Chassis
- Front suspension
- Rear suspension
- Brake system
- Steering
- Body
- Exterior
- Interior
- Doors, locks and windows
- Safety system
- Ventilation and heating
- Electrical equipment
- Power devices
- Equipment and devices
- Lighting and alarm
- Audio system
- Electrical circuits