
Table of contents: Press the fender liner back ↓ Removal the side part of the bumper… ↓ Removal the radiator frame trim 1.… ↓ Adjusting the front bumper trim ↓ Removal the end part of the front… ↓ Installation in reverse order. ↓ Removal the front bumper trim… ↓ Removal the air intake grille ↓
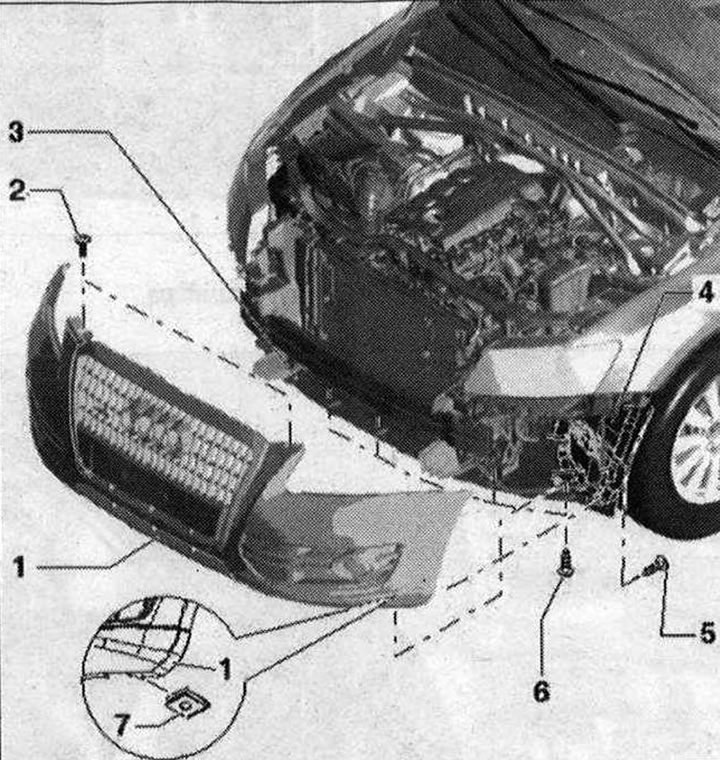
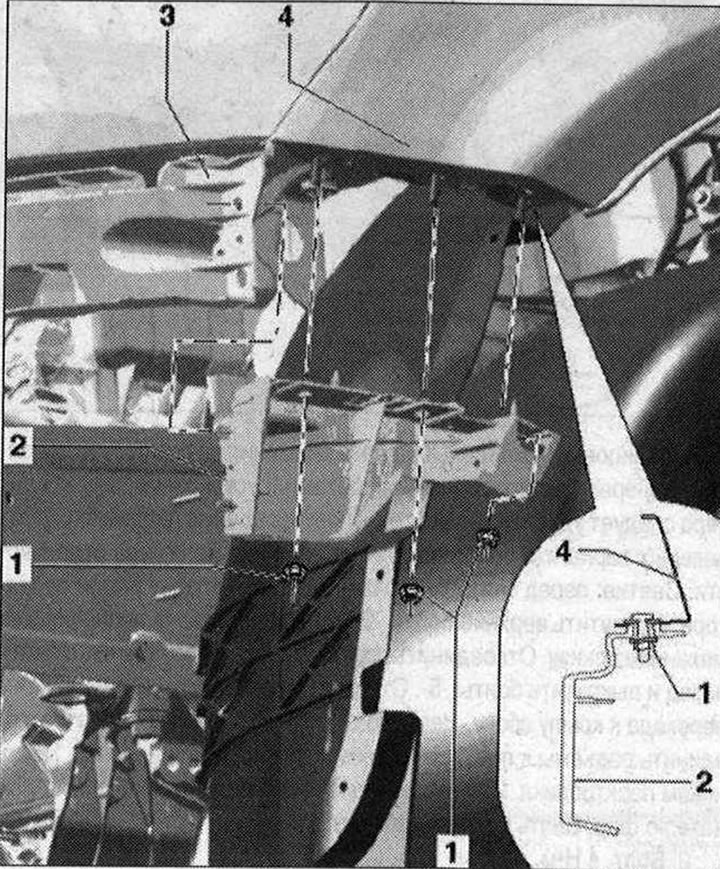
Bumper trim 1. Bumper trim. Pay attention to the difference in design. Before painting and installing the "S-line" bumper, only the transport jumper should be removed. In some versions, the bumper sides can be replaced separately. Removal: Before removing, remove the upper trim of the radiator frame. Unscrew the upper bolts "2", as well as the bolts "6" of the locking mechanism from below. Disconnect the fender liner in the area of bolts "5", press back and unscrew the bolts "5". Disconnect the trim from the mount at the transition to the wing on the side. Pull the trim forward a little and disconnect the connectors to the fog lights and, if available, to the parking sensors. If necessary, disconnect the cable to the headlight washer. Remove the trim forward; 2. Bolt 4 Nm; 3. Soundproof casing; 4. Fastening the wing. When installing the bumper cover, it should be fixed between the bracket and the wing; 5. Bolt 2.5 Nm; 6. Bolt. 5 Nm; 7. Bracket
Press the fender liner back
Unscrew the mudguard bolts and push them aside. Unscrew the bolts to the trim.
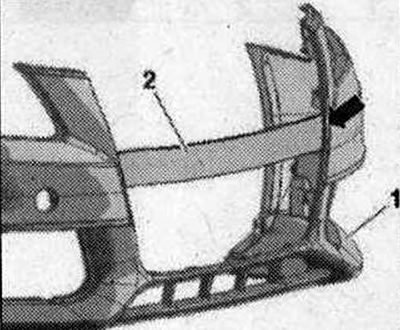
Remove the transport bridge for the "S-line" bumper cover. The transport bridge "2" before painting on the left "arrow" and on the right is removed from the cover "1".
Removal the front spoiler
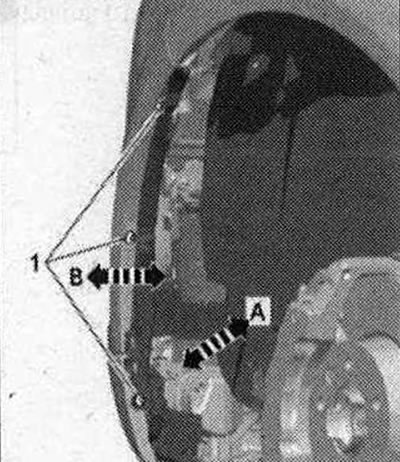
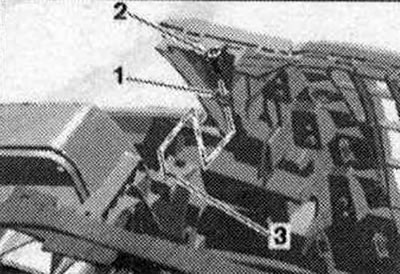
1. Bolt 2.5 Nm; 2. Front spoiler. The locking mechanism and bumper cover are removed. Sequentially unlock the spoiler fasteners on the bumper and radiator grille from below and remove the spoiler. When installing, you should correctly fix all the fasteners to the spoiler, as shown in the figure "arrows"; 3. Wing trim. Unscrew bolts "1" and remove the locking mechanism; 4. Bumper trim
Removal the side part of the bumper trim
To remove individual parts, the bumper trim must be completely removed.
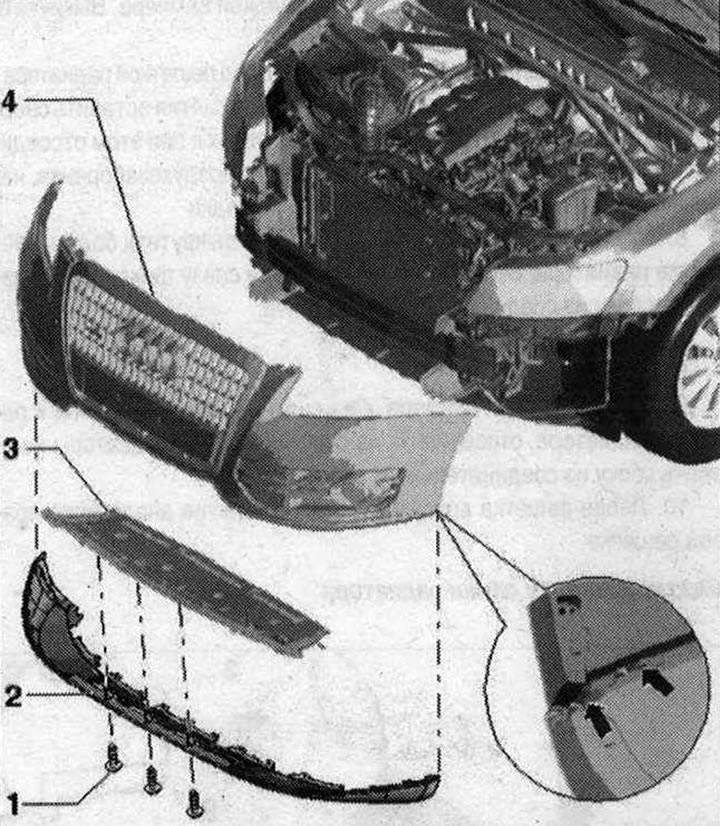
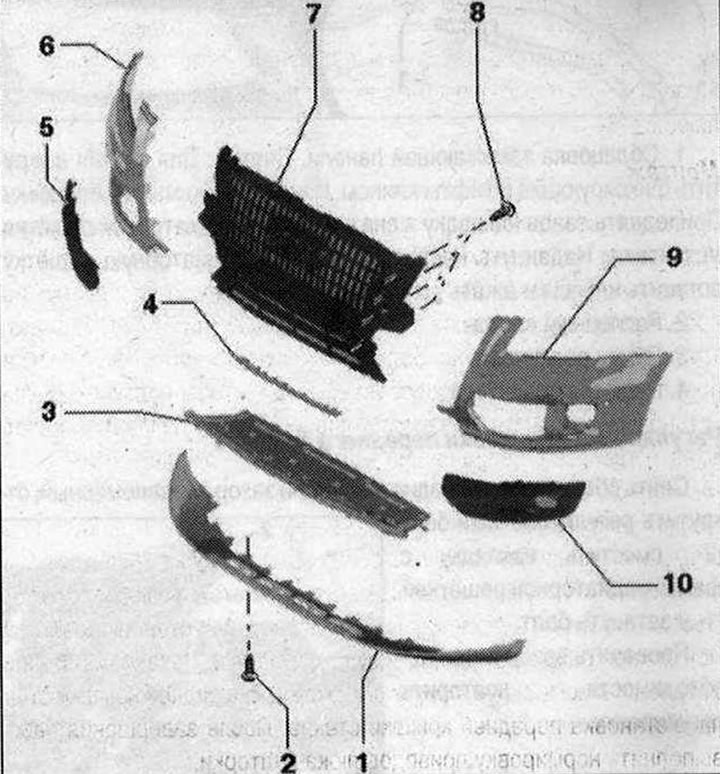 1. Front spoiler; 2. Bolt 2.5 Nm; 3. Wing trim. Removed with bumper trim. Unscrew spoiler bolts and remove back; 4. Connecting piece. Clipped under the radiator grille; 5. Right air intake grille. To remove, insert a screwdriver from above at an angle from below into the groove, press upwards and at the same time detach the retainer from the trim. Remove the air intake grille, starting from above the radiator grille, from the trim; 6. Right bumper cover. To remove, unscrew the bolts to the radiator grille, disconnect the clips on the spoiler from below and remove it from the side of the connecting element.; 7. Radiator grille; 8. Bolt. 2.5 Nm; 9. Left bumper trim. To remove, unscrew the bolts to the radiator grille, disconnect the clips on the spoiler from below and remove it from the side of the connecting element; 10. Left air intake grille. Removal is similar to the right grille
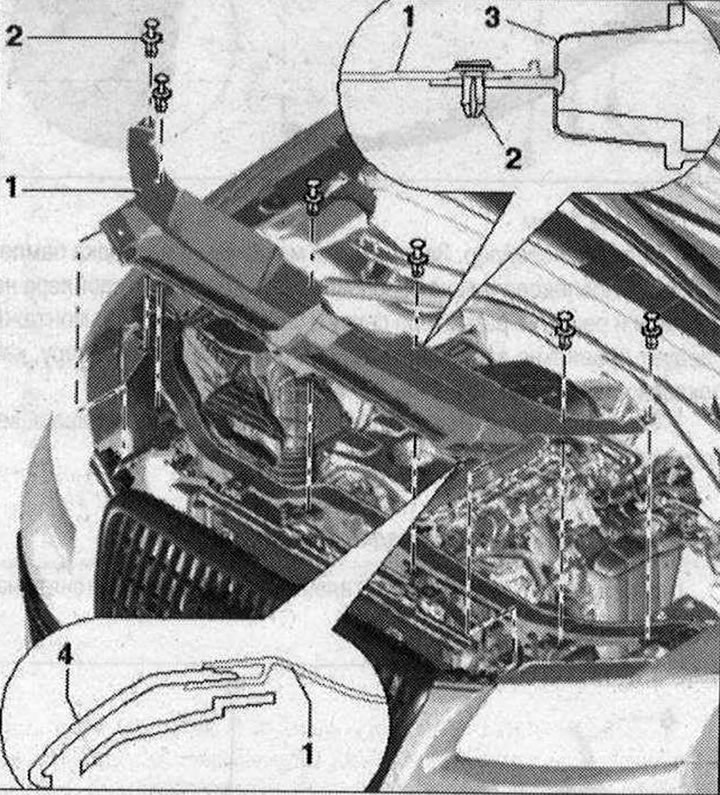
Removal the radiator frame trim
1. Trim of the closing panel. Removal: To remove, unscrew the retaining pins of the clip. Remove the clips from the trim. Lift the trim from behind and remove it from the false radiator grille. Installation: Slide the trim onto the false radiator grille, insert the clips and press the bolts until they stop; 2. Expansion piston; 3. Radiator frame; 4. Radiator grilleAdjusting the front bumper trim
Remove the radiator frame trim. If the gap is uneven, unscrew the adjusting bolt "2", move the trim with the false radiator grille "1" and tighten the bolt.
Check the gap and repeat the adjustment if necessary.
Removal the end part of the front bumper trim
Unscrew bolts "1" and "2". Remove the end part back.
Installation in reverse order.
Removal the front bumper trim fastening
1. Nut. 4 Nm; 2. Support mount. Remove the front bumper trim panel. Unscrew the nuts "1" and remove the front bracket; 3. Fastening the headlight; 4. WingRemoval the air intake grille
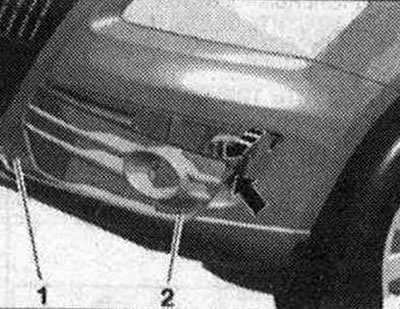
Unlock the "arrow" lock with a screwdriver. Disconnect the air intake grille "2" from the bumper cover "1" by moving it forward.