
Table of contents: Removal ↓ Installation ↓
Removal
1. Open the hood.
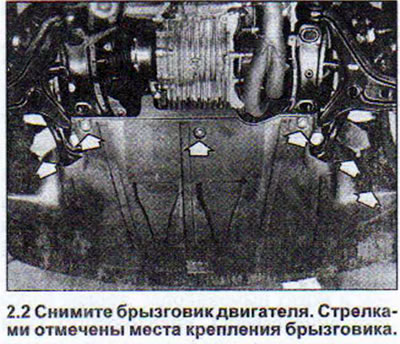
2. Remove the engine splash guard (see illustration).
3. Unscrew the Phillips-head bolt located in the center of the bumper on the back of the bumper.
4. Remove the small grilles from the right and left sides of the bumper by pressing the fasteners.
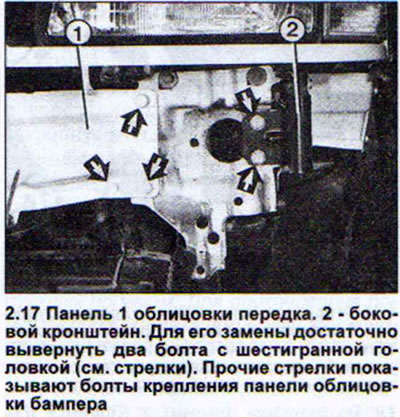
5. Unscrew the 6 mm socket head cap screws located in the upper part of the grating openings (see illustration).

6. Disconnect the plastic plugs from the left and right sides on the lower rear part of the bumper.
7. Release the bumper sides from the holders on the body. To do this, press the bumper down from the side and pull it towards you at the same time (see illustration).
8. Lift the ends of the bumper above the wheel well and detach the bumper by pushing it forward. The bumper can now be removed by pulling it forward.
9. Disconnect the fog light connectors if the vehicle is equipped with them.
10. Disconnect the headlight washer hoses and plug their ends with plugs to prevent the washing fluid from leaking out of the reservoir if the car is equipped with a headlight washer. The bumper covers can be removed separately. The license plate frame is secured with two bolts.
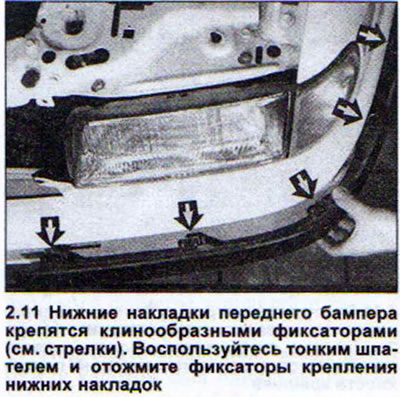
11. Unscrew the two bolts securing the license plate frame and, using a spatula, press the fastening clips of the lower bumper trims and remove the trims (see illustration).
Installation
12. Connect the fog light power plugs and headlight washer hoses if the vehicle is equipped with them.
13. Install the bumper in place by placing it on the holders.
14. Reinstall the bumper side panels so that they do not extend into the wheel well. To do this, align the lower edge of the side panel with the mounting bracket, and then press on the adjacent end of the bumper.
15. Replace the plastic plugs.
16. Tighten the bumper mounting bolts. After installing the bumper, make sure that the gap between the metal rim of the headlight and the bumper is the same along its entire length.
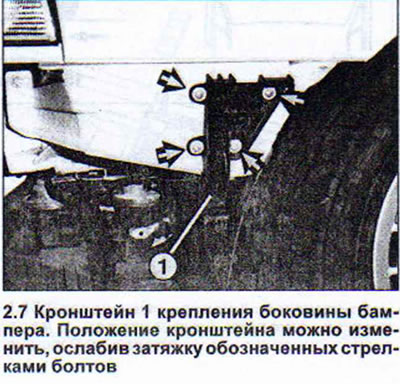
17. Also make sure that the gap between the bumper and the hood is the same along the entire length. Its width should not be more than 6 mm. If this is not the case, remove the bumper and reinstall it. If necessary, loosen the bolts securing the bumper brackets and move them in the elongated holes (see illustration).
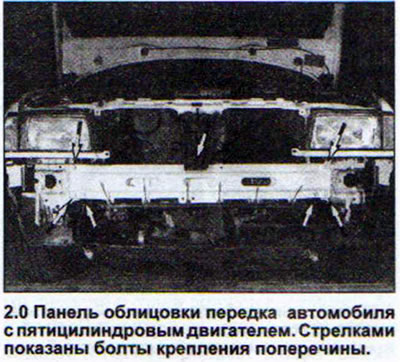
Attention! The plastic bumper of the AUDI 80 takes its original shape even after a strong collision, making it difficult to detect damage on the rear side. For this reason, after hitting the bumper with an obstacle, check the condition of the bumper under the lining, the front trim panel and bumper brackets, headlight holders, radiator grille, lower edge of the hood (see illustration 2.0).
Read the original source on the website: AUDIMANUAL.RU