
Table of contents: Removal ↓ Installation ↓
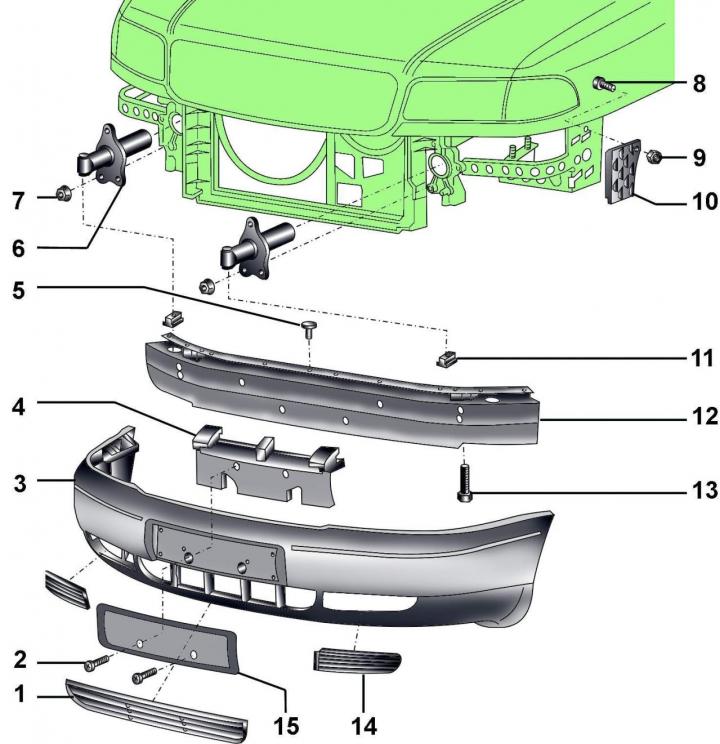
Fig. 16–1. Front bumper: 1 – central ventilation grille; 2 – screw, 1 Nm; 3 – bumper; 4 – filler; 5 - expanding piston; 6 – shock absorber; 7 – nut (until 1994.) or bolt (since 1995), 23 Nm; 8 – bolt, 12 Nm; 9 – nut; 10 – bracket; 11 – nut; 12 – bumper reinforcement; 13 – bolt, 65 Nm; 14 – ventilation grille; 15 – license plate holder
The front bumper is shown in Fig. 16–1.
Removal
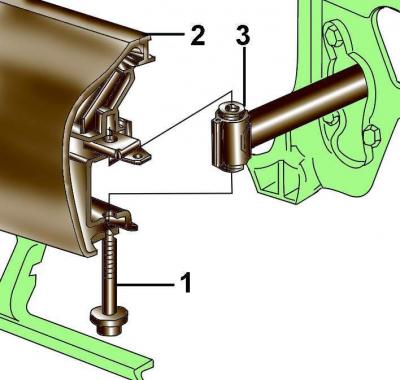
Fig. 16–2. Fastening the front bumper (2) to the shock absorber (3): 1 – bolt
Loosen the screws and remove the lower engine compartment splash guard (Fig. 16–2)
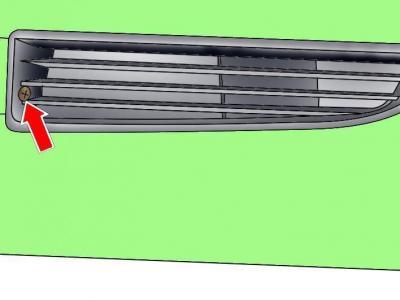
Fig. 3.2–1. Location of the screw securing the left ventilation grille
Loosen the screws securing the left and right bumper ventilation grilles and remove them (see Fig. 3.2–1).
On the right side, disconnect the generator air duct from the bumper.
On vehicles with right-hand headlight washers, disconnect the washer hose from the tee.
Release the three clamps and unscrew the two nuts securing the front part of the front wheel arch trim.
From below the bumper, unscrew the bumper mounting bolts (see Fig. 16–2).
Pull forward to remove the bumper from the side guide brackets.
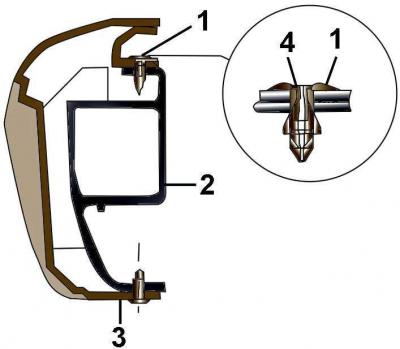
Fig. 16–3. Fastening elements of the front bumper to the bumper reinforcement: 1 – clamp; 2 – bumper reinforcement; 3 – bumper; 4 – expanding piston
Press the expanding piston 4 (Fig. 16–3) of the upper bumper mount out of the clamps.
Tilt the top of the bumper away from the bumper reinforcement and, moving downwards, remove the bumper from its reinforcement.
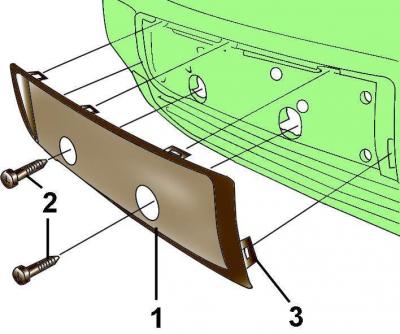
Fig. 16–4. Fastening elements of the license plate holder to the front bumper: 1 – license plate holder; 2 – screws; 3 – retainer
Remove the screws 2 securing the license plate holder 1 to the bumper, press the side clips of the license plate holder and remove it from the bumper (Fig. 16–4).
Installation
Installation is carried out in the reverse order of removal.