



Table of contents: Removal ↓ Installation ↓
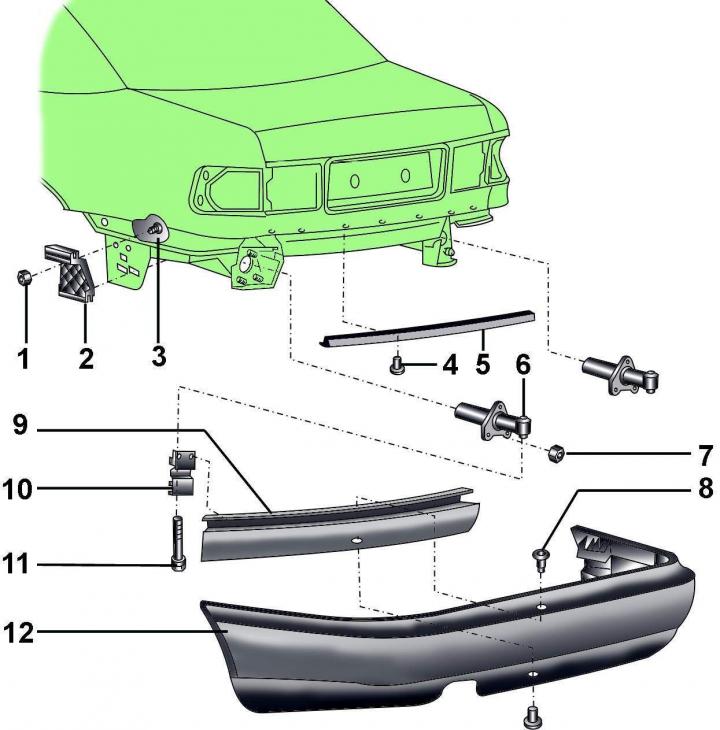
Fig. 16–6. Rear bumper: 1 – nut; 2 – bracket; 3 – bolt, 12 Nm; 4 – bolt, 2.5 Nm; 5 – overlay; 6 – shock absorber; 7 – nut (until 1994.) or (bolt since 1995.), 23 Nm; 8 - expanding piston; 9 – bumper reinforcement; 10 – bracket; 11 – bolt, 65 Nm; 12 – bumper
The rear bumper is shown in Fig. 16–6.
Note: To access bolt 3 (see Fig. 16–6), it is necessary to remove the interior trim of the trunk and the sealing ring; access to the right bolt is only possible after removing the battery.
Removal
Remove the lower rear bumper trim.
Unscrew bolts 11 (see Fig. 16–6) securing the bumper.
Pull back to remove the bumper from the side guide brackets.
Installation
Installation is carried out in the reverse order of removal.
[The article was copied from the website «AudiManual»]