
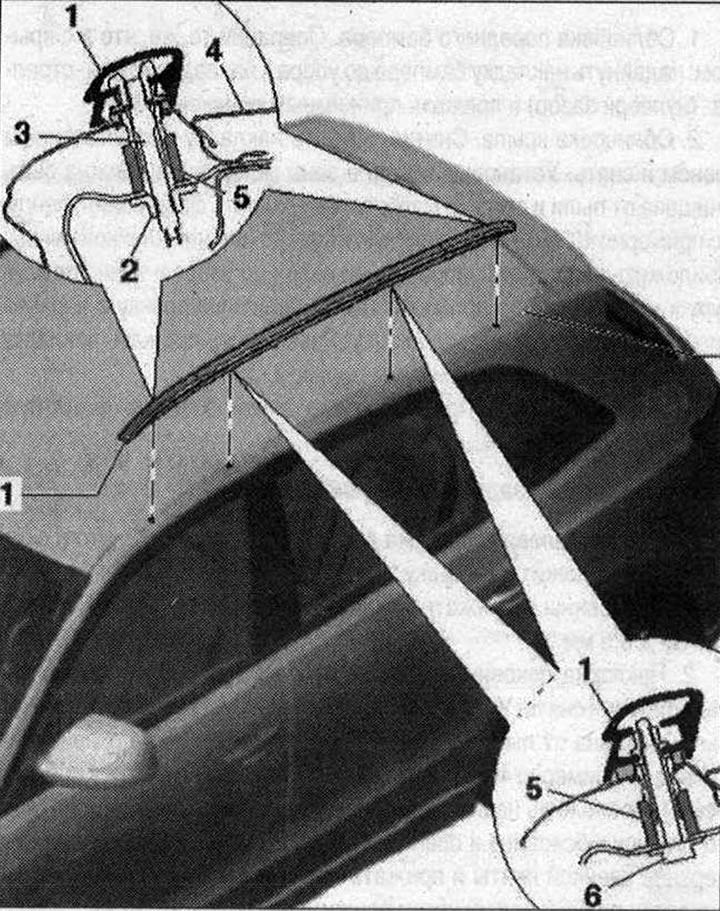
 1. Roof rails. Removal: Lower the roof panel. The roof rack recognition sensor "G625" is located in the left-hand roof rack only. Disconnect the connector of the roof rack recognition sensor "G625". Unscrew the nuts and bolts and remove the roof rack in an upward direction. Installation: The adjusting elements must be inserted into the roof and be in a slightly tensioned position in the installation position. Position the roof rack on the roof and insert the threaded pins through the adjusting elements. Observe the tightening sequence. First tighten the bolts, then the nuts to the correct torque; 2. Threaded pin. Inserted into the roof rails at the front and rear; 3. Nut. Replace, screw on a new nut with thread varnish -D 000; 600 A2-. 10 Nm; 4. Roof; 5. Adjuster. Insert the front adjusters and both rear adjusters into the holes and slide them forward into the mounting position. Insert the remaining adjuster (if you look from the 2nd element from the front) into the hole and slide it back into the installation position. Lightly tighten the adjusting elements (0.3 Nm) so that they fit against the outer skin; 6. Bolt. Replace, clean threaded holes with a tap from thread varnish. 10 N·m
Roof Rack Recognition Sensor "G625"

The roof rack recognition sensor "G625-2" is installed only in the left railing and cannot be replaced separately.
(The original text is available on the website «AUDIMANUAL.RU»)