

Replacing the front wheel arch trim 1. Front bumper trim. The operations are the same as for the fender: push the bumper trim all the way to the fender trim -arrow- (zero clearance) and press with pressure roller -3356-; 2. Wing trim. Removal: heat the pad with an industrial hair dryer and remove. Installation: the wing in the gluing area must be cleaned of dust and grease. Heat the bonding surface with a hairdryer to approximately 40°C. Remove the protective film from the bottom adhesive tape. Place the trim upwards until it stops and exactly along the contour to the fender and press lightly. Remove the protective film from the top adhesive tape and press the pad. Press the trim evenly over the entire surface using the pressure roller -3356-; 3. Adhesive tape. When installing, remove the side protective film from the adhesive tape.
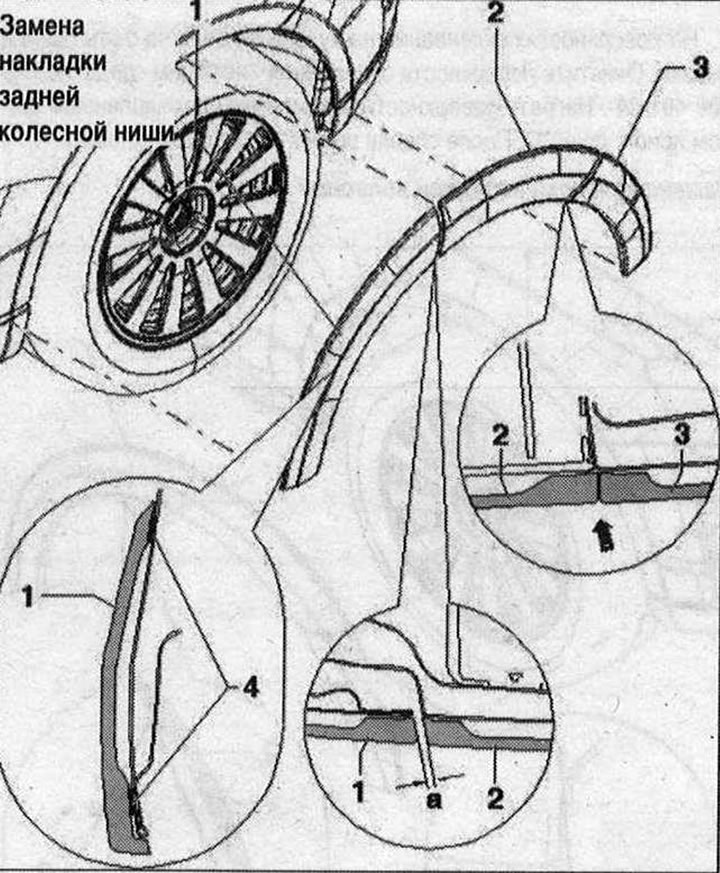
Replacing the rear wheel arch trim 1. Rear door slot trim. The operations are the same as with the sidewall. Place rear door trim at distance -a- to side trim and press with pressure roller -3356-. Distance -a- = 3.5 mm; 2. Sidewall trim. Removal: heat the pad with an industrial hair dryer and remove. Installation: the sidewall in the gluing area must be cleaned of dust and grease. Heat the bonding surface with a hairdryer to approximately 40°C. Remove the protective film from the bottom adhesive tape. Place the trim upwards until it stops and exactly along the contour to the sidewall and press lightly. Remove the protective film from the top adhesive tape and press the pad. Press the trim evenly over the entire surface using the pressure roller -3356-; 3. Rear bumper trim. The operations are the same as with the sidewall. Push the bumper trim all the way onto the side trim -arrow- (zero clearance) and press with pressure roller -3356-; 4. Adhesive tape
Visitor comments