
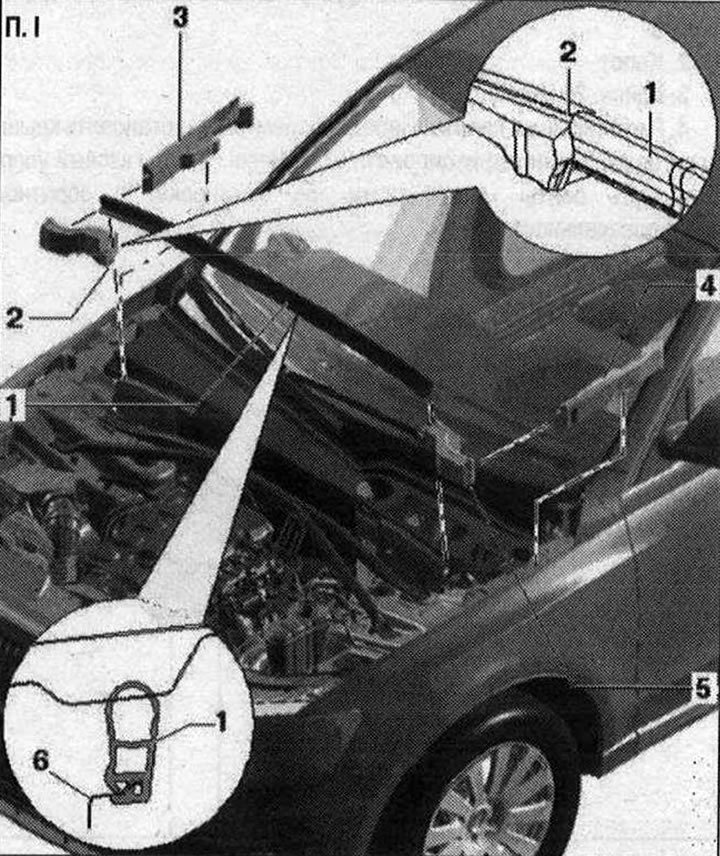
I 1. Seal of the water drainage box. To remove, remove the body flange from the side in a rearward direction. Starting from the side, insert into the sealing profile with preliminary tension. Gradually press the seal to the opposite side. Also put the seal on the sealing profile on the opposite side. Crimp the allowances along the front wall of the water drainage box; 2. Sealing profile on the right. To remove, detach from the body and remove from the side under the wing bracket. When installing, the clips of the foam element should snap into the body; 3. Seal, right. Disconnect from the wing bracket in an upward direction; 4. Sealing profile on the left. To remove, detach from the body and remove from the side under the wing bracket. When installing, the clips of the foam element should snap into the body; 5. Seal, left. Disconnect from the wing bracket in an upward direction; 6. Front wall of the water drain box. Install the seal of the windshield washer reservoir on the side
(The original source of the article can be found on the website: audimanual)