
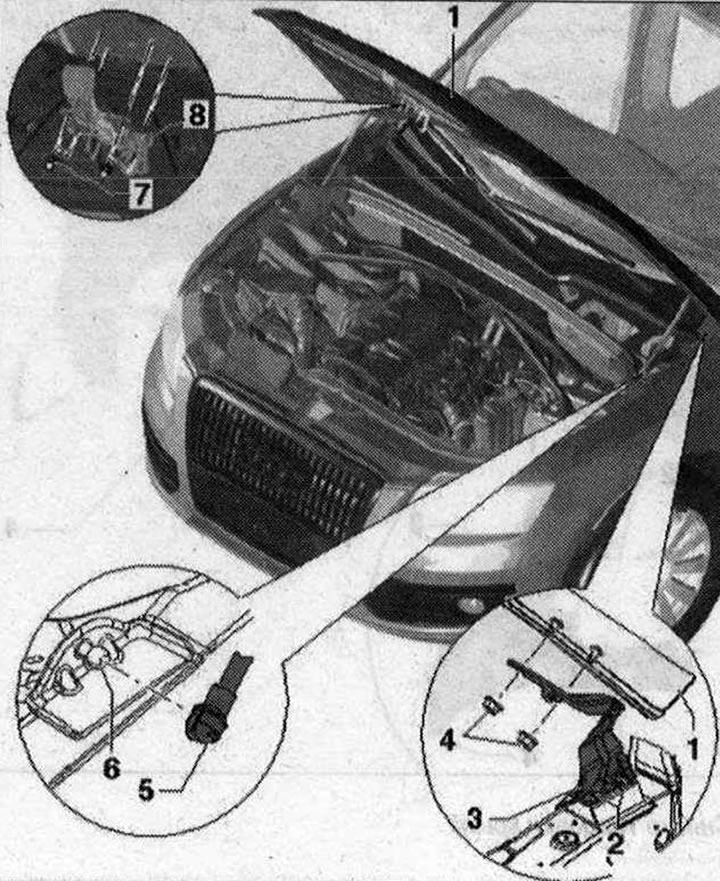
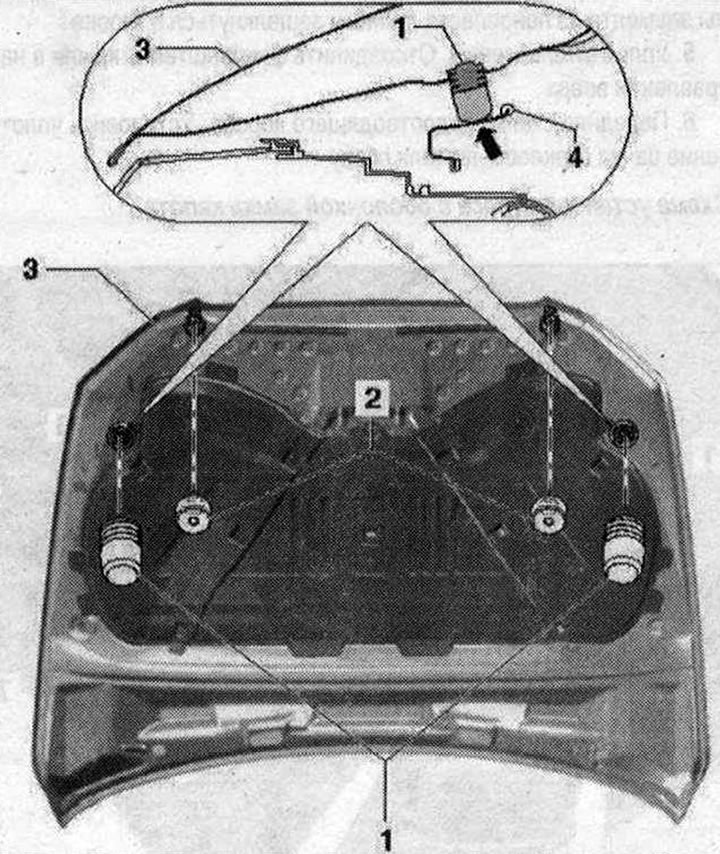
Removal the trunk lid 1. Hood. A second mechanic is required to support and hold the hood for removal and installation. Removal: Remove the gas strut from the hood. Unscrew the nuts "4" on the top hinge of the hood. Remove the hood. Installation: In reverse order. Adjustment: Align the hood between the fenders. Adjust the height of the hood above the bottom of the hood lock. Align the hood relative to the fenders using the stops; 2. Bolts. 21 Nm; 3. Trunk lid hinge. For removal and installation, the hood must be removed or securely supported. Removal: remove the gas strut. Unscrew bolts "2" and nuts "4". Installation: in reverse order; 4. Nut. 21 Nm; 5. Gas strut. The gas shock absorber pipe is installed on the body; 6. Ball pin. 21 Nm; 7. Nut. 8 Nm; 8. Hook. Removing the hook: unscrew the nuts and remove the locking hook
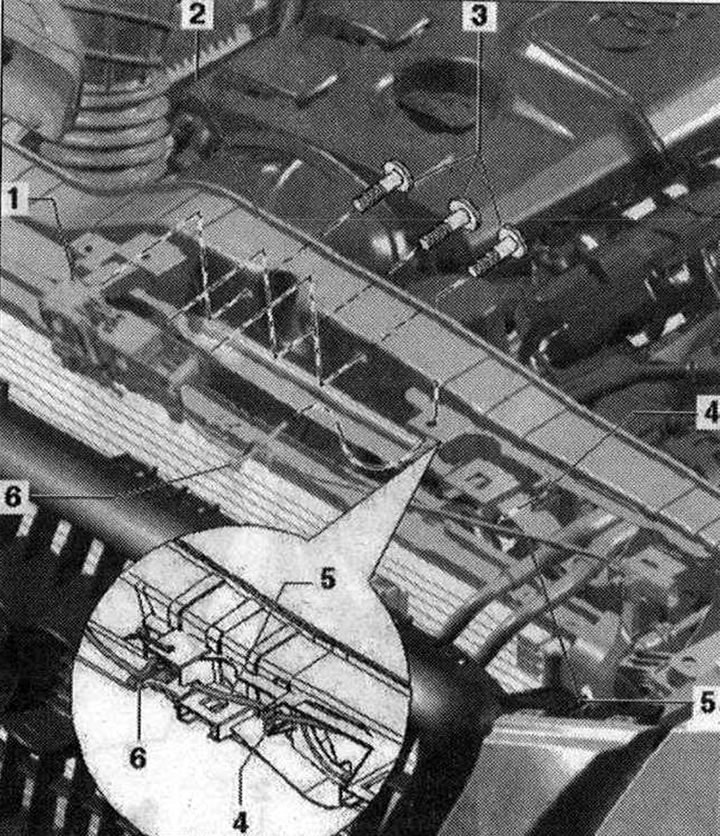
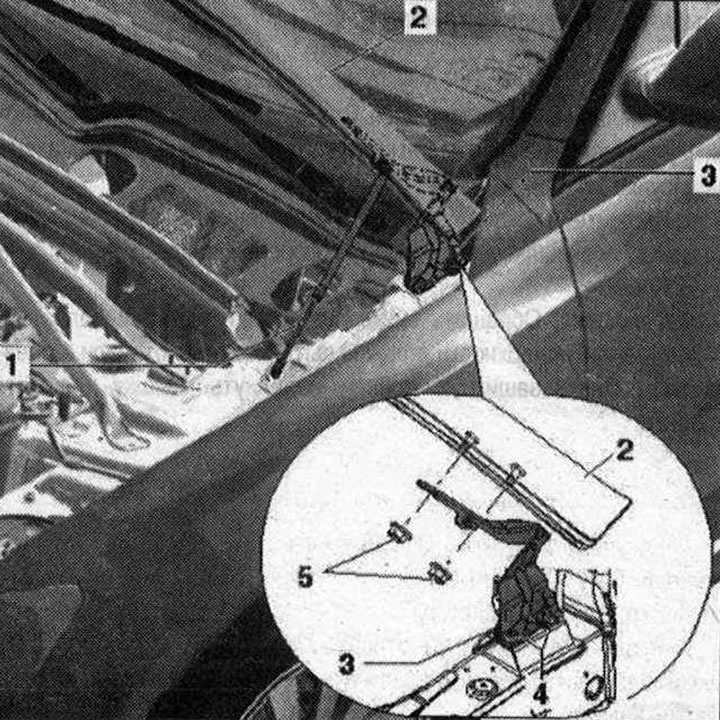
Removal the hood lock 1. Trunk lid lock. Disconnect the upper bumper trim and push it aside. Disconnect the lid lock cable on the coupling. Disconnect the plug connector. Unscrew screws "1" and "2". To adjust the height of the hood, move the hood lock up or down; 2. Radiator frame; 3. Bolt 15 Nm; 4. Clamp. Insert the cable and wire into the eye of the lock frame and put on the clamp; 5. Electric wire of the hood lock; 6. Cable tie
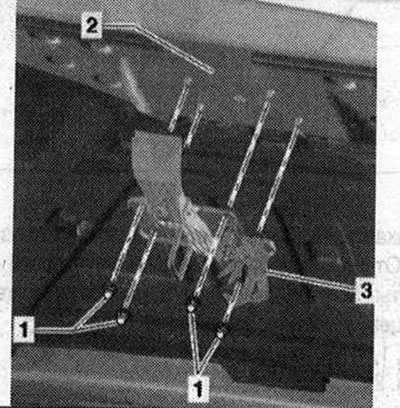
Removal the bonnet hinge 1. Gas strut. Hang the gas strut tube from the hood side; 2. Hood; 3. Nut. 25 Nm; 4. Bonnet lid hinge. Before removing the hinge, install the lid on supports and/or secure it from falling. Remove the gas strut. Unscrew bolts "4" and nuts "5". Installation: in reverse order; 5. Nut. 21 Nm
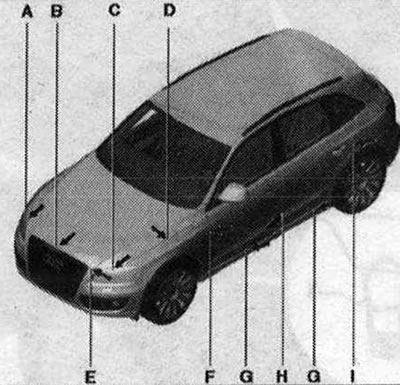
Adjusting the hood
Dimension A = 5.0 mm. Dimension B = 4.5 mm. Dimension C = 5.0 mm. Dimension D = 3.0 mm. Dimension E = 4.5 mm
Safety bar for height adjustment 1. Adjustable stop. Use to adjust the height at the front. Adjusting stops "2" should be flush with the radiator frame when the hood is closed; 2. Buffer. Rubber shock absorbers "1" serve to protect against sharp impacts and should not be in contact with the closing panel when the lid is closed; 3. Hood; 4. Radiator frame

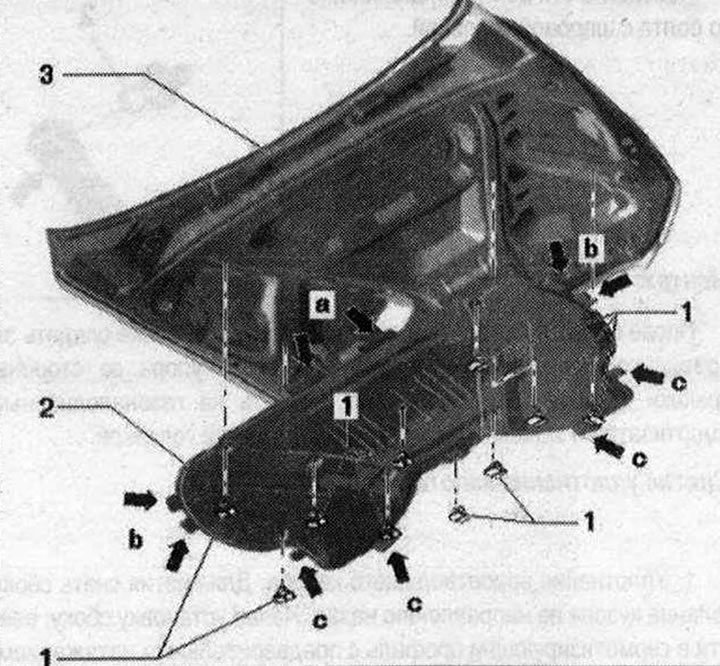
Replacing the hood protectors
The protective stops are additionally equipped with double-sided adhesive tape.
- 1. Lid
- 2. Protective stop. To remove, remove the clamp from the hood and remove the protective stop
- 3. Clamp
Hood trim 1. Mounting bracket; 2. Hood trim. Installation: First insert the tabs on the rear edge into the holes provided on the inner panel. Insert the tabs on the front edge and on the side. The fastening clips should click into place; 3. Lid; 4. Clamp
The original material is located on the website Audimanual.ru