
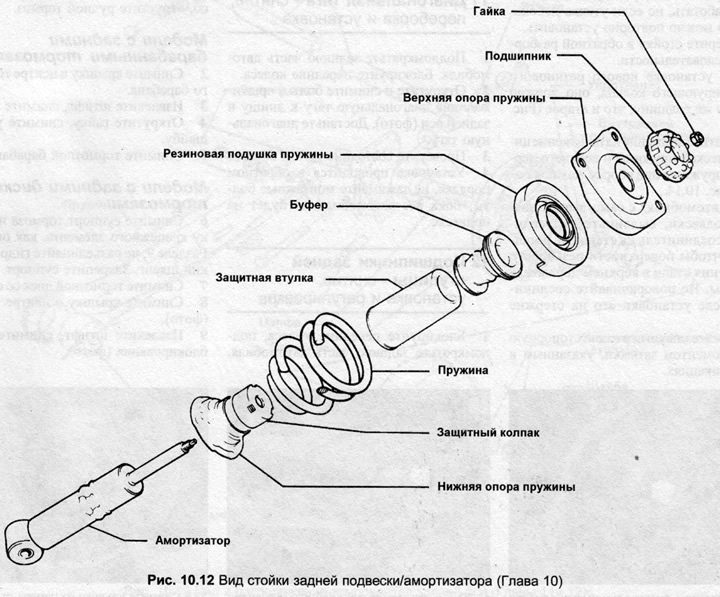
2. Install the puller on the spring and secure the strut assembly in a vice.
3. Compress the spring until the upper spring retainer is released from tension, unscrew the upper lock nut.
4. Remove the rubber bearing, upper spring retainer and shock absorber ring.
5. On vehicles with self-leveling suspension, disconnect the hydraulic connector from the piston rod.
6. Remove the spring with the compressor, then the shock absorber with the bushing, the protection cover and the lower spring holder.
7. Check the condition of the shock absorber. With the shock absorber vertical, check its operation by fully pulling and pushing the piston rod manually several times. You should feel resistance to movement, evenly along the entire stroke of the piston.
8. If the shock absorber has had excessive oil leakage, it will not work effectively, but if the leakage is small, it can be reinstalled.
9. Assemble the rack in the reverse order of disassembly.
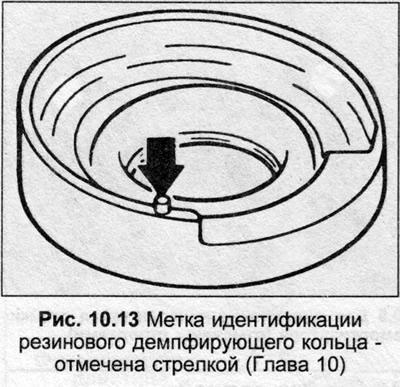
10. When installing a new rubber shock-absorbing ring, it must be the same thickness as the old one (Fig. 10.13).
11. Note the position of the coil spring and upper spring retainer during assembly as shown in Fig. 10.14.
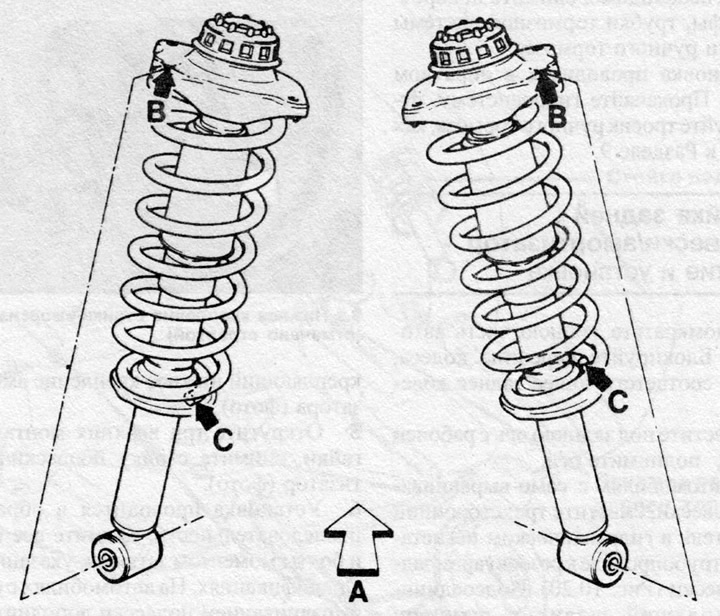
Fig. 10.14 Location of rear coil spring and upper spring retainer (Chapter 10)
A - Direction of movement
B - Central hole in the upper spring holder
C - Lower end of the coil spring
12. On vehicles with self-leveling suspension, slide the hydraulic connector onto the piston rod until the threaded connection surfaces become flush with the upper spring retainer. Do not turn the connector after it is installed on the piston rod.
13. Tighten the new upper lock nut to the torque specified in Specifications.
[Read the original source on the website «AUDImanual»]