



Table of contents: Removal ↓ Installation ↓
Removal
Remove the rear wheel.
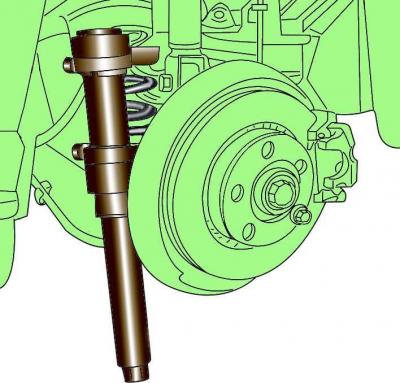
Fig. 12–18. Using the special tool VAG 1752/1 to compress the rear suspension springs
Using the special device VAG 1752/1 for compressing springs, alternately compress the rear suspension springs and remove them (Fig. 12–18). When using the special device for compressing springs, make sure that the spring coils are securely gripped, compress the spring from opposite sides.
The spring has a very high compression force, so use only a very reliable tool.
Remove the rear wheel arch protection.
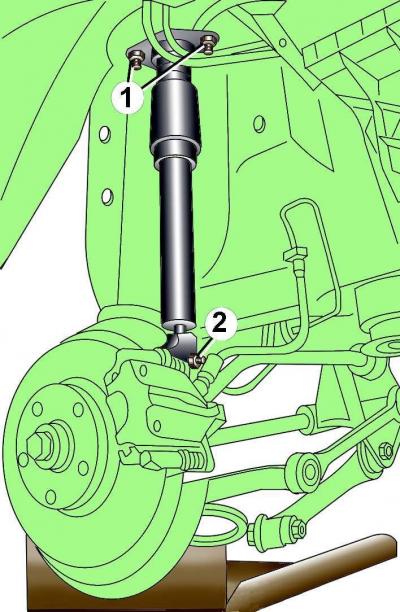
Fig. 12–19. Positioning the nuts (1) and bolt (2) for fastening the rear shock absorber and raising the lower trapezoidal arm using the VAG 1359/2 tool
Using a jack with the VAG 1359/2 device installed on it, lift the lower trapezoidal arm (Fig. 12–19).
Unscrew bolt 2 and nuts 1 of the rear shock absorber and remove the shock absorber from under the car.
Installation
Installation is carried out in the reverse order of removal, taking into account the following.
Finally tighten the lower shock absorber mounting bolts after jacking up the lower trapezoidal arm until the shock absorber is compressed by 40–50 mm.
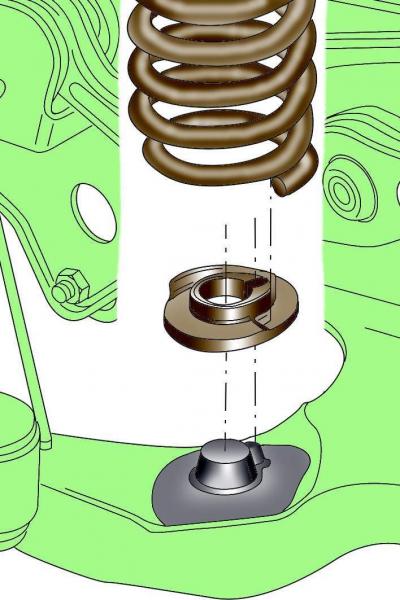
Fig. 12–20. Correct positioning of the spring relative to its lower support
Install the spring so that the lower coil of the spring is precisely aligned with the recesses of the lower spring support (Fig. 12–20).
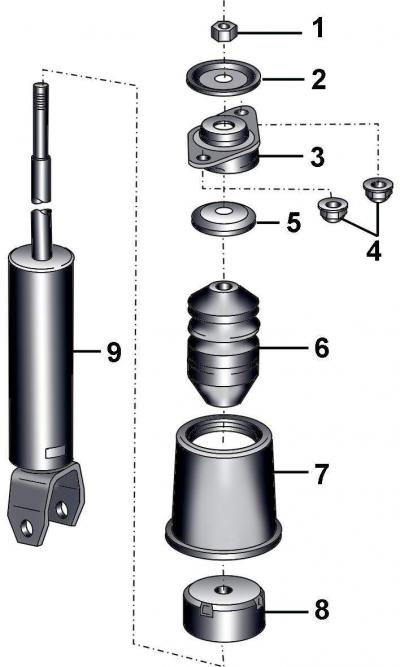
Fig. 12–21. Rear shock absorber: 1 – nut, 30 Nm; 2 – disc washer; 3 – upper support; 4 – nuts, 30 Nm; 5 – washer; 6 – buffer; 7 – protective sleeve; 8 – protective cover; 9 – shock absorber
Remove the spring compressor.
(The original source of the article can be found on the website audimanual)