
Table of contents: Removal ↓ Installation ↓
Removal
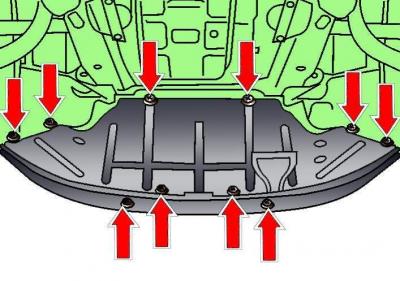
Fig. 3.1–1. Location of the engine compartment lower mudguard mounting fasteners
Release the fasteners and remove the lower engine compartment splash guard (see Fig. 3.1–1).
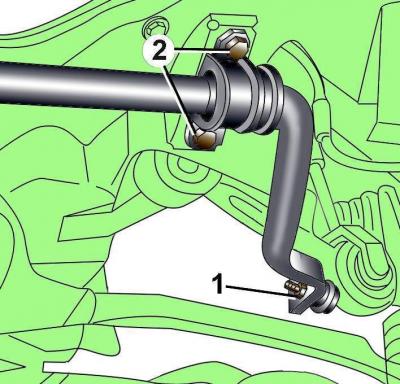
Fig. 12–15. Location of the nut (1) for fastening the shackle and the bolts (2) for fastening the stabilizer bracket
Unscrew nut 1 and remove the stabilizer earring (Fig. 12–15).
Unscrew the bolts securing the 2 stabilizer brackets.
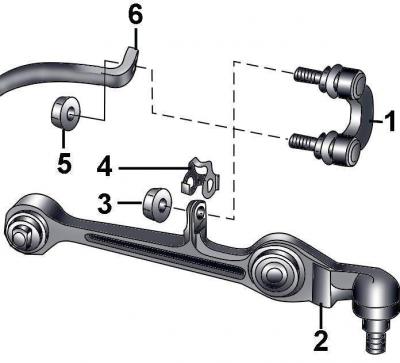
Fig. 12–16. Fastening the stabilizer bar earring: 1 – stabilizer bar earring; 2 – lower transverse arm; 3 – self-locking nut, 40 Nm + turn further by 90°; 4 – clamp; 5 – self-locking nut, 90 Nm; 6 – anti-roll bar
Installation
Installation is carried out in the reverse order of removal, taking into account the following.
The arrow on the stabilizer earring indicates the direction of movement.
Before screwing in the stabilizer bracket mounting bolts, use a tap to clean the threads in the bolt holes.
If the stabilizer was replaced, install rubber bushings on it without lubrication