
Removal
Remove the front engine parts and do the following:
Remove all accessory drive belts.
Remove the upper timing belt cover.
Using a felt-tip pen, mark the direction of rotation of the timing belt on its outer side if the belt is to be reinstalled.
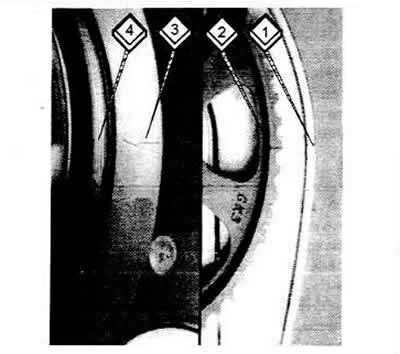
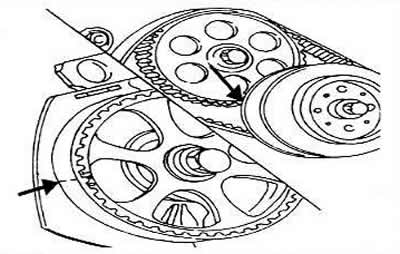
Turn the engine until the piston of the first cylinder is at TDC. The indicated marks should match (1, 2, 3, 4).
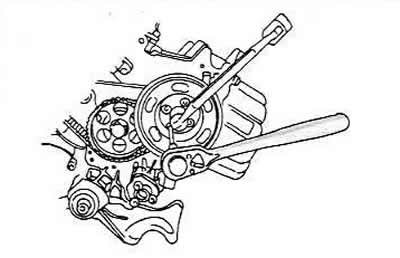
Loosen the vibration damper bolts. With the engine installed, engage the gear and apply the parking brake, or use a socket head to hold the crankshaft gear bolt and loosen the vibration damper bolts. With the engine removed, lock the flywheel by the toothed ring.
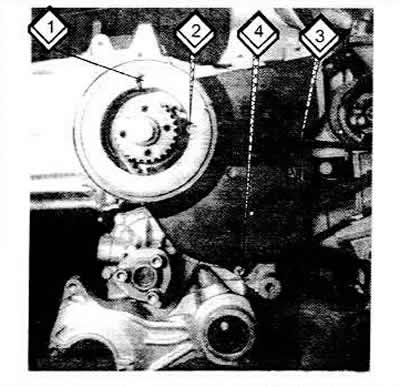
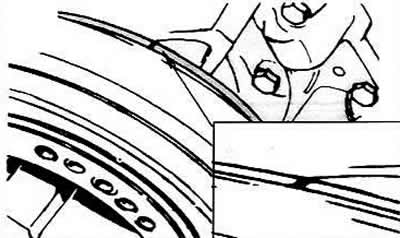
Remove the lower timing belt cover. Its mounting locations are indicated by numbers (1, 2, 3, 4).
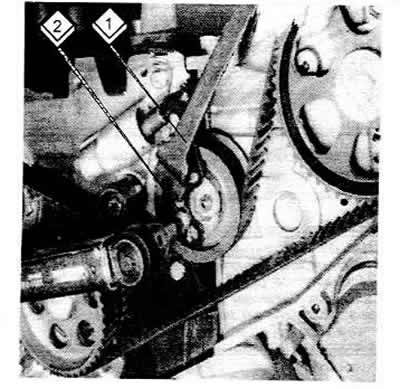
Loosen the toothed belt tensioner nut. You will need a TORX key (T45) for this. Press the belt tensioner down in the direction shown by the arrow to loosen the toothed belt and remove the belt from the gears. If it is to be reinstalled, the belt should not bend or twist.
Installation
To adjust the belt tensioner, a special key is required. This is a digital key that is inserted into both holes in the tension roller. This key is produced by various companies, the Hazet company designates it with the number 2587.
When installing a new timing belt, the timing marks must match as described in the text. The engine must be at room temperature to properly tension the belt. When installing the timing belt, perform the following operations:
Install the toothed belt on the crankshaft and intermediate shaft gears without bending it. When installing the old belt, watch the direction of its rotation.
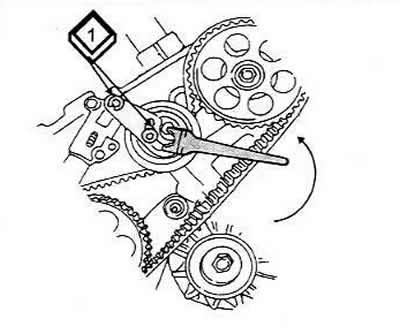
Temporarily install the vibration damper and secure it with one bolt. To prevent the engine from turning, the timing mark (TDC) on the camshaft gear (left) should be opposite the arrow on the belt cover, and the notch on the vibration damper and the timing mark on the intermediate shaft gear (right) should be opposite each other. If everything matches, install the belt on the camshaft gear.
Now you need to tighten the belt. There is a special key for this (MATRA V 159) insert into the belt tensioner and move in the direction shown by the arrow until it is possible to turn the belt between the camshaft and intermediate shaft gears by 90°, holding it between the index finger and thumb. In this position, tighten the 2 bolts (1) to a torque of 20 Nm.
Rotate the crankshaft 2 full turns and check that the tension remains correct.
Remove the vibration damper and install the timing belt cover.
Now secure the vibration damper and tighten its bolts. Lubricate the threads and head of the bolts with oil. Holding the crankshaft, tighten the bolts to 90 Nm and from this position tighten another 90°, tightening in 2 passes.
Install all drive belts. Install the front end components.
Toothed belt of 5-cylinder engine
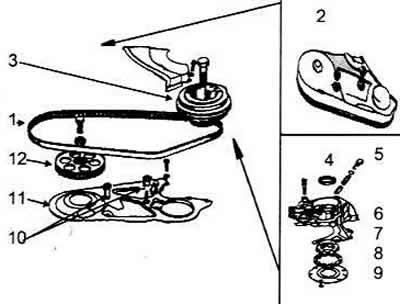
1 Belt
2 Upper belt cover
3 Pulley and sprocket (gear) assembly.
4 Seal
5 Oil pressure reducing valve
6 Oil pump
7 Gasket
8 Oil pump gears (replace in pairs)
9 Lid
10 Distance washer
11 Rear cover of the sponge belt
12 Timing belt sprocket
Removal
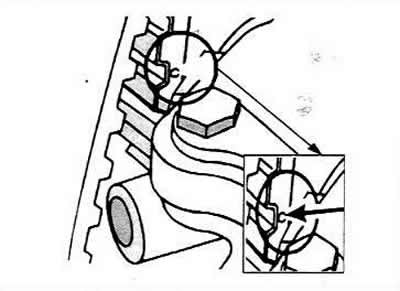
Disconnect the negative battery cable. Using the large bolt on the crankshaft sprocket, rotate the crankshaft so that the #1 cylinder piston is at TDC for the compression stroke. Align the "O" mark with the mark on the casing. If the belt has not slipped, the timing mark on the back of the camshaft sprocket will be aligned with the upper left edge of the valve cover.
Remove the alternator and air conditioning compressor drive belts.
Remove the upper and lower timing belt covers.
Loosen the water pump bolts enough to turn the pump clockwise.
Pull the toothed belt off the sprockets.
Installation
If necessary, rotate the camshaft so that the mark on the rear of the sprocket aligns with the left edge of the cylinder head gasket.
If necessary, align the "0" mark with the mark on the casing.
Install the timing belt and turn the water pump counterclockwise to tighten the belt. Tighten the water pump bolts to 20 Nm.
Caution: The timing belt is tensioned correctly when it can be twisted 90° midway between the camshaft sprocket and the water pump. Make sure that the belt is not jammed between the oil pump and the sprocket when installing the vibration damper.
Install the timing belt covers and tighten the bolts to 10 Nm.
Install the alternator and air conditioning compressor belts. These belts are tensioned correctly when they can be deflected 10 mm in the middle.