
Table of contents: Removal ↓ Adjusting the hood ↓ Removal the upper cross member of… ↓ Replacing the hood cable drive ↓
Removal
Disconnect the engine compartment lighting wires, windshield washer nozzle heating wires, where present, and also the flexible jumper.
Advice: if the same hood is to be installed, then when pulling out the wire, you need to secure a cord to its end. Pull the cord with the wire through the hood. Leave the cord in the hood, which will help when installing the wire in place.
Disconnect the windshield washer hose.
Remove the lock washers from the upper air spring mounting bolt.
Take off (where is there) hinge protection.
Loosen the bolts in the hinges on the right and left.
The hood is too heavy to remove alone, so ask someone to support it on the right and left.
Now you need to push out the pneumatic spring mounting axis and remove the spring.
Unscrew the already loosened bolts by hand and remove the hood.
If necessary, the hood hinges can now be removed.
Adjusting the hood
The gap between the closed hood and the left and right fenders should be the same (6-7 mm), the front edge of the hood should also be at the same level with the fenders. Then the height adjustment should match. The hood should not protrude above the upper edge of the fenders or be below them (height adjustment).
To adjust in the longitudinal direction, loosen the bolts at the top between the hinge and the hood.
To adjust laterally, loosen the bolts between the hinges and the body.
Move the hood cover in the desired direction and tighten the bolts.
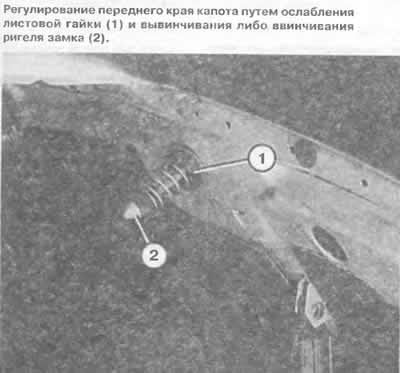
At the front edge of the hood, height adjustment is made through the hood latch.
Loosen the lock nuts on the right and left stop buffers and screw them fully into the body crossmember.
Loosen the leaf nut with pliers and screw or unscrew the lock bolt with a screwdriver until the top edge of the hood is level with the fenders.
Check the installation from the front (right and left!), closing the hood.
Tighten the locknuts again.
Make sure that the lock bolt fits exactly into the hole in the front body panel. If this is not the case, it can be moved in the longitudinal and transverse directions after loosening the lock nut.
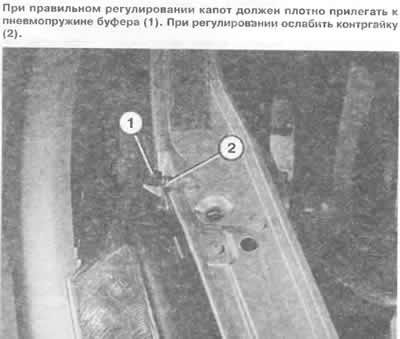
Turn the bumper so that the hood does not swing after closing. This may require several attempts.
Removal the upper cross member of the engine compartment
Removing the crossmember is necessary when performing certain repair work, for example, when disassembling the engine, as well as after accidents.
Unscrew 4 bolts on the top of the crossbar on the right and left.
Unscrew the Phillips-head screws on the right and left from the inside, which are used to secure the headlight housing.
Unscrew the hex bolts of the radiator bracket on the left and right at the top.
Disconnect the spring clips of the hood release cable.
Replacing the hood cable drive
Open the hood, loosen the threaded nipple on the right hood lock.
If difficult to access, remove the side wall of the engine compartment.
Remove the plastic guide sleeve.
Remove the cable from the plastic clip on the side wall of the engine compartment.
Remove the shelf on the left below the dashboard (chapter "Salon").
Unscrew the release handle located in the driver's footwell.
Pull the hood release handle inside the passenger compartment. Be careful, the spring cable can damage your eyes!
Push the new cable from the inside through the inlet tube, secure the handle.
Install the guide sleeve on the left.
Push the cable through the lock retainer and the front spoiler mount.
Insert the guide sleeve on the right, pull the cable and tighten the threaded nipple.
(The text is based on materials from the website: AUDIMANUAL.RU)