
To loosen the piston rod nut at the top of the shock absorber strut, a special device is used in the workshop to tighten the nut to the exact tightening torque. In extreme cases, a spanner wrench can be used here.
During this operation the vehicle must stand on its wheels.
Remove the plastic cover (2) from the top of the shock absorber strut.
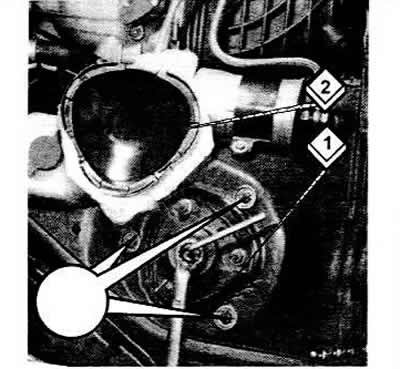
Mark the installation position of the shock absorber bearing (1) with dashes (arrows).
Loosen the 22mm piston rod nut while holding the piston rod with a 7mm Allen key.
Remove the shock absorber bearing after loosening three 13mm nuts.
Turn the steering wheel so that the piston rod can align with the bearing plate. To do this, you can clamp a piece of wood between the spring and the wheel arch.
Pull the rubber buffer off the piston rod.
Unscrew the shock absorber cartridge mounting nut in the depth of the strut using tool 2069 (or as described), pull the shock absorber cartridge upwards.
The car with the cartridge removed cannot be moved now, because the spring may fly out, which is very dangerous.
During subsequent assembly, make sure that the marks on the shock absorber bearing match the marks on the shock absorber strut, otherwise you will have to adjust the front wheel alignment angles.
Tightening torques:
- shock absorber cartridge nut - 18Nm
- nuts on the shock absorber bearing - 30 Nm
- nut on the shock absorber piston rod - 60 Nm
Use new self-locking nuts!
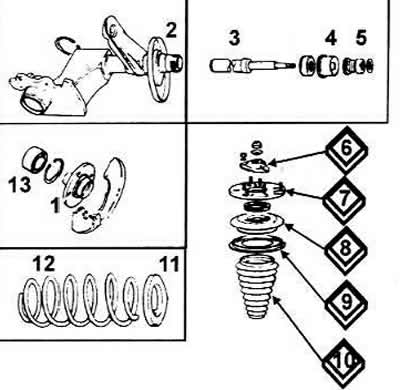
Front shock absorber strut disassembled (early models)
1 Wheel hub
2 Shock absorber housing or wheel bearing housing
3 Shock absorber
4 Protective cap
5 Buffer (bumper)
6 Shock absorber bearing
7 Bearing plate
8 Spring plate
9 Protective ring
10 Corrugated cover
11 Lining
12 Spring
13 Wheel bearing
Warning: Never disassemble a removed shock absorber strut without securing the spring with a compressor, otherwise the spring may unexpectedly straighten out, which is very dangerous!
[The original text of the material can be found on the website: AudiManual.ru]