2. To check the reservoirs, the car must be positioned correctly, but this work can only be done by an experienced mechanic. If the pressure is low, the reservoir must be replaced.
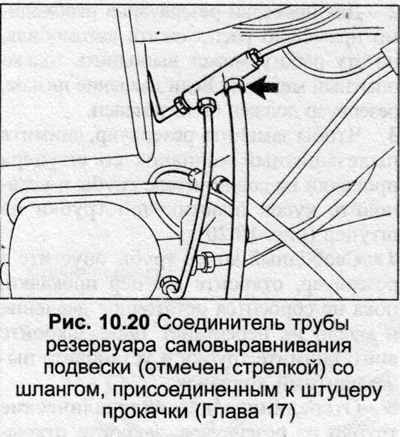
3. To replace the reservoir, remove the dust cap from the bleed nipple on the pipe connector and install a piece of plastic tubing onto the nipple (fig. 10.20).
4. Lower the free end of the pipe into the tank, open the bleed nipple until the residual pressure is released and the oil stops flowing. Close the screw, remove the pipe and install the dust cap.
5. Disconnect the two hydraulic tubes from the reservoir, cap the open ends to prevent dirt from entering and oil loss.
6. Remove the two mounting nuts and washers and lift the tank.
7. Installation is carried out in the reverse order. Fill the system with working fluid using the procedure described in Chapter 25. If the reservoir has been replaced, render the old unit inoperative by drilling a 3 mm diameter hole in the reservoir body to release residual pressure. Be careful when doing this and always wear safety glasses.