Table of contents: Girling support ↓ Teves support ↓
1. Jack up the rear of the car. Remove both rear wheels.
2. Check the brake pad thickness by looking through the slot in the caliper housing. If the shim thickness on any of the pads is equal to or below the minimum specified thickness, all four pads must be replaced.
Girling support
3. Unscrew the upper and lower guide pin bolts (photo).
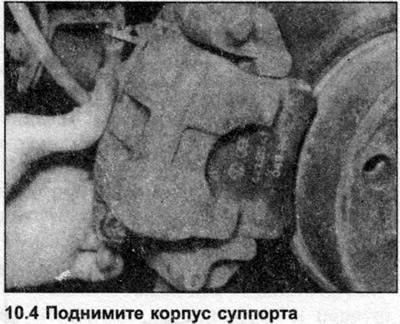
4. Lift the caliper body and move it to the side (photo).
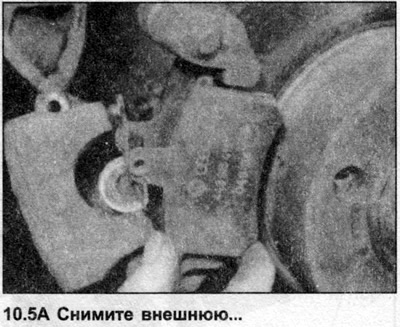
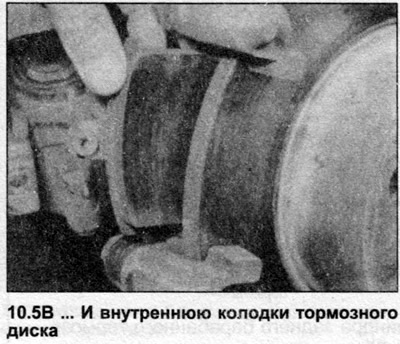
5. Remove the brake disc pads from the mounting bracket (photo). If the pads are to be reused, mark them so that they can be installed in their original positions.
6. Clean the caliper, piston, disc and pads from dust and dirt.
7. Rotate the disc manually to remove rust and deposits. Carefully inspect the entire disc surface; if there are deep cracks or large wear, the disc must be replaced. Inspect the caliper around the piston. Replace the piston seals or caliper housing as needed.
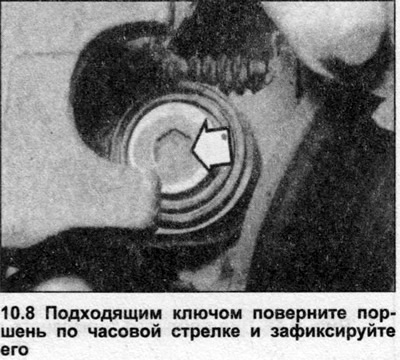
8. If new pads are being installed, draw the piston into the hole by turning it clockwise and pushing at the same time (photo).
9. Place the pads in their position on the bracket hanger, install the caliper body onto the pads.
10. Install and tighten the new guide pin bolts to the torque specified in Specifications.
Teves support
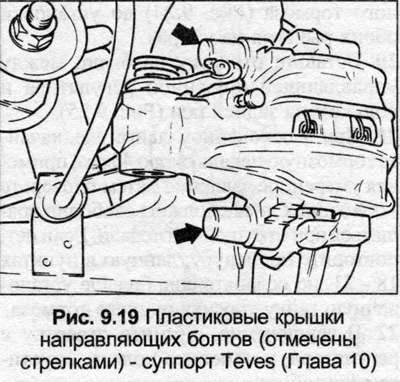
11. Remove the plastic covers from the guide bolts, unscrew the bolts only enough to release the caliper. Do not remove them completely.
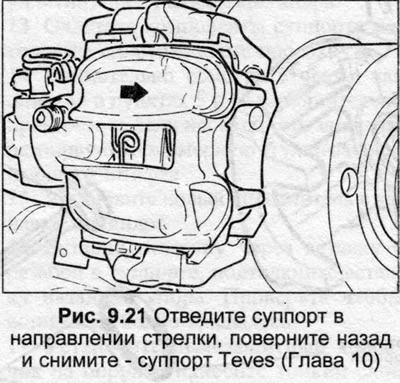
12. Move the caliper body away from the car, turn it back, lift it off the pads. Place the caliper on the side, do not bend the brake line tube.
13. Remove the pads from the fastener hanger. If the pads are to be reused, mark them so that they can be installed in their original positions.
14. Before installing the pad, see points 6, 7 and 8. Note that on this caliper the piston is retracted by simply pushing it in.
15. Place the pads on the bracket hanger, then the caliper.
16. Secure the caliper with the guide bolts, tightening them to the tightening torque specified in Specifications, install plastic covers.
Girling and Teves calipers
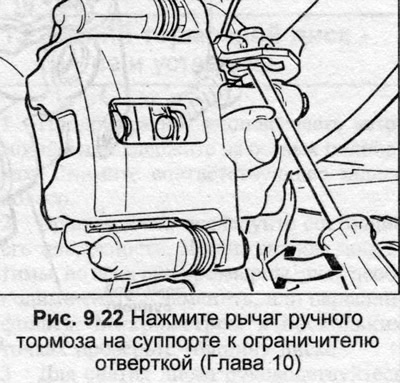
17. The handbrake must be released.
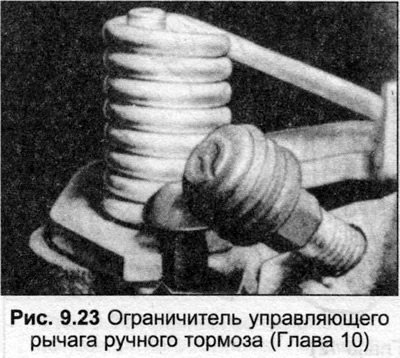
18. Using a screwdriver, spread the handbrake control lever on the left caliper until the lever rests against the limiter (Fig. 9.22 and 9.23). Lock the lever in this position, the control lever on the right caliper should be in the same position.
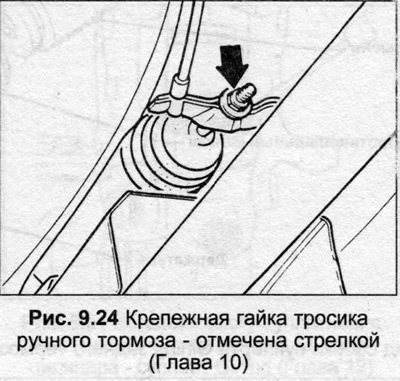
19. If the right lever is far from the stop after this procedure, loosen the handbrake cable adjusting nut (Fig. 9.24) until both levers are positioned on the stops.
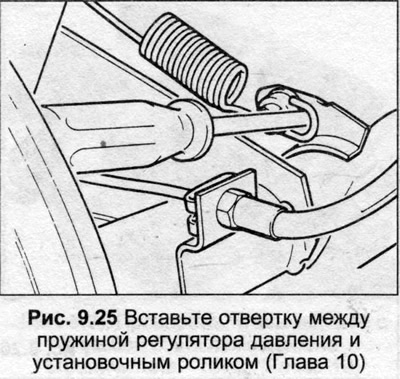
20. Insert a 6 mm screwdriver between the regulator control spring and the roller on the rear axle (Fig. 9.25).
21. With the engine off, pump the brake pedal about 40 times, applying moderate pressure, then check - both rear discs should rotate freely with the pedal released. If not, repeat the procedure given in points 18-21, but loosen the handbrake cable adjusting nut even more.
22. Finally, remove the screwdriver from the regulator, install the wheels, lower the car.
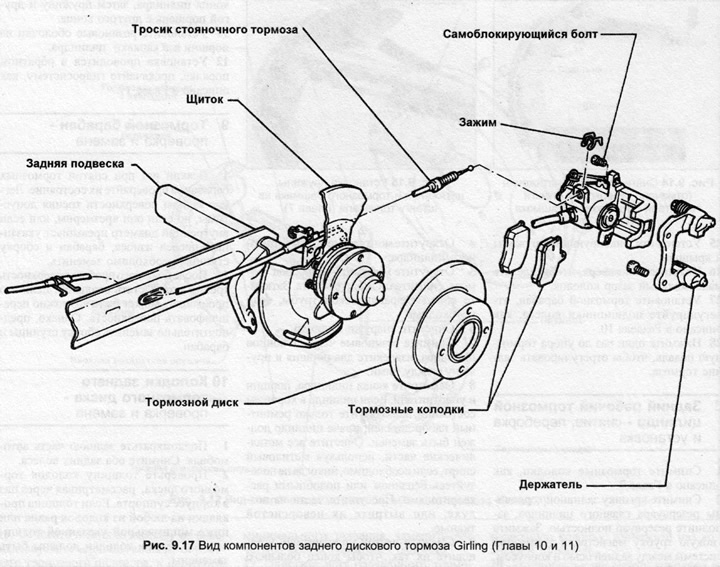
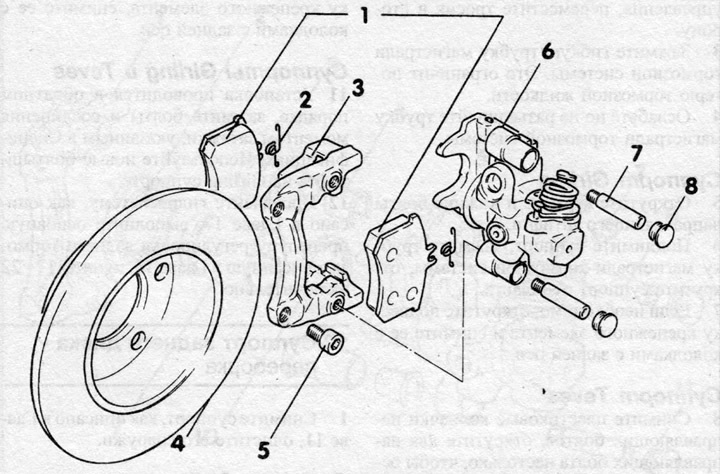
Fig. 9.18 View of Teves rear disc brake components (Chapters 10 and 11)
1 — Brake disc pads
2 - Mounting springs
3 - Suspension of the fastening element
4 — Brake disc
5 — Bolts for fastening the suspension of the fastening element
6 — Caliper housing
7 - Guide bolt
8 - Bolt caps