
Table of contents: Girling support ↓ Teves support ↓
Note: On models equipped with anti-lock brakes, refer to Chapter 28 before starting work.
1. Jack up the rear of the car. Remove the rear wheel.
2. Remove the bracket securing the handbrake cable to the caliper body, release the end of the cable from the control lever, and move the cable to the side.
3. Clamp the flexible brake line tube. This will limit the loss of brake fluid.
4. Loosen but do not disconnect the brake line pipe.
Girling support
5. Remove the upper and lower guide pin bolts.
6. Raise the caliper, clamp the brake line tube, and unscrew the caliper from the hose.
7. If necessary, unscrew the mounting element hanger and remove it with the pads from the rear axle.
Teves support
8. Remove the plastic caps of the guide bolts, unscrew the two guide bolts enough to release the caliper; don't remove them completely.
9. Move the caliper body away from the center of the car, turn it to the rear, lift it off the pads. Clamp the brake line tubes and unscrew the caliper from the hose.
10. If necessary, unscrew the suspension of the fastening element, remove it with the pads from the rear axle.
Girling and Teves calipers
11. Installation is carried out in the reverse order, tighten the bolts and connections with the tightening torque specified in Specifications. Use new pin bolts on the Girling caliper.
12. Bleed the hydraulic system as described in Chapter 17, perform the basic rear brake adjustment procedure described in Chapter 10, items 17–22 inclusive.
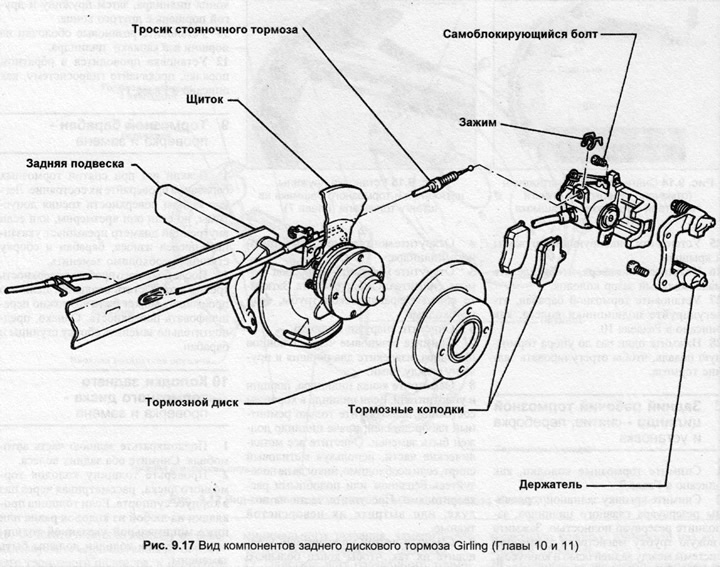
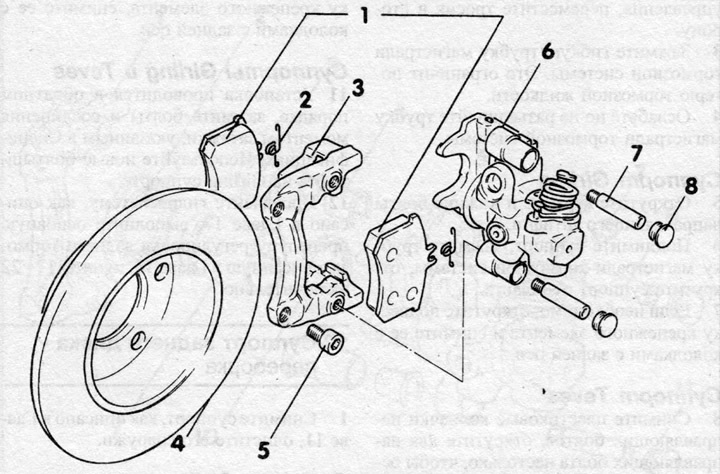
Fig. 9.18 View of Teves rear disc brake components (Chapters 10 and 11)
1 — Brake disc pads
2 - Mounting springs
3 - Suspension of the fastening element
4 — Brake disc
5 — Bolts for fastening the suspension of the fastening element
6 — Caliper housing
7 - Guide bolt
8 - Bolt caps