
Table of contents: Girling support ↓ Teves support ↓
1. Remove the caliper as described in Chapter 11, clean it from the outside.
Girling support
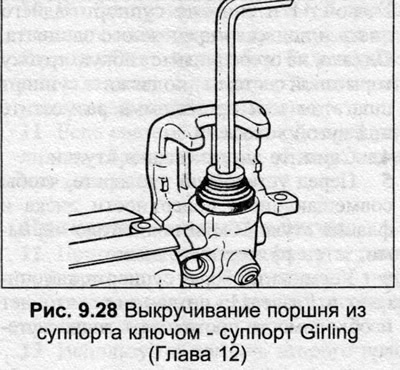
2. Unscrew the piston from the cylinder, remove the piston dust cap.
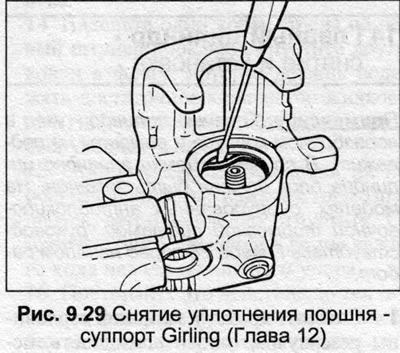
3. Using a blunt screwdriver, remove the seal from the cylinder bore, being careful not to scratch the walls of the hole.
4. Clean the caliper components with methyl alcohol, let dry.
5. Check the condition of the piston and the caliper bore, if necessary, replace the caliper assembly. Also replace the pins and clean the boots.
6. If the components are in satisfactory condition, use the repair kit consisting of new seals and dust cap during assembly.
7. Install the new seal into the cylinder groove. Apply a thin layer of paste to the seal and cylinder.
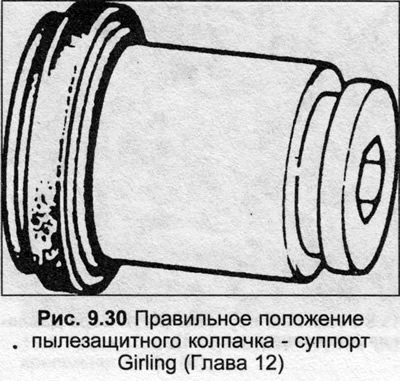
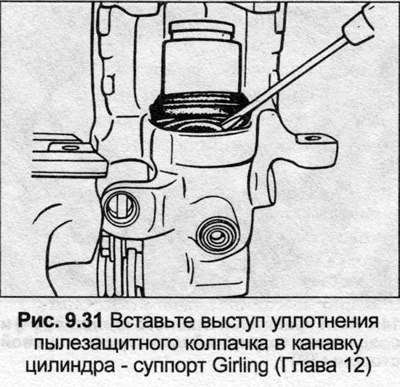
8. Install the dust cap onto the piston (Fig. 9.30). Fit the dust cap seal lug into the groove of the cylinder bore using a screwdriver.
9. Lubricate the piston with paste and screw it into the cylinder. After screwing the piston in as far as possible, insert the outer projection of the dust cap into the groove on the piston.
Teves support
10. Using a pump or compressor, blow the piston out of the cylinder, place a block inside to prevent damage to the piston.
11. Remove the piston dust cap.
12. Using a blunt screwdriver, remove the seal from the cylinder bore.
13. Clean the caliper components with methyl alcohol, let dry.
14. Carefully inspect the parts as described in points 5 and 6, additionally check and, if necessary, replace the rubber and polymer bushings of the guide pin.
15. Install the new seal into the cylinder groove.
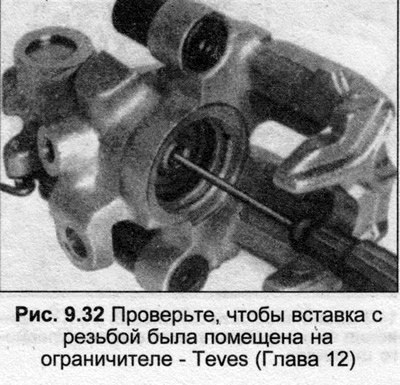
16. Insert a screwdriver through the threaded insert in the caliper and push the insert back until it stops. Check that the insert rotates freely.
17. Install the dust cap on the piston, apply a thin layer of paste to the piston, seal and cylinder bore.
18. Install the dust cap seal protrusion into the cylinder bore groove.
19. Turn the piston so that the thread fits onto the thread of the insert. Push the piston into the cylinder.
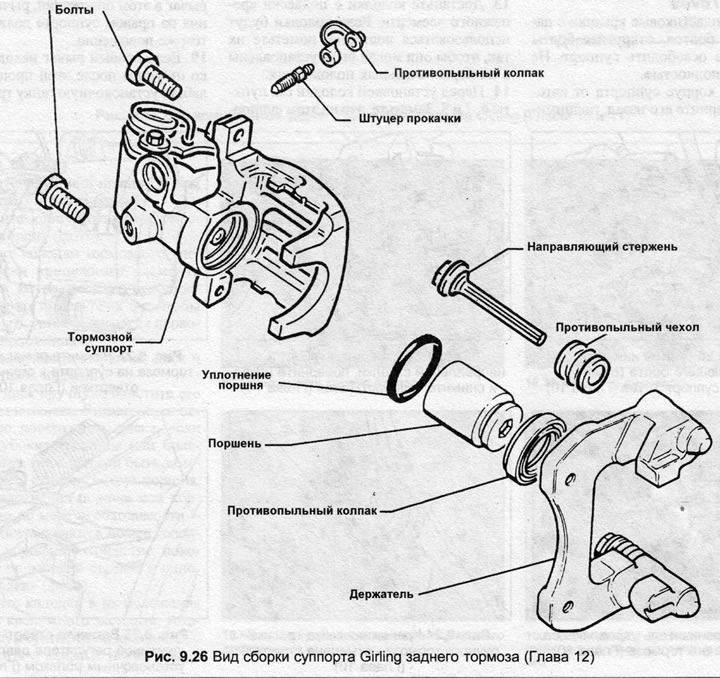
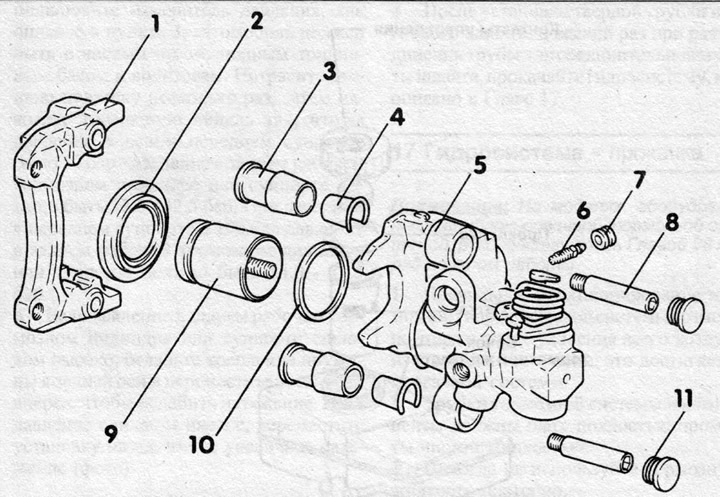
Fig. 9.27 View of the Teves rear brake caliper assembly (Chapter 12)
1 - Suspension of the fastening element
2 - Dust cap
3 - Rubber bushing
4 - Polymer bushing
5 — Brake caliper
6 — Bleed nipple
7 — Lid
8 - Guide bolt
9 — Piston
10 — Piston seal
11 — Bolt cover
(Text provided by the online resource: AudiManual.ru)