
1. Remove the brake shoes as described in Chapter 7.
2. Remove the filler cap of the brake fluid reservoir, cover the filler neck with a piece of polyethylene to prevent fluid loss during the following procedure. You can also install a clamp on the pipes between the rear axle and the underbody.
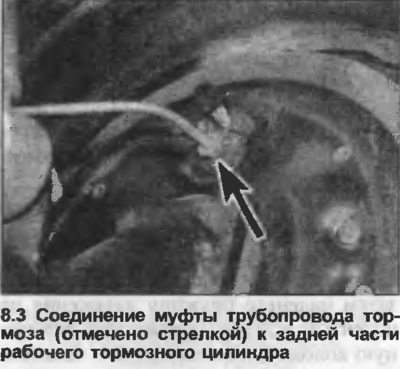
3. Loosen the brake line coupling on the rear of the wheel cylinder (photo).
4. Using a socket wrench, loosen the mounting bolts of the working brake cylinder.
5. Unscrew the brake line coupling, remove the working brake cylinder from the shield. Plug the end of the hydraulic pipe if necessary.
6. Clean the outer surface of the working brake cylinder, make sure that no foreign objects get into the opening of the hydraulic pipe.
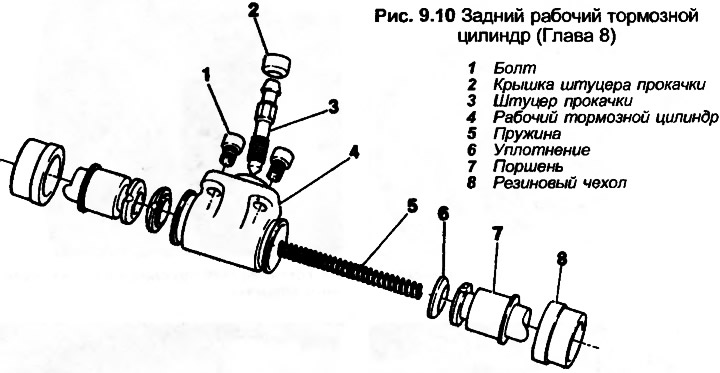
7. Remove the rubber boots from the ends of the cylinder, take out the two pistons and the spring between them.
8. Check the condition of the bore, pistons and seals. If the cylinder is in satisfactory condition, the repair kit can be used, otherwise the cylinder should be discarded and a new assembly installed. When servicing the cylinder, use all the parts included in the repair kit. Clean all metal parts in methylated spirits if necessary, but never use gasoline or similar solvents, then allow to air dry, or dry them with a lint-free cloth.
9. Apply paste to the seals, install them so that the larger diameter faces the end of the piston.
10. Apply the paste to the pistons and into the cylinder bore. Install the piston at one end of the cylinder, then the spring and another piston at the other end. Try not to turn the pistons in the cylinder, this can twist the seals.
11. Place the rubber boots on the pistons and in the grooves of the working brake cylinder.
12. Installation is carried out in the reverse order. Bleed the hydraulic system as described in Chapter 17.