
2. There are many individual do-it-yourself priming kits available. It is recommended that you use one of these kits whenever possible, as they make the priming process much easier.
3. If you do not have one of these kits, you will need to prepare a clean reservoir and a suitable length of clear plastic tubing that can be tightly fitted onto the bleed nipple, and you will also need the help of another person.
4. Before starting bleeding, check that all rigid tubes and flexible hoses are in good condition, all hydraulic connections are tightened. Be very careful not to spill hydraulic fluid on the car paintwork, otherwise serious damage will occur. Wash off any spilled fluid immediately with cold water.
5. If hydraulic fluid is lost from the master cylinder due to a leak in the system, identify and correct the cause before proceeding.
6. To bleed the system, clean the area around the bleeder nipple. If the hydraulic system has been disconnected partially at one of the circuits, and the necessary precautions have been taken to prevent further fluid loss, only that portion of the system will need to be bled. However, if the entire system is to be bled, the following sequence must be followed:
- (1) Brake master cylinder on ABS models only
- (2) Right rear wheel cylinder or caliper
- (3) Left rear wheel cylinder or caliper
- (4) Right front caliper
- (5) Left front caliper
7. When bleeding the rear wheel cylinders or calipers on models with a brake pressure regulator, have an assistant push the regulator lever all the way back.
8. Remove the filler cap of the additional brake system reservoir and top up the fluid level (photo). Periodically check the fluid level during bleeding and top up as needed.

9. With all bleeder screws closed, quickly pump the brake pedal several times to build up initial pressure in the system.
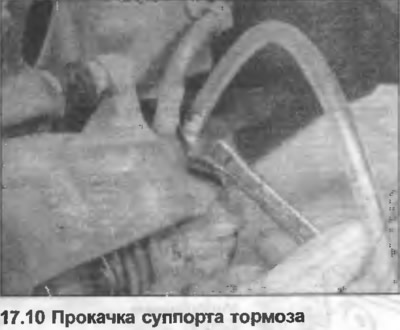
10. If using a custom bleeder kit, connect the bleeder tube to the bleeder screw, then open the screw half a turn (photo). If possible, position the unit so it is visible from the vehicle, then press the brake pedal to the floor and slowly release it. The one-way valve in the kit will prevent the bleeder air from returning to the system at the end of each stroke. Repeat this action until the tube runs free of air bubbles. Now tighten the bleeder screw and remove the bleeder tube.
11. If you do not have a bleeder kit, connect one end of a plastic tube to the bleeder screw and lower the other end into a reservoir containing enough clean brake fluid to keep the end of the tube submerged. Open the bleeder screw half a turn and have an assistant depress the brake pedal to the floor and then slowly release it. Squeeze the bleeder screw at the end of each downward stroke to prevent the air that has been removed from the system from flowing back into the system. Repeat this action until the fluid flows through the tube without any air bubbles. Now squeeze the bleeder screw and remove the bleeder pipe.
12. If the entire system is bled, the above procedures must now be repeated for each wheel. Do not forget to recheck the fluid level in the reservoir and top up as necessary.
13. Finally, recheck the fluid level, top up if necessary, and install the cap. Check the "feel" of the brake pedal; it should be stable, not sag or spring, which indicates the presence of air in the system.
14. Discard the removed liquid as it is likely to be contaminated with moisture, air and dirt and is not suitable for further use.
[The article is a reprint of material from: AudiManual.ru]