
Table of contents: Teves support ↓ Girling support ↓ Teves and Girling calipers ↓ Teves support ↓ Girling support ↓ Teves and Girlittg calipers ↓
1. Block the front wheels, then jack up the rear of the car and support it on axle stands.
2. The thickness of the rear outer brake pads can be checked through the holes in the wheels. The inner pads can be checked through the holes at the rear of the brake calipers using a mirror and a flashlight.
3. If any pad is worn to the specified minimum thickness, replace all rear brake pads together.
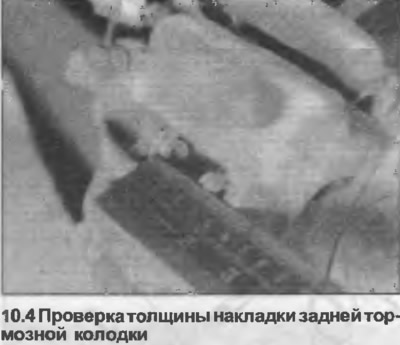
4. If the thickness of the pads cannot be determined, remove both rear wheels for a more complete examination (photo).
5. Before removing the pad, first remove the wheels. If the pads are to be reused, mark them so that they can be installed in their original position.
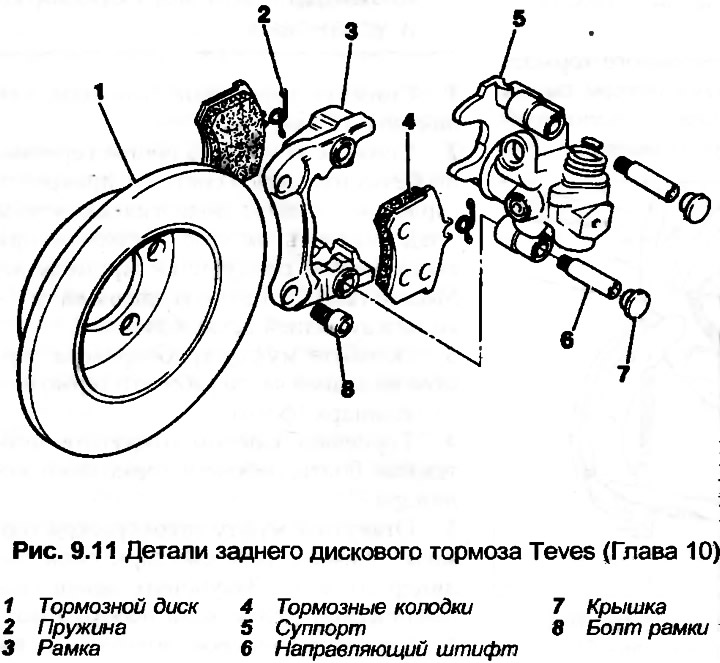
Teves support
6. Remove the covers from the inner ends of the guide pins.
7. Using a socket wrench, loosen both guide pins, but do not remove them from the rubber bushings.
8. Move the caliper slightly outward so that you can recess the piston into the hole and provide some clearance for the pads.
9. Turn the caliper back and support it on one side, being careful not to deform the hydraulic hose.
10. Remove the brake pads from the caliper frame.
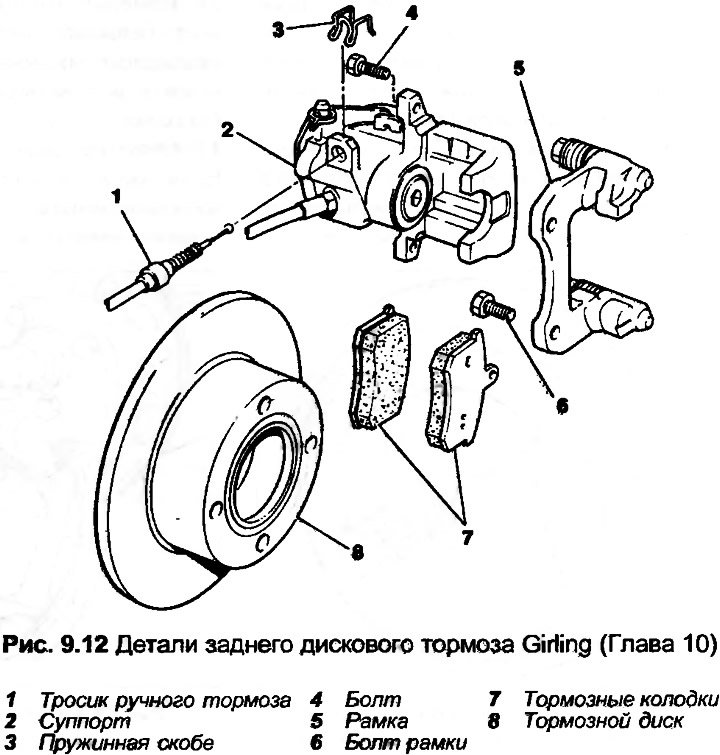
Girling support
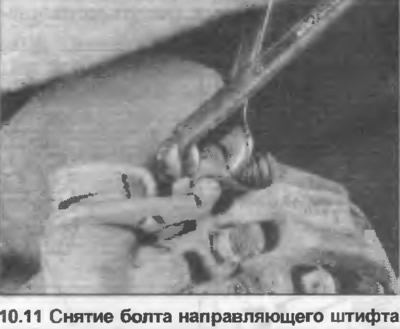
11. Loosen and remove both guide pin bolts (photo).
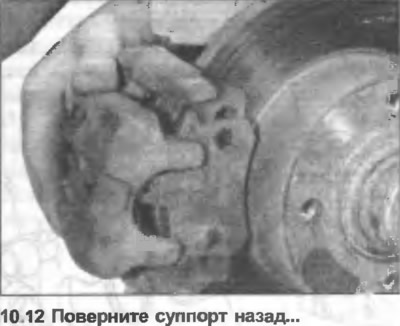
12. Turn the caliper back and support it on one side, being careful not to deform the hydraulic hose (photo).
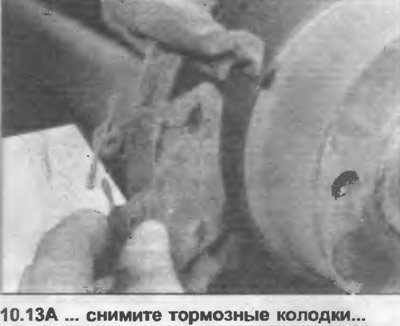
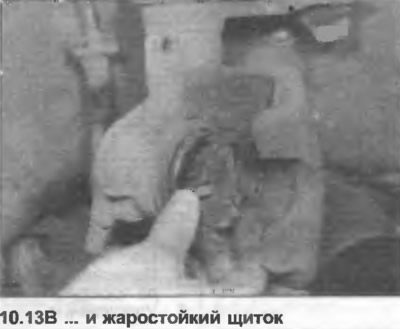
13. Remove the brake pads from the caliper frame. Also remove the heat shield (photo).
Teves and Girling calipers
14. Clean the caliper, piston, disc and pads from dust and dirt. Clean the pad and disc support plates from rust.
Teves support
15. Push the piston completely into the cylinder using the G-clamp and block.
16. Position the brake pads on the caliper frame.
17. Note that the new brake pads come with four self-locking bolts that are only used with Girling calipers.
18. Position the caliper on the pads, then insert and tighten the two guide pins.
19. Install the covers on the guide pins.
Girling support
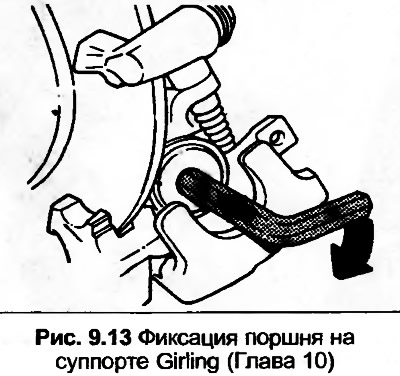
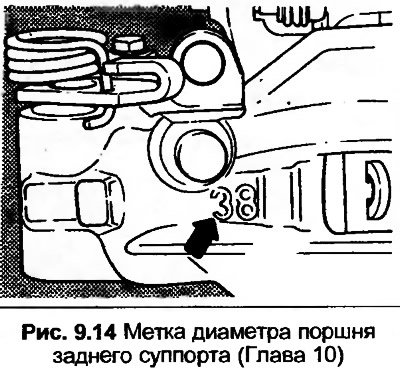
20. Screw the piston into the cylinder to accommodate the new brake pads. The calipers have a 38mm piston (with chassis 89JA225957), marked with the number 38 instead of 36, Audi recommends using tool #3131. Snap ring pliers can be used instead (photo). Install the heat shield.

21. Position the brake pads on the caliper frame.
22. Place the caliper on the pads.
23. Insert new guide pin bolts (are included in the new set of pads) and tighten them with the specified tightening force Specification.
Teves and Girlittg calipers
24. Release the parking brake completely.
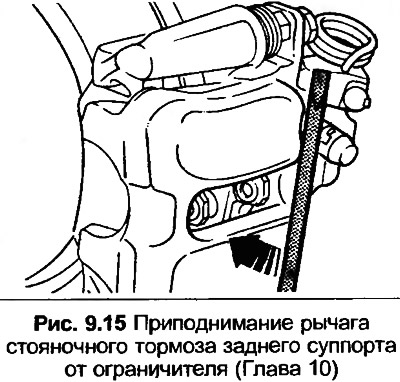
25. On one of the rear calipers, use a screwdriver to lift the parking brake lever off the limiter (photo). Now repeat the procedure on the opposite caliper and check if the first lever remains on the limiter. If not, the handbrake cable is adjusted too much, loosen the adjustment nut on the equalizer as necessary.

26. Insert the screwdriver (diameter not less than 6 mm) between the rear spring hook and the rear roller of the brake pressure regulator (Fig. 9.16).
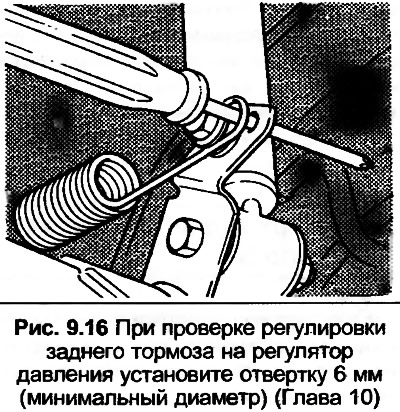
27. With the engine off, pump the brake pedal forty times on calipers with 36 mm pistons, or once on calipers with 38 mm pistons.
28. Check that both rear wheels rotate freely, then remove the screwdriver from the brake pressure regulator spring.
29. Lower the car to the ground.