
1. Clean the outer surface of the caliper, make sure that no foreign objects enter the hydraulic hose hole.
2. Clamp the caliper in a vice.
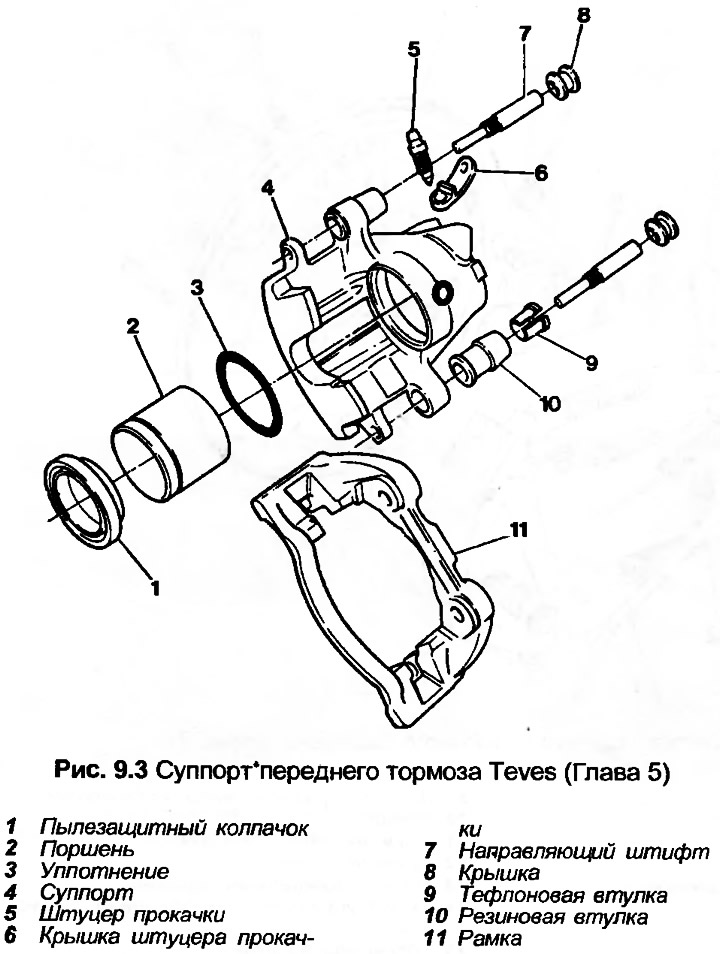
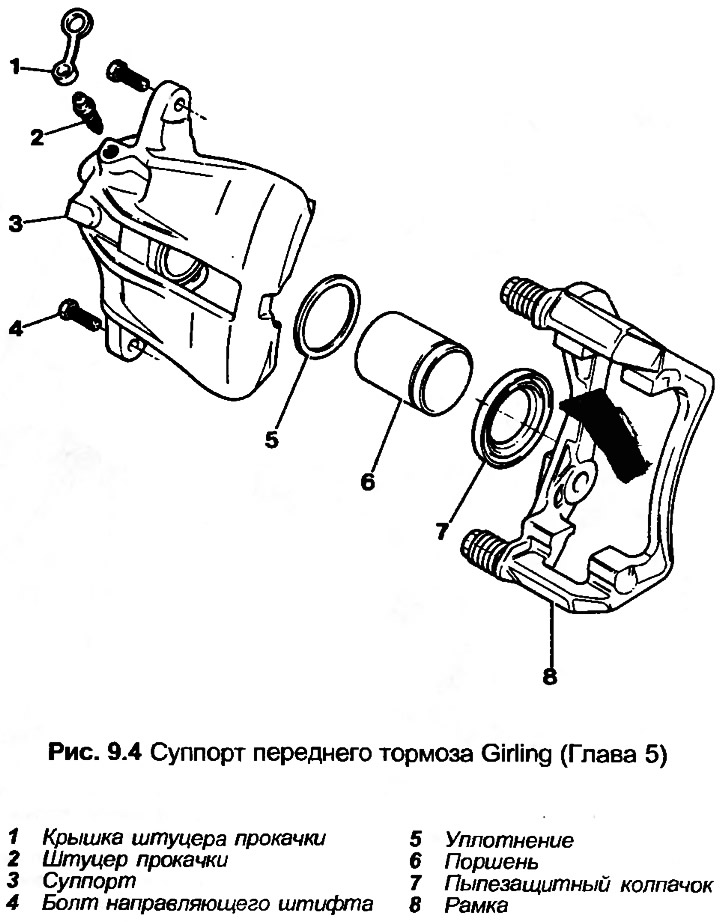
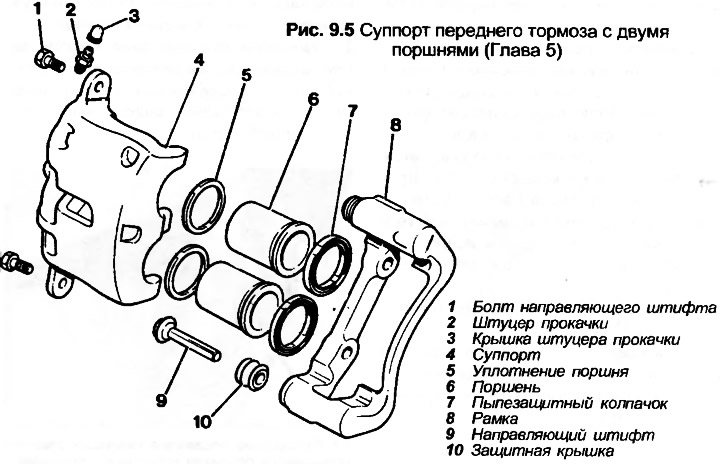
3. Remove the dust cap from the groove in the caliper.
4. Place the die in the caliper jaws, opposite the piston(s).
5. Using compressed air through the brake fluid inlet, blow the piston out of the bore(s). If there are two pistons, remove the first piston by blocking one with a die. Use a rubber block, die, and G-clamp to seal the open cylinder so that the remaining piston can be removed.
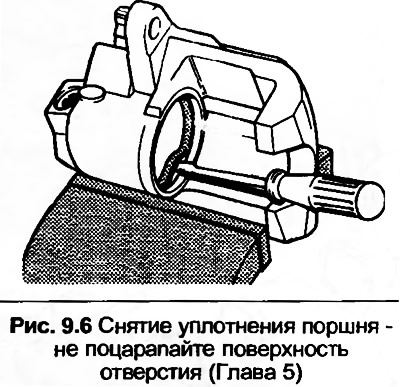
6. Remove the piston seal from the bore(s), being careful not to scratch the bore surface. Remove the dust cap from the pistons.
7. Unscrew the bleed screw.
8. Clean all parts with methyl alcohol and dry them.
9. Inspect the piston surface and bores for signs of corrosion and wear. If necessary, the caliper should be replaced as an assembly, but if the surfaces being inspected are in good condition, prepare a repair kit containing new seals. Also prepare brake cylinder paste.
10. Apply the paste to the surface of the bore(s) and piston(s).
11. Position the piston seal in the bore groove.
12. To install the piston, place the dust cap on the end of the piston, then place the piston against the caliper and use a screwdriver to lift the dust cap into the groove in the caliper. Now press the piston into the hole until the dust cap snaps into the groove on the outer end of the piston.
13. Install a new rubber cap on the bleeder screw. Apply paste to the threads, then screw the bleeder screw into the caliper.
14. On Girling calipers, apply grease to the guide pins before installation.
15. On the Teves caliper, check the guide pin bushings (teflon), if necessary, replace them. Also check the rubber bushings.