
Table of contents: Removal ↓ Installation ↓
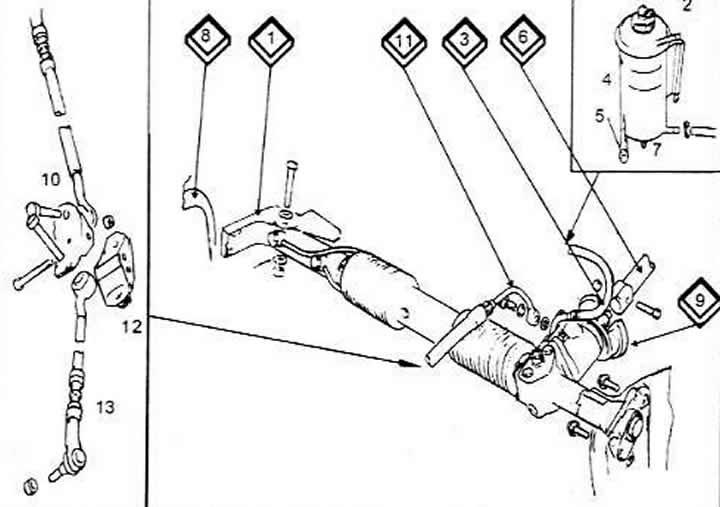
Steering rack elements
1 Steering gear assembly
2 Return line from the brake booster unit
3 Return line
4 Liquid tank
5 To the return line from the pump
6 Flange tube. Adjust the steering wheel switch clearance (3mm) here
7 From the pressure accumulator
8 Housing (arch) of the right wheel
9 Cap (installed from the inside)
10 Mounting plate (always replaced)
11 Discharge line to the valve body
12 Tie rod bracket
13 Left steering rod
14 Left wheel housing (arch)
Removal
Raise and securely support the vehicle.
Pull back the retaining plate and remove the two bolts securing the steering rods to the steering rack inside the engine compartment. Pull the steering rods away from the mounting hinge.
Remove the lower instrument panel trim.
Remove the pressure and return lines from the steering rack control valve housing
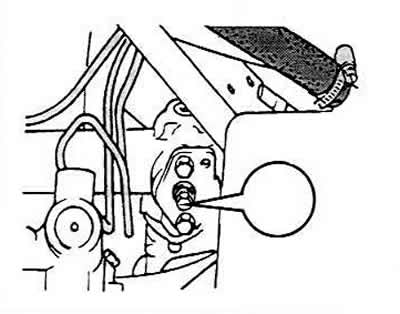
Remove the shaft clamp bolt, pull the clamp back and move the shaft towards the inside of the vehicle using a brass rod.
Remove the steering gear mounting bolts at both ends. There is one bolt at the right end.
For convenience, turn the wheel to the right and remove the steering mechanism through the hole in the right wheel casing.
Installation
Temporarily install the steering rod mounting joint to the rack. Remove one bolt, install the steering rod and put the bolt back. Do the same on the other steering rod. Make sure the mounting plate is installed.
Tighten the bolts to the following torque:
- Steering rods: 60 Nm.
- Hinge bolts: 41 Nm.
- Steering gear mounting bolts to the body: 20 Nm.
Steering rack adjusting bolt
Install the lines with new sealing rings and tighten to 41 Nm.
Remove air from the hydraulic system.