
Table of contents: Removal ↓ Installation ↓
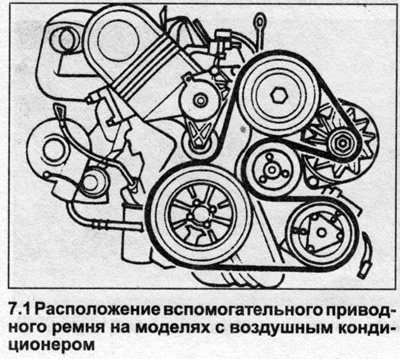
1. The auxiliary belt drives the alternator and the power steering pump. On models with air conditioning, it also drives the compressor. The belt has a spring-loaded tensioner that maintains the required tension at all times (see illustration).
Removal
2. Apply the handbrake, then jack up the front of the car and support it on axle stands. Remove the lower engine compartment shield and release the front locking lug.
3. Remove the front bumper as described in Section 11.
4. Remove both front headlights (see Section 12).
5. Disconnect the cable from the hood lock, then unscrew the crossbar bolts from the side panels of the engine compartment and the front brackets and remove it.
6. If the toothed drive belt is not replaceable, mark it to indicate the direction of rotation. When installing the belt, orient it so that it rotates in the same direction.
7. Unscrew and remove the fan with the heat-viscous coupling. To do this, place a thin wrench behind the fan and unscrew the fastening nut. Also remove the fan casing.
8. Keep the tensioner locking pin handy (it must be inserted into the hole in the mechanism after removing the drive belt).
9. With the wrench positioned on the existing washers, turn the tensioner clockwise, then insert the pin into the hole.
10. Note the correct location of the drive belt, then pull it off the pulleys and roller and remove it from the engine.
Installation
11. Install the drive belt over the pulleys and roller, making sure it fits into the guide grooves.
12. Using a wrench, turn the tensioner clockwise to remove the locking pin, then slowly release the tensioner, making sure that the belt ribs are in the grooves of the pulleys.
13. Install the fan and tighten the mounting nut.
14. Install the crossbar and connect the cable.
15. Install the headlights as described in Section 12.
16. Install the front bumper (see Section 11).
17. Install the lower shield, then lower the vehicle to the ground.