
2. Make marks on the clutch pressure plate cover frame and on the flywheel so that the clutch can be reinstalled in exactly the same position.
3. Loosen the clutch housing mounting bolts, diagonally in pairs. When all the bolts are loosened enough to release the diaphragm spring tension, remove the bolts and lift the clutch housing and disc.
4. Clean the parts with a damp cloth.
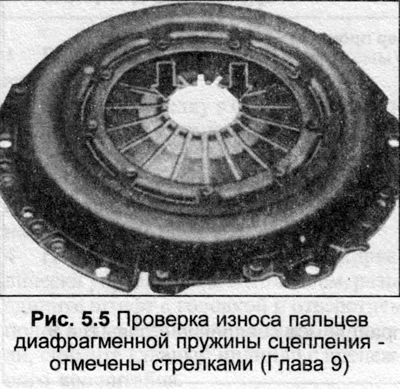
5. Inspect the diaphragm spring plates. If the wear depth exceeds 0.3 mm, replace the cover assembly.
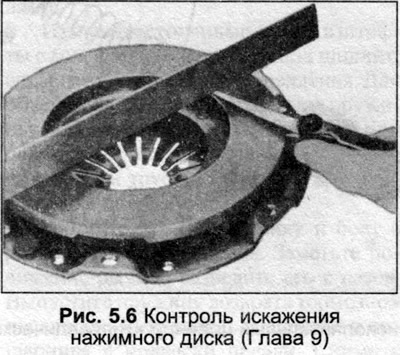
6. Place the clutch housing on the diaphragm spring, check the plate for distortion (Fig. 5.6). If a 0.3 mm thick feeler gauge can be inserted into any gap under the rib, the clutch housing must be replaced.
7. Check the condition of the pressure plate.
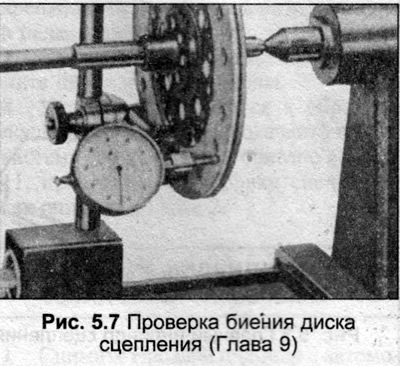
8. Inspect the clutch disc and install a new disc if the friction material surface is level with the rivets. Replace the disc if the friction material is soaked with oil or has frayed edges.
9. Check the clutch disc hub. Check that the hub on the gearbox input shaft slides smoothly, there should be no radial play between the gearbox shaft and the clutch hub.
10. Check the condition of the flywheel working surface; regrind or replace as necessary.
11. Clean all parts from oil and grease before assembly.
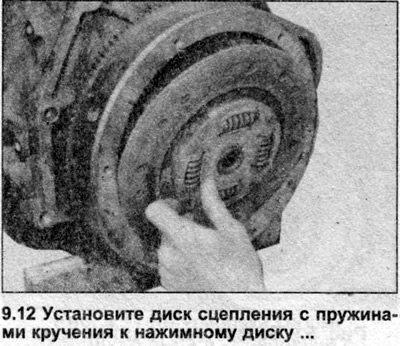
12. Install the clutch disc so that the torsion spring housings face the pressure plate (photo).
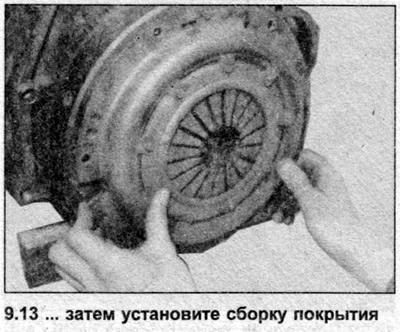
13. Place the clutch housing on the flywheel, aligning it with the marks made before dismantling (photo). Insert the bolts, tighten them with your fingers.
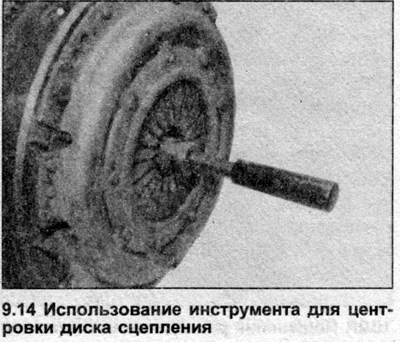
14. Center the clutch disc (photo).
15. Tighten the clutch housing bolts evenly in a diagonal sequence to the tightening torque specified in Specifications.
16. Lubricate the hub grooves with molybdenum grease.
17. Check the release bearing in front of the gearbox, replace if necessary.
18. Install the engine or gearbox.
(The original article is located on the online resource: «AUDImanual.ru»)