
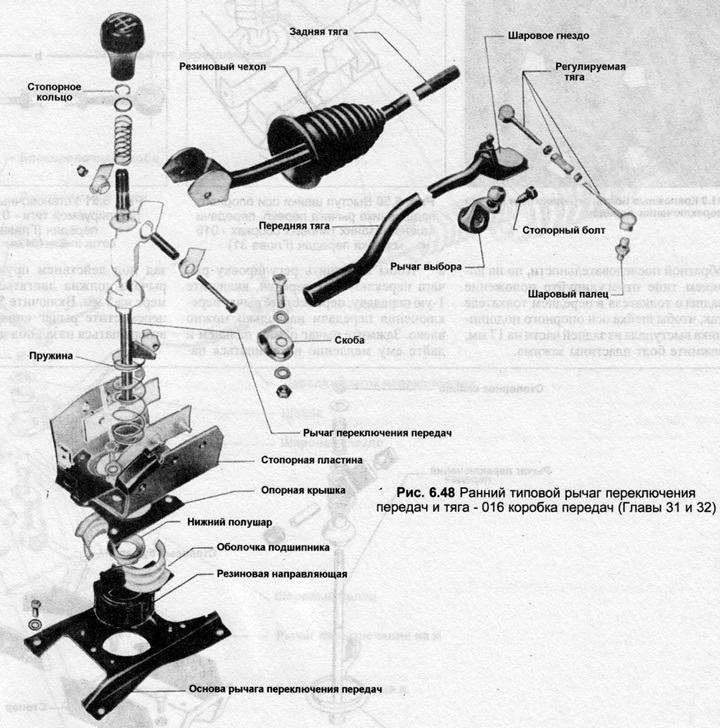
2. To remove the early standard lever, start from the center console.
3. Remove the nut and bolt securing the shift rod to the shift lever and the four bolts securing the shifter base to the floor. Separate the shift rod, remove the lever assembly.
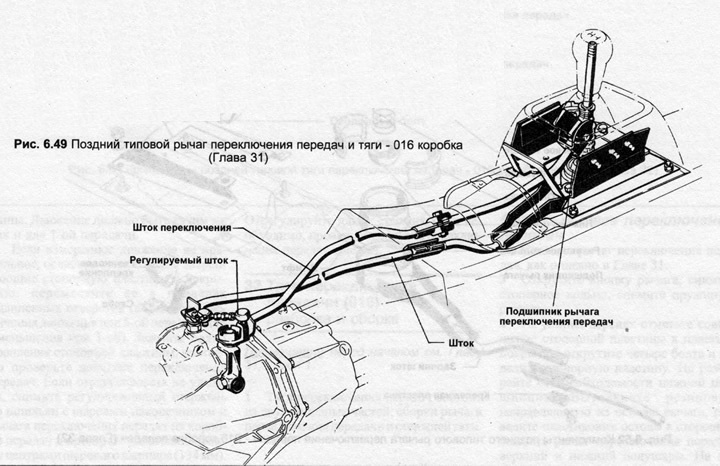
4. To remove the late typical lever, also start from the central console.
5. Remove the nut and bolt that secures the shift rod to the lever and the bolt and clamp plate that secures the front and rear tappets together.
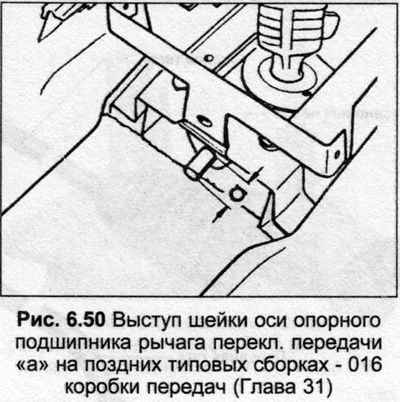
6. Turn off four nuts, lift a lock plate. Unhook the rear neck of the pusher support bearing axle from the rubber cushion, remove the lever assembly.
7. In both cases, assemble in the reverse order, but on the late type, adjust the position of the rear pusher in the front pusher so that the journal of the support bearing axle protrudes from the rear by 17 mm, tighten the clamp plate bolt.
8. To check the adjustment of the gear lever, engage 1st gear, move the gear lever as far to the left as possible. Pinch the lever with one finger and let it slowly return back under the action of the spring. The lever button must move at least 5 mm. Engage 5th gear, move the lever to the right, let it return back under the action of the spring. The movement should be the same as for 1st gear.
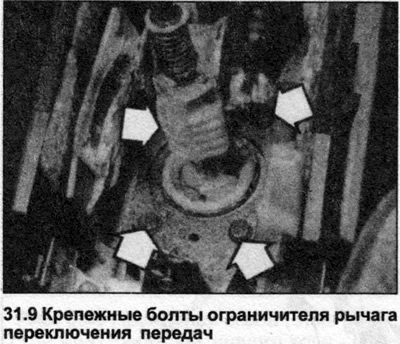
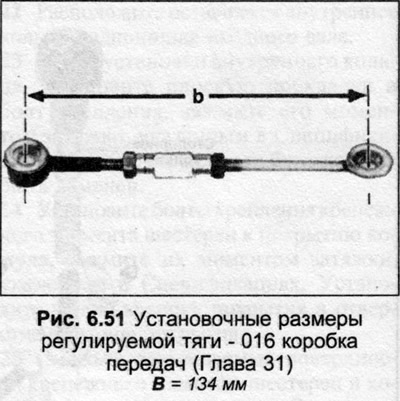
9. If the measured movement is not correct, loosen the four bolts securing the stop plate to the cover, move it within the elongated holes (to the right to increase movement in 5th gear or decrease in 1st). Tighten the lock plate mounting bolts, re-check the shift action. If adjustment fails, remove the adjusting rod from the ball stud and shift lever on the transmission and check the distance between the centers of the ball joint (134 mm). Adjust rod length if necessary, check shift action again.
Visitor comments