



Fastening the inner door panel
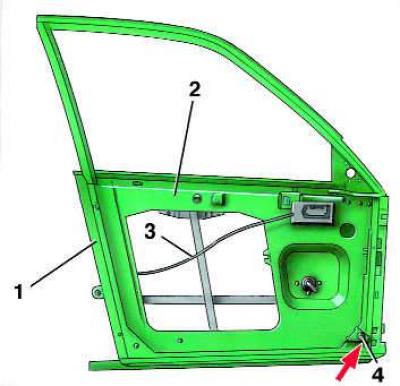
- 1 - door frame;
- 2 - inner panel;
- 3 - lock handle cable;
- 4 - bolt
Window regulator parts
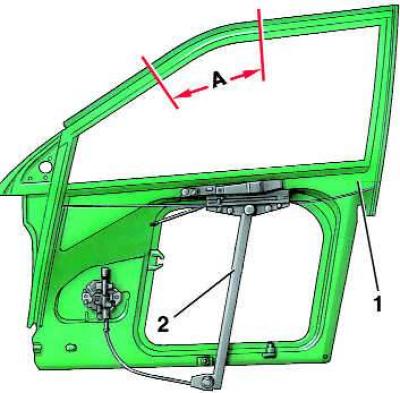
- 1 - glass;
- 2 - window lifter;
- A - glass contact area
Glass adjustment
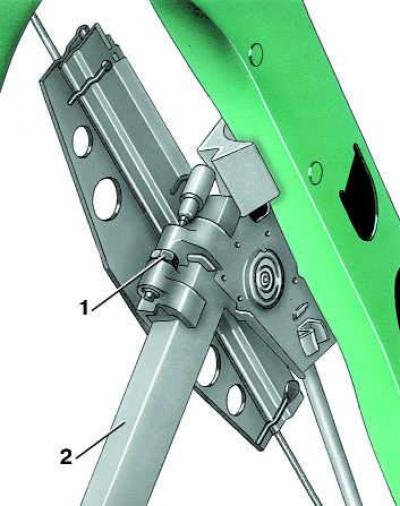
- 1 - adjusting screw;
- 2 - window lift guide
Execution order
1. Remove the door trim (see subsection 11.9).
2. Remove the inner door lock handle rod from the holder and disconnect it from the handle.
3. Loosen the four inner door panel mounting bolts located at the corners. Note the thickness and position of the expansion joints for each bolt. The front upper mounting bolt is located under the rubber seal of the outside rearview mirror.
4. Remove the inner door panel assembly upward.
5. To do this, remove the spacer ring from the guide rod, take out the plastic washer and rubber gasket. Lower and remove the door glass.
6. If necessary, remove the window regulator. Remove it in the same way as removing the electric window regulator (see subsection 11.15).
7. Insert the glass from below and secure the glass clip to the window regulator slider pin with a retaining ring, having first installed a rubber gasket and washer.
8. Temporarily install the window lift handle and lower the glass down until it stops.
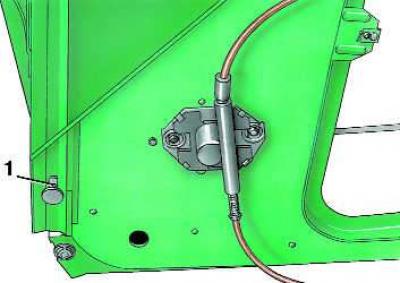
9. Position the lower part of the window regulator guide so that the glass pin (1) is in the middle of the glass guide.
10. Raise the glass up to the stop.
11. Adjust the lower part of the window regulator guide so that the glass fits against the seal along the entire perimeter of the window and especially in zone A.
12. If the glass does not fit tightly or deforms the seal, then it is necessary to adjust the position of the glass with a screw.
13. Install the inner panel on the door from above, making sure that the locking rod enters the hole, and secure it at the corners with four bolts, installing the appropriate compensation elements.
14. Connect the cable of the inner lock handle to the lever and secure it in the holder.
15. Install the interior door trim.