
External door lock handle
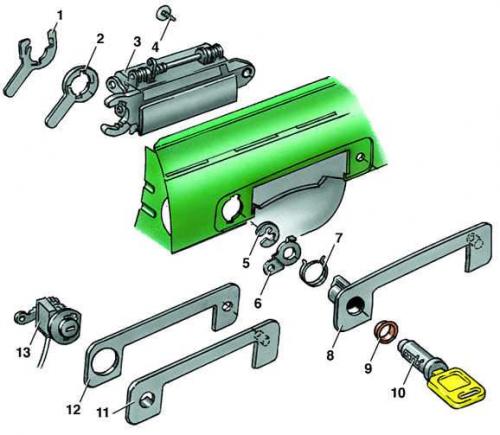
- 1,2 - rotary brackets;
- 3 - handle;
- 4 - screw;
- 5 - retaining ring;
- 6 - drive lever;
- 7 - spring;
- 8 - casing;
- 9 - sealing ring;
- 10 - lock cylinder;
- 11 - casing;
- 12 - gasket;
- 13 - lock cylinder
Installing the swivel bracket
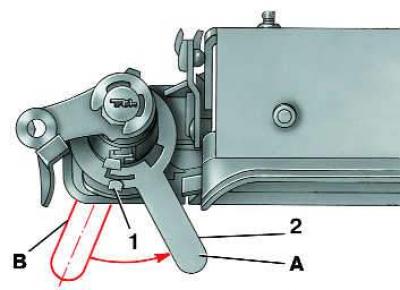
- 1 - recess in the lock handle;
- 2 - bracket;
- A, B - bracket positions during installation
Removal
Models produced before December 1987.
1. Use a screwdriver to pry up the front part of the decorative handle cover and remove it.
2. Remove the handle mounting screw located under the cover.
3. Open the door and remove the rubber plug located in the area of the lock.
4. Remove the two screws securing the handle.
5. Carefully pull the handle out of the door, removing the hook at the front from the door opening.
6. Disconnect the rods from the handle by lifting the holder with a screwdriver and remove the outer door handle.
Models produced since December 1987.
7. Disconnect the locking rod and actuator rod from the handle.
8. Remove the staples by turning them 65°.
9. Remove the screw and remove the handle.
Disassembly (removing the lock switch cylinder)
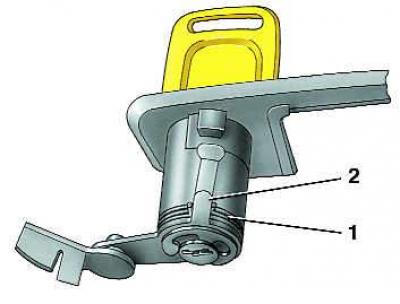
1. Insert the key into the lock switch.
2. Unscrew the fastening screw and remove the eccentric of the lock switch cylinder with the spring.
3. Remove the key switch cylinder with the key.
4. Wrap the cylinder with insulating tape and only then remove the key from it. Otherwise, the tumblers will fall out of the cylinder.
Assembly
1. Insert the lock switch cylinder into the handle.
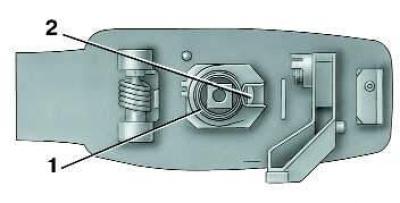
2. Install the spring (1). To do this, compress it and place one end on the protrusion (2).
3. Install the eccentric on the square until it stops. Make sure that the protrusion is between the ends of the spring.
4. Screw in the fastening screw.
Installation
Models produced before December 1987.
1. Insert the hook on the front of the handle into the door hole and connect it to the handle with a screwdriver. In this case, put the tip of the straight rod on the metal ball pin, and the tip of the curved rod on the plastic ball pin. Fix the rods with holders.
2. Finally insert the outer handle into the door with the gasket.
3. Screw in the handle mounting screws.
4. Install the rubber plug.
5. Install the decorative trim.
6. Check the operation of the handle. The lock should open easily and lock securely.
Models produced since December 1987.
7. Install the handle in the reverse order of removal.
8. In this case, set the bracket to position B, and then turn it to position A.
9. The recess in the handle must engage with the bracket. The ends of the spring (1) in the compressed state must be located to the left and right of the drive lever (2).