
Table of contents: Removal ↓ Installation ↓
Removal the door lock
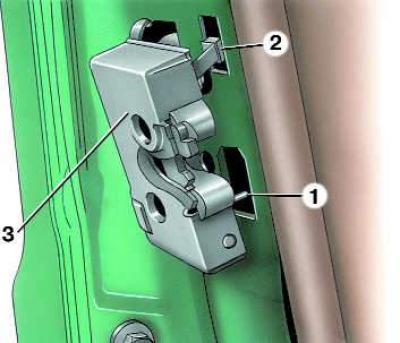
- 1 - traction;
- 2 - bushing;
- 3 - lock
Locking the drive lever of the lock
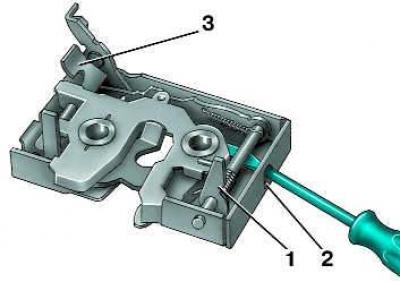
- 1 - drive lever;
- 2 - mounting hole;
- 3 - lock lever
Door locking mechanism
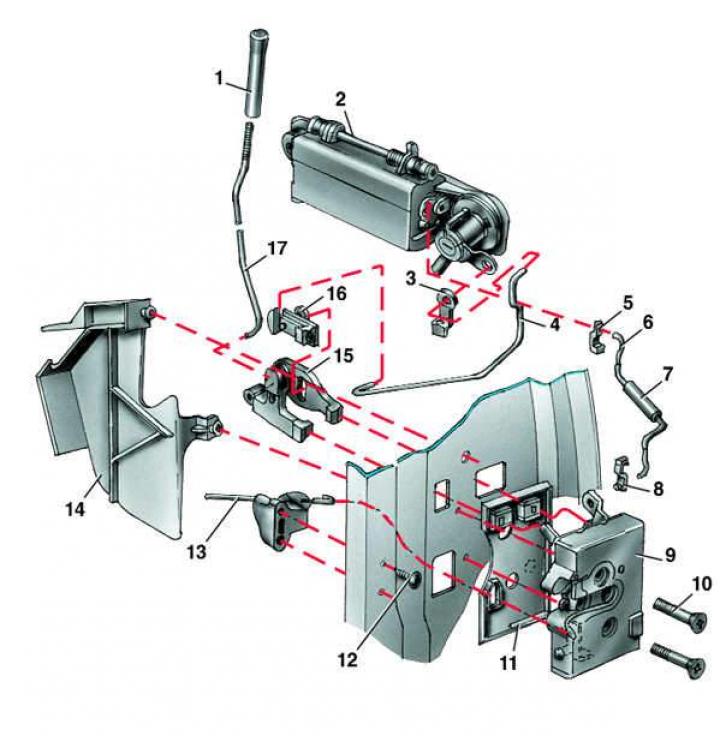
- 1 - lock button;
- 2 - handle;
- 3, 5, 8 - articulated joints;
- 4 - locking rod;
- 6 - lock rod;
- 7 - adjusting nut;
- 9 - door lock;
- 10 - bolt;
- 11 - seal;
- 12 - Phillips head screw;
- 13 - cable;
- 14 - lock cover;
- 15 - blocker;
- 16 - stopper;
- 17 - traction
Removal
Models produced before January 1988.
1. Unscrew the door lock button.
2. Loosen the two Allen bolts securing the lock.
3. Pull the lock slightly towards you and disconnect the rod from the lock drive lever.
4. Remove the lock.
Models produced since January 1988.
5. Disconnect the rods from the lock levers by pressing the spring holders with a screwdriver.
6. Disconnect the cable from the lock lever.
7. Unscrew the two bolts and remove the lock from the blocker.
Installation
Models produced before January 1988.
1. Install the lock drive lever vertically (at an angle of 90° to the lock body) and lock it with a screwdriver through the mounting hole.
2. Connect the rod to the lock drive lever.
2. Insert the locking lever into the locking rod bushing.
3. Unlock the drive lever by removing the screwdriver.
4. Tighten the two bolts securing the lock.
Models produced since January 1988.
5. Install the door lock in the reverse order of removal. If necessary, adjust the length of the rod using the adjusting nut.