



Table of contents: Removal ↓ Installation ↓
Removal
Remove the door trim.
Remove the bracket from the door.
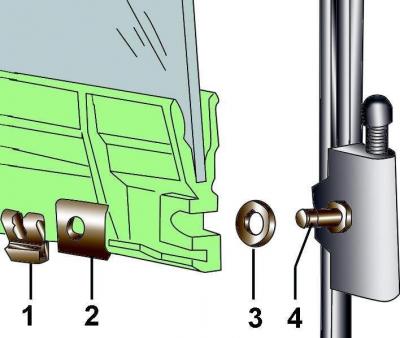
Fig. 16–27. Elements of the lower fastening of the front door glass: 1 – spring clip; 2 – washer; 3 – damper; 4 – guide pin
Using a small screwdriver, remove spring clip 1 (see Fig. 16–27) from the groove of guide pin 4 and remove washer 2.
Move the glass slightly away from the guide pin and lower the pin along the guides.
Remove damper 3 from the guide pin.
Disconnect the electrical connector from the window lift motor.
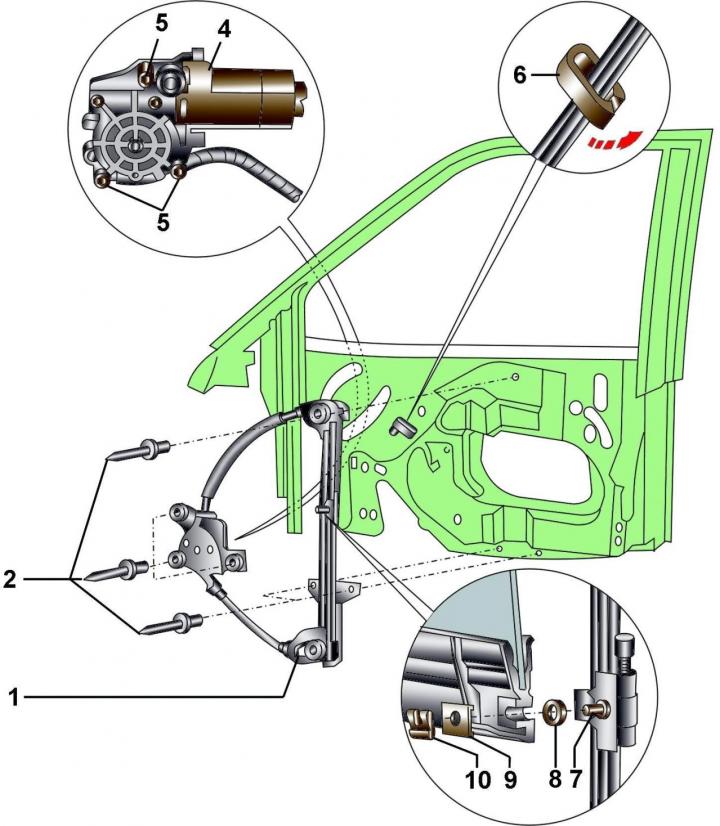
Fig. 16–30. Front door window regulator: 1 – front door window lifter; 2 – rivets; 3 – door bracket; 4 – window lift motor; 5 – bolt, 10 Nm; 6 – clamp; 7 – guide pin; 8 – damper; 9 – washer; 10 – spring clamp
Drill out rivets 2 (Fig. 16–30) securing the window regulator and remove the window regulator.
Installation
Installation is carried out in the reverse order of removal, taking into account the following.
Use only original rivets to secure the window lifter. Start installing the rivets from the front upper rivet securing the window lifter mechanism.
Connect the ground wire to the battery.
Raise the power windows all the way up. Then press all power window switches again for at least 1 second to the closed position to activate the power window control unit.