
Table of contents: Removal ↓ Installation ↓
Lower rear front fender mount
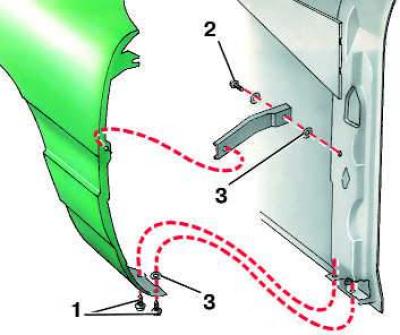
- 1, 2 - screw;
- 3 - washer
Front fender upper mount
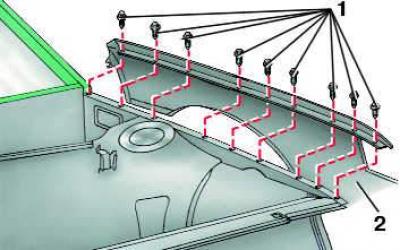
- 1 - bolt;
- 2 - front wing
Removal
1. Remove the front bumper (see subsection 11.1) and lokar (see subsection 11.5).
2. Remove the front wing trim.
3. Remove the direction indicator (see subsection 12.1.5.6).

4. Disconnect the side mount of the lower spoiler to gain access to the screws (1, 2).
5. Remove the wing mounting screws.

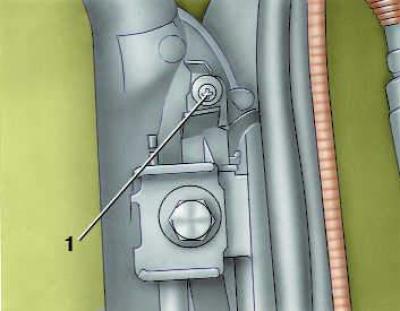
6. Remove the screw (1) securing the wing.
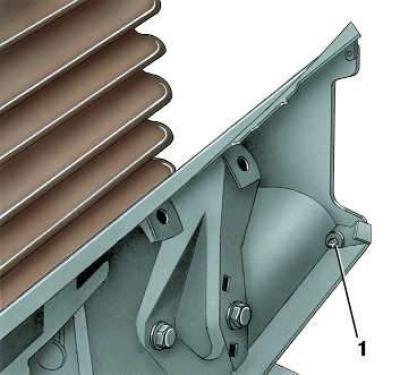
7. Open the door and unscrew the screw (1) securing the wing, located above the door hinge.
8. Remove the two screws from the bottom of the wing.
9. Unscrew the screw securing the bracket to the front pillar through the wheel well.
10. Open the hood and unscrew the upper wing mounting bolts.
11. Remove the wing from the car.
Installation
1. Clean the surfaces on the wing and body where they join.
2. Apply a layer of sealant to the joints between the wing and the body.
3. Install the wing and tighten the bolts on its upper mount.
4. Screw in the remaining wing mounting screws, making sure that the washers are installed correctly.
5. Screw in the screw (1).

6. Screw in the screw (1) with the door open.
7. Install the lower spoiler in place.
8. Install the direction indicator.
9. Install the locker and front buffer.
10. Install the wheel and tighten the mounting bolts.
11. Lower the vehicle to the ground and finally tighten the wheel mounting bolts evenly across the diameter to a torque of 110 N·m (11.0 kgf·m).