Table of contents: Removal ↓ Installation ↓
Removal
Remove the front bumper. Unscrew the screws and remove the front wheel well trim.
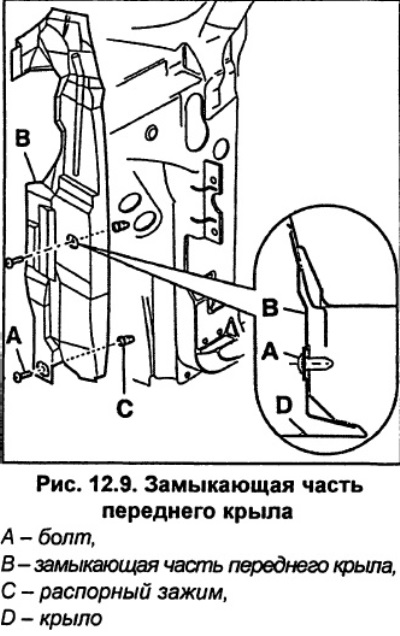
Remove the wing end piece (see fig. 12.9).
Remove the headlights.
Remove the side turn signal repeaters.
Unscrew the front wing mounting bolts 2, 3, 4, 5 and 6 (Fig. 12.8). To avoid damaging the paintwork, wrap the areas near the wing mounting screws with adhesive tape.
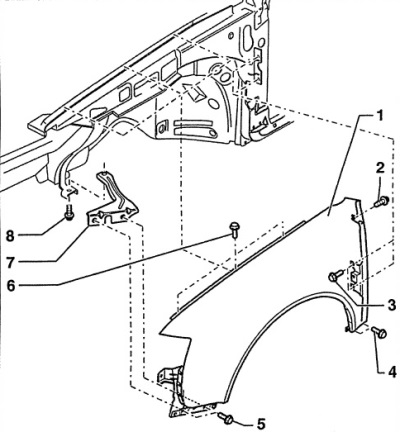
Fig. 12.8. Front wing
1 - wing,
2 - bolt, 10 Nm,
3 - bolt, 10 Nm,
4 - bolt, 10 Nm,
5 - bolt, 10 Nm,
6 - bolt, 15 Nm,
The bolts are in microcapsules, protected by a special agent. They must be replaced after each unscrewing.
7 - bracket,
8 - bolt, 10 Nm
Installation
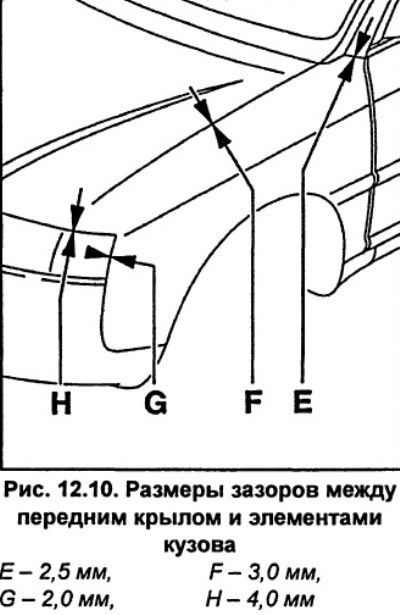
If necessary, paint the fender. Install the front fender on the car, align the bolt holes and tighten the bolts. When installing the fender, check that the gaps between the fender and the hood, as well as between the fender and the front door, are uniform along the entire length.
Further installation is carried out in the reverse order of removal.