
2. On models with automatic transmission, remove the automatic transmission (Section 7).
3. The flywheel/drive plate bolts are offset to ensure proper installation. Remove the bolts, locking the flywheel/drive plate. Temporarily insert the bolt into the cylinder block, and using a screwdriver, lock the flywheel/drive plate, or use the tool as shown in photo 25.79D.
4. Lift the flywheel/drive plate off the crankshaft. Note the location of the shims when removing the drive plate.
5. Check the condition of the flywheel/drive plate. Inspect the starter ring gear. If the drive plate or ring gear is damaged, the drive plate must be replaced. However, the flywheel ring gear can be replaced separately from the flywheel, but this work is best left to an Audi dealer. If the friction surface of the clutch is discolored from overheating or excessively worn, it can be reground, but this work is also best left to an Audi dealer.
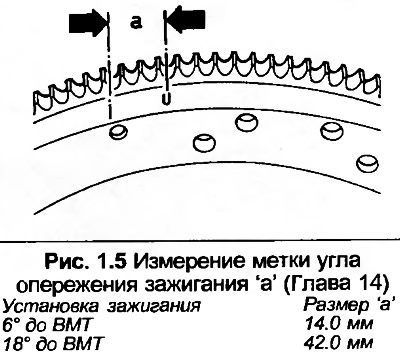
6. Note that if the flywheel/drive plate is replaced, the new part will only have a TDC mark. Therefore, it will be necessary to place the ignition timing mark according to the information given in Fig. 1.5.
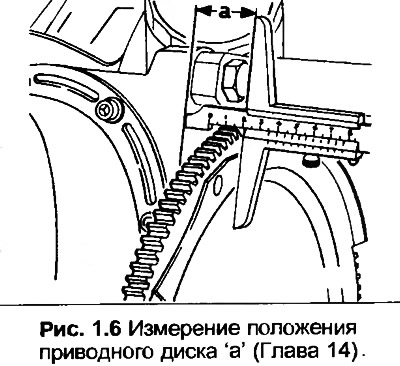
7. Reassemble in reverse order, but coat the threads of the (new) bolts with locking fluid before installing and tightening the bolts to the torque specified in the Specification. If a replacement drive plate is used, its position must be checked and adjusted if necessary. The distance from the rear face of the block to the mounting surface of the torque converter on the drive plate (Fig. 1.6) should be 30.5-32.1 mm. If necessary, remove the drive plate and fit a shim behind it to obtain the correct clearance.
(Read the original source on the website «AUDIMANUAL.ru»)