Audi 100
1. Remove the steering wheel.
2. Remove the combination switch and instrument panel as described in Section 10.
3. Remove the central console as described in Chapter 24 this Section.
4. Unscrew the four screws on the side of the heating device and the lower group.
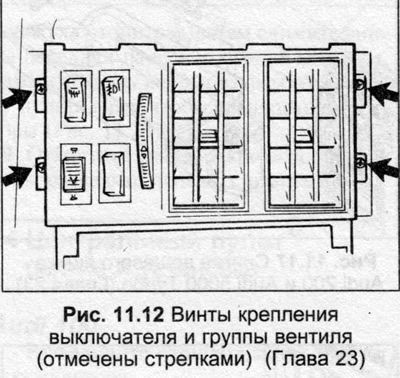
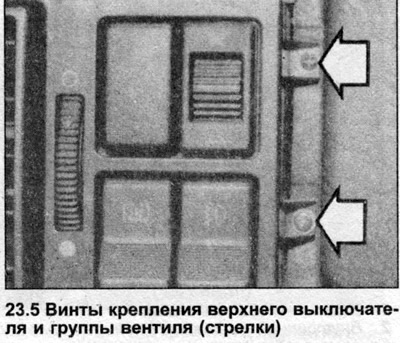
5. Unscrew the four screws on the side of the upper switch and the valve group (photo), remove the group, disconnect the wiring at the back. Remove the group.
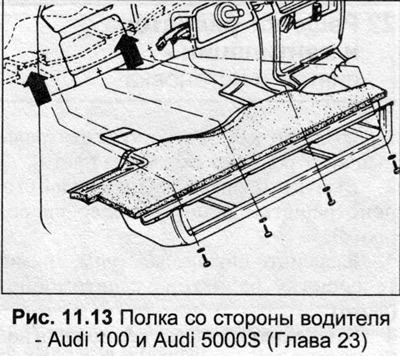
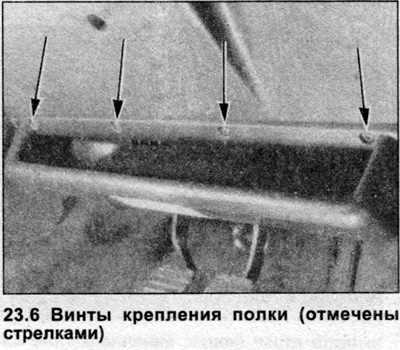
6. Unscrew the shelf on the driver's side, lower it and separate it from the guides. Remove the shelf (photo).
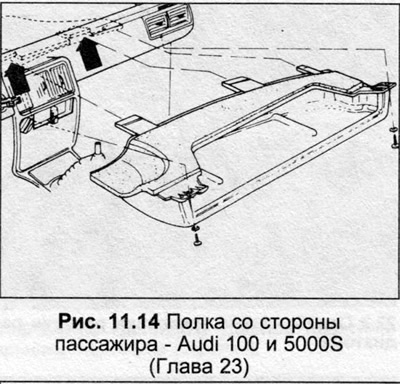
7. Unscrew the shelf on the passenger side, lower it and separate it from the guides. Remove the shelf.
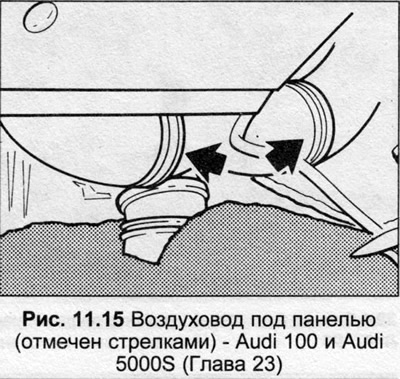
8. Disconnect the air ducts in the heater blower under the panel.
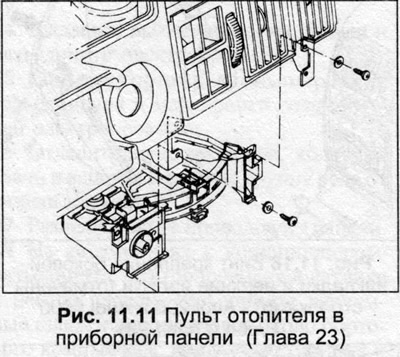
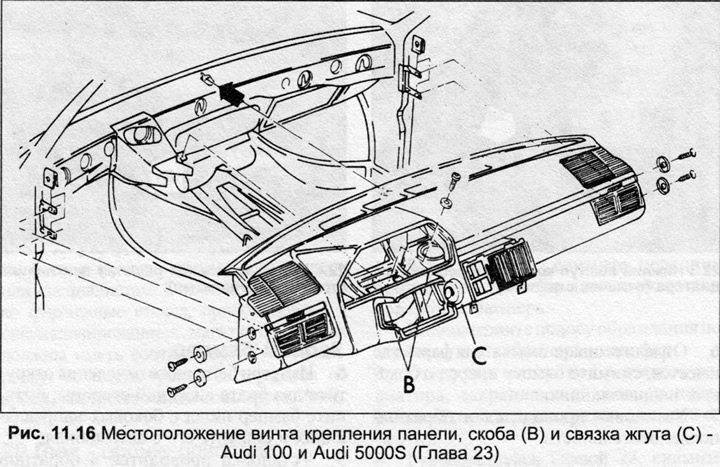
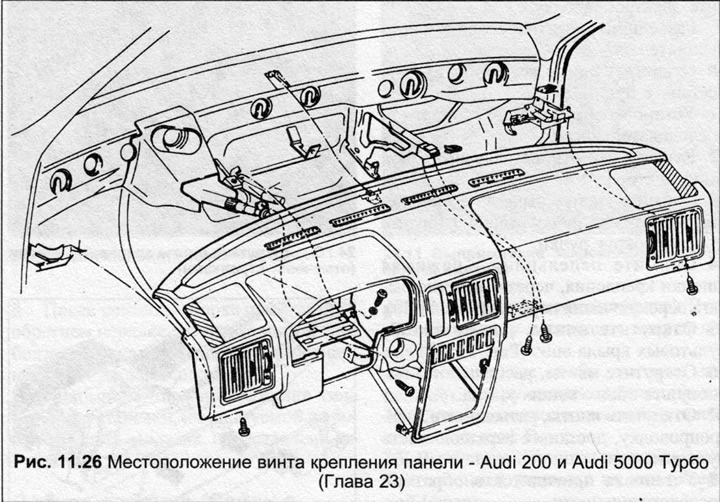
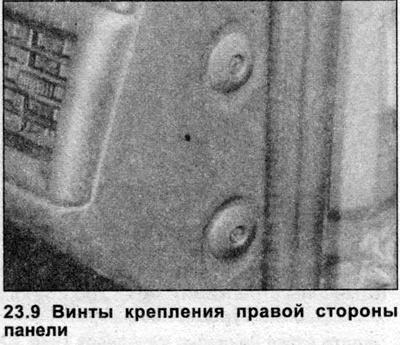
9. Remove the two screws on each side (photo) and one through the hole in the instrument panel. Separate the wiring harness, pull the panel out of place. Remove the panel from the car.
10. Installation is carried out in reverse order.
11. Remove the steering wheel.
12. Remove the combination switch and instrument panel as described in Section 10.
13. Remove the screw securing the left hinge of the glove box to the panel. Disengage the glove box from the right hinge and remove it from the panel.
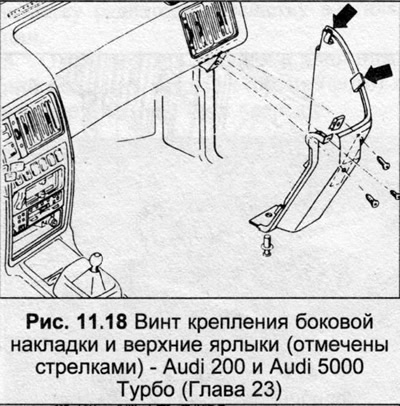
14. Unscrew the three screws, remove the side cover, lowering it to release the top tags (Fig. 11.18).
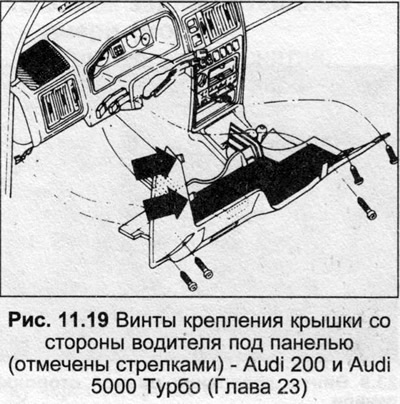
15. Remove the screws, unhook the tags, and remove the cover under the dashboard on the driver's side.
16. Remove the shift lever knob or handle, then unclip the shift lever trim from the brackets upward.
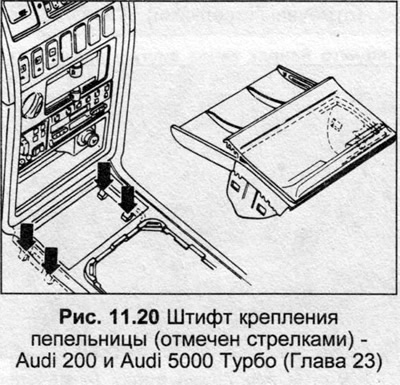
17. Press the ashtray mounting pin through the hole in the gear shift lever trim in the console.
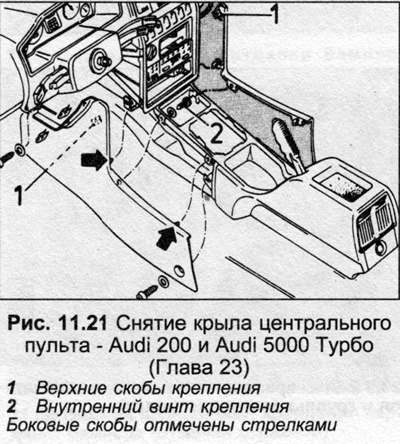
18. Unscrew the screws, unclip the brackets, and remove both wings of the remote control downwards.
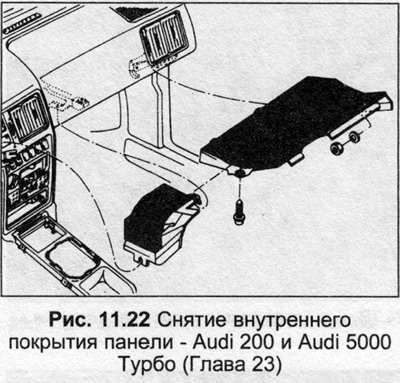
19. Unscrew the screws securing the internal panel coverings, disconnect the electrical wiring. Remove the coverings and control units.
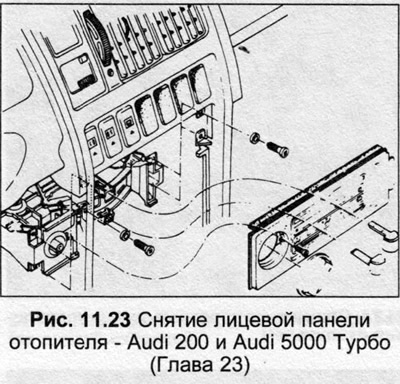
20. Remove the heater control knobs, unscrew and remove the heater panel.
21. Unscrew the heater instrument panel, disconnect the electrical wiring and lower the panel.
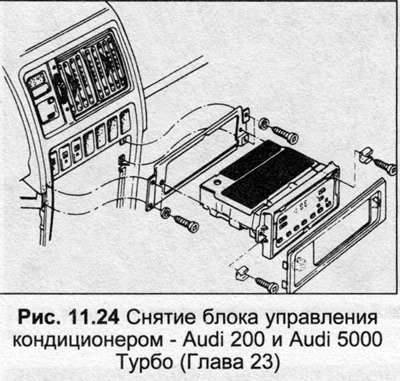
22. On vehicles with automatic air control/air conditioning, remove the trim plate, unscrew the screws, remove the control unit. Disconnect the wiring, remove the control unit.
23. If necessary, remove the radio.
24. Push out the switches on the panel and disconnect the electrical wiring.
25. Remove the trip computer after disconnecting and marking the electrical wiring connectors.
26. Separate the wiring harness, spark plug caps and auxiliary relay group from the panel and console.
27. Disconnect the wiring harness from the panel.
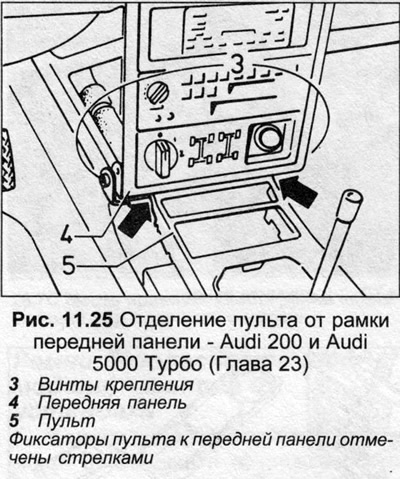
28. On vehicles with air conditioning, disconnect the wiring harness at the sensor in the center of the dash. Disconnect the air conditioning vacuum hoses near the trip computer, in the heater shroud, and in the instrument cluster. Separate the lower air hoses from the rear duct and heater shroud, then remove the front panel screws on each side, push the frame forward, and press the console cover down to disengage the clips (Fig. 11.25).
29. Unscrew the screws securing the panel, move the panel apart and remove it.