
2. Place chocks under the front wheels, then lift the rear of the car and carefully install the safety supports. Then release the handbrake.
3. Remove the ashtray under the rear of the console as described in chapter 11.
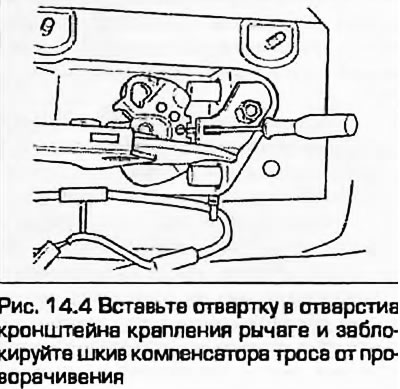
4. Using a screwdriver, block the compensator pulley from turning through the hole in the lever mounting bracket (Fig. 14.4).
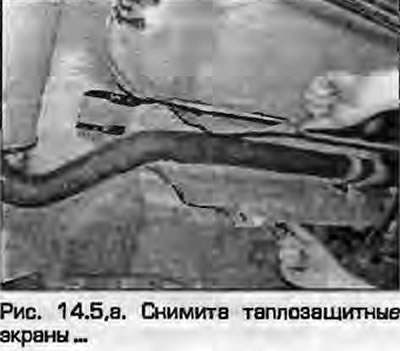
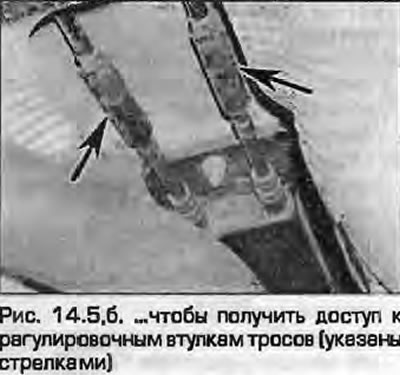
5. Working underneath the vehicle, locate the cable adjustment bushings - they are located above the exhaust manifold. Access can be improved by removing the heat shields (Fig. 14.5).
 |
 |
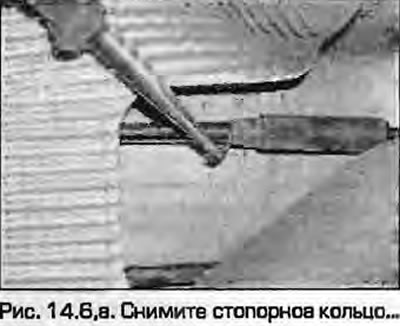
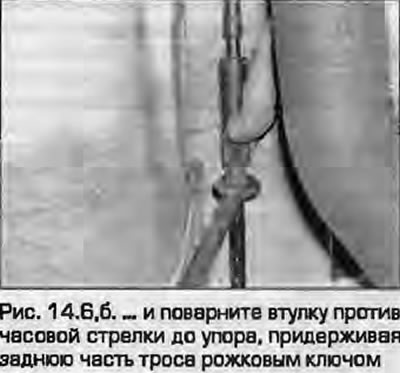
6. Working with the first bushing, remove the locking ring and turn the bushing counterclockwise until it stops. Hold the rear part of the cable with an open-end wrench by the hex nut (fig. 14.6, a, b).
 |
 |
7. Carefully push both parts of the cable together to take up any slack.
8. Turn the adjusting sleeve clockwise until the slot for the locking ring becomes barely visible. Insert the locking ring.
9. Repeat the steps described in paragraphs 6...8 for the other adjusting sleeve.
10. Stretch both parts of the adjusting sleeve until there is slack in the cables. Make sure that the operating levers on the calipers are still installed in the stops.
11. From inside the vehicle, remove the screwdriver to release the compensator pulley. Raise and release the handbrake lever at least three times.
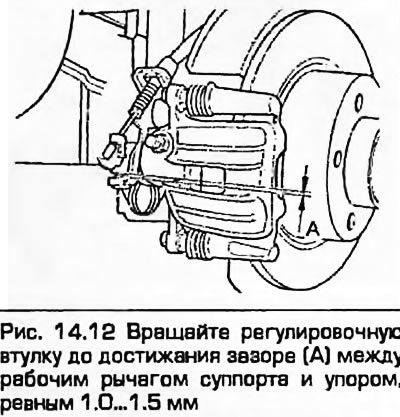
12. Under the vehicle, rotate the adjusting sleeves so that the gap between the operating levers and the stops is approximately 1 mm (no more than 1.5 mm) (fig. 14.12).
13. Check that in this position of the adjusting sleeves, the rubber ring colored seals inside the sleeves are not screwed. If so, the cables may be stretched beyond the adjustment limits and the brake shoes may wear out quickly.
14. Check the handbrake adjustment and repeat the procedure if necessary.
15. Adjusting the handbrake (both wheels are locked with the same force and released when the lever is released), lower the car.
The original version is on the portal AUDIMANUAL.ru