
In a disc brake system, the rear cables act on the brake shoes via a drive lever, a release bar and an adjuster mechanism.
The parking brake should operate when the parking brake lever is set to the third tooth of the sector. When the parking brake lever is tightened to the fourth tooth of the sector, the rear brakes should be locked.
In vehicles with rear disc brakes, the free travel of the parking brake lever depends on the operation of the adjustment mechanism. However, in general, the following rule can be used as a guide. If the travel of the parking brake lever is increased, this is evidence of wear of the rear brake pads or the result of stretching of the drive cables.
As a rule, parking brake adjustment is only necessary when replacing the cable or rear brake shoe linings.
Parking Brake Cable - Replacement
1. Place the rear of the vehicle on jack stands.
2. Release the parking brake.
3. Loosen the adjusting nut on the equalizer bracket just enough to allow the cable to be disconnected.
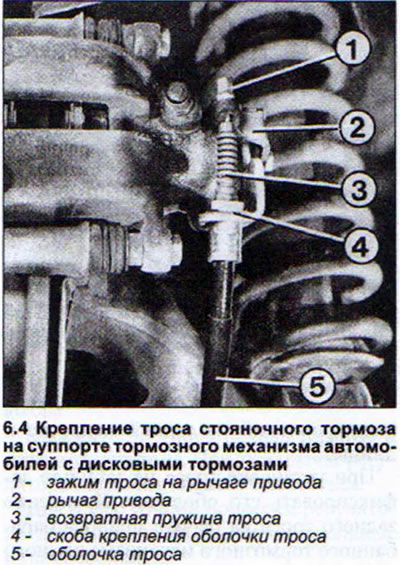
4. Remove the brake drum and brake shoes. Disconnect the other end of the cable from the drive lever. For disc brakes, remove the cable sheath mounting bracket and the cable clamp on the drive lever (see: illustration).
5. Release the drive cable from the various fastenings on the rear suspension and underbody.
When installing the cable, do not forget to fix its sheath. Fastening the rear cable to the drum brake actuator lever is a little difficult due to the presence of a coil spring.
6. Compress the coil spring with side cutters to release the end of the cable and secure it to the drive lever.
Attention! After replacing the parking brake cable of the disc brake mechanism, be sure to adjust the mechanism.
7. Adjust the parking brake. The parking brake adjustment should only be performed after repairing the parking brake mechanism and after replacing the brake shoe linings.
8. Place the rear of the vehicle on jack stands.
9. Vehicles with drum brakes: Release the parking brake.
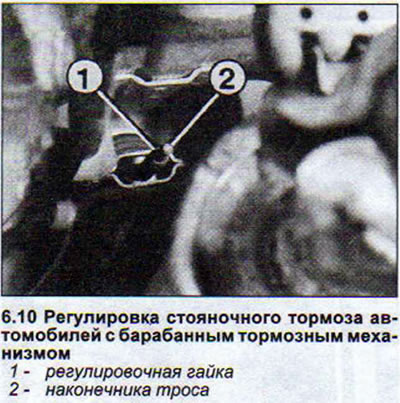
10. Loosen the adjusting nut to the very end of the cable end thread (see illustration).
11. Press the brake pedal all the way down.
12. Tighten the parking brake lever by two sector teeth.
13. Tighten the adjusting nut until both wheels can be turned by hand with difficulty.
14. Release the parking brake lever and check that both rear wheels turn freely.
15. Cars with disc brakes. Adjust the brake mechanism.
16. Tighten the parking brake cable adjusting nut until both the drive levers on the left and right wheel brake calipers move away from the stops. Ask an assistant to check this point.
17. Loosen the adjusting nut by two turns. To check the tension of the cables, move the drive lever of one of the brake mechanisms to the stop. If the drive lever on the second mechanism also moves to the stop, then the cables are too tight (see illustration).
18. Loosen the adjusting nut.
19. Apply and then release the parking brake lever. Check how freely the rear wheels rotate.
The original text of the material can be found on the website: AUDImanual.ru