

1. Remove the cylinder head (Chapter 12), pallet (Chapter 16) and oil pump (Chapter 18).
2. Turn the engine so that the journal of connecting rod No.1 is at BDC. Mark the position of the connecting rod and connecting rod cap relative to the cylinder with a punch.
3. Unscrew the nuts and remove the lower connecting rod bearing cover.
4. Using a hammer handle, push the connecting rod and piston out through the top of the cylinder. Place the bearing cap with the connecting rod. Keep all parts together.
5. Repeat the procedure given in points 2-4 inclusive, remove the remaining pistons and connecting rods.
6. Before disconnecting the pistons from the connecting rods, mark the orientation of the connecting rods, if necessary, indicating the side facing the front end of the engine. The mark on the ridge on the surface of the connecting rod and cap faces the front end of the engine.
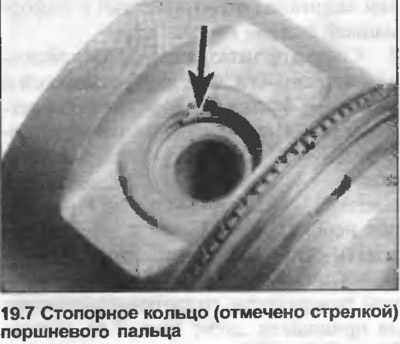
7. Remove the retaining rings from the grooves in the piston pin holes (photo), push the pin out enough to remove the connecting rod. Do not remove the pin completely unless you are installing a new one. If the pin is difficult to push out, heat the piston in hot water.
8. New bushings can be installed in the connecting rods, but since they need to be expanded to the required size after installation, it is better to entrust this work to an Audi agent.
9. Using old feeler gauges or pieces of plastic inserted behind the piston rings, carefully remove each ring from the piston. Stack the rings so that they maintain the correct orientation and so that the top ring can be identified. Carefully clean the rings and ring grooves on the pistons from carbon deposits using the pieces of piston ring.