
Table of contents: Removal ↓ Installation ↓
Master brake cylinder
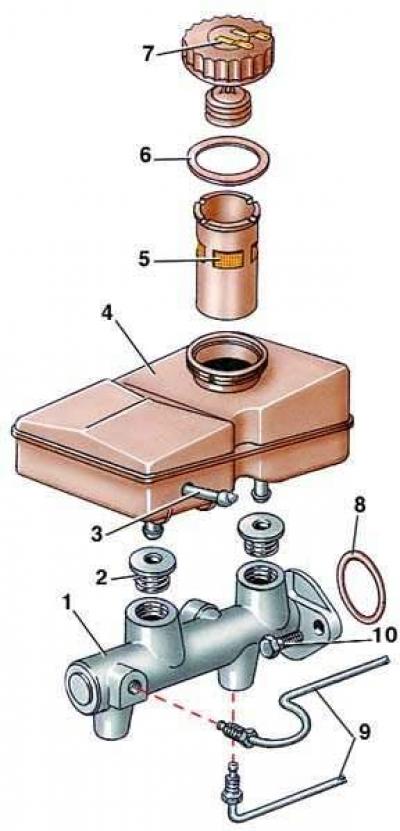
- 1 - body;
- 2 - sealing sleeve;
- 3 - nipple;
- 4 - tank;
- 5 - filter;
- 6 - sealing ring;
- 7 - lid;
- 8 - rubber seal;
- 9 - pipeline;
- 10 - bolt
Removal
1. Disconnect the wire from the negative terminal of the battery.
2. Clean the places where the pipes are connected to the master cylinder from dirt.
3. Disconnect the wires from the terminals of the brake fluid level sensor installed in the master cylinder reservoir cap and remove the cap.
4. Loosen the fastening nuts and disconnect the pipelines from the brake master cylinder body. Plug the pipeline openings.
5. Unscrew the two bolts securing the master cylinder to the vacuum booster and remove the brake master cylinder with the reservoir. Make sure that the rubber cylinder seal does not fall out.
6. Turn the master cylinder over and drain the brake fluid from the reservoir into a container. Then press the master cylinder piston several times, thereby removing the fluid from it.
Installation
The master cylinder is installed in the reverse order of removal. After installation, it is necessary to bleed the brake system (see subsection 10.15).
[This article was copied from an online resource: AUDImanual]