
Table of contents: Removal ↓ Installation ↓
1. Depending on the engine type and vehicle configuration, one, two or three belts are used. The main belt drives the generator, the viskomufta of the fan and the power steering pump (GUR). If an air conditioner is installed, the second belt from the crankshaft pulley drives the air conditioner compressor. On all engines except AHL the third belt drives the cooling system pump from the additional pulley to the power steering pump
2. The main belt and the air conditioning compressor drive belt are poly-V, while the coolant pump drive belt on engines other than AHL is V-shaped in cross-section.
3. On all engines, the main belt tension is automatic, with a spring-loaded roller. If air conditioning is provided, its belt tension is carried out with a torque wrench. On engines other than AHL, adjustment of the water pump drive belt tension is not required.
4. To remove the drive belts, apply the handbrake, raise the front of the vehicle and install safety stands. Remove the lower powertrain protective cover.
Removal
5. If the belt is to be installed backwards, mark it with the direction of rotation.
6. Although there is no absolute need, access can be improved by sliding the entire front panel back (together with the hood lock bracket assembly) forward from the engine as far as possible. Do not disconnect the radiator hoses or electrical wiring. To do this, first remove the front bumper as described in chapter 11, unscrew the three quick-release clips from the noise-insulating panel, remove the air duct between the lock bracket and the air filter. To the left of the radiator, disconnect the wiring from the fasteners. Unscrew the bolts securing the lock bracket to the body side member, unscrew the upper bolts that are behind the headlights. Together with an assistant, move the entire unit as far away from the car as possible. Audi mechanics use special brackets for this, however, you can make homemade ones from pieces of threaded rods, screwing them into the side members.
7. On models with air conditioning, loosen the tensioner bolts and move the pulley up to loosen the belt. Pull the belt off the crankshaft pulley, compressor pulley and tensioner pulley.
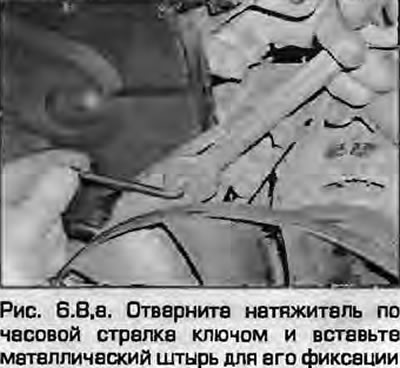
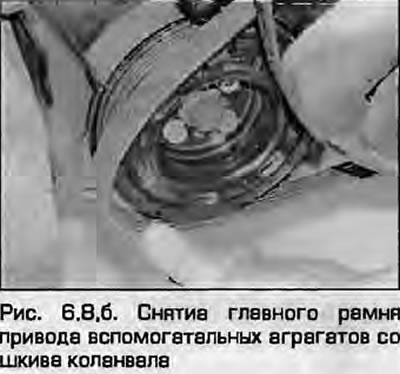
8. To remove the main belt, loosen the automatic tensioner and secure it with a suitable pin. Using an open-end wrench, turn the tensioner clockwise until the holes align and insert a metal pin, bolt or drill shank to secure the tensioner in this position. Remove the belt from the crankshaft pulleys, alternator, fan viscous coupling and power steering pump (fig. B.8, a, b).
 |
 |
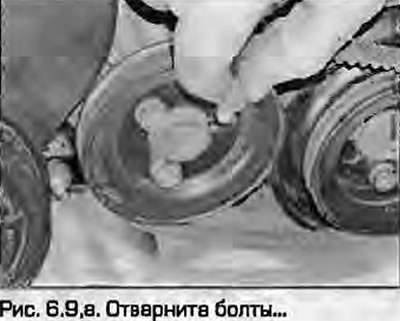
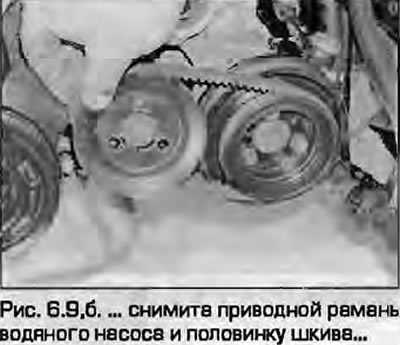
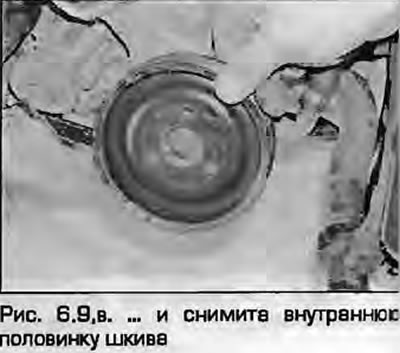
9. To remove the water pump drive belt (installed on engines except AHL), secure the power steering pump pulley with a screwdriver by inserting it from the back of the pump, unscrew the bolts securing the pulley to the water pump. Remove the drive belt and both halves of the pulley (fig. 6.9, a-c).
 |
 |
Note: Before removing the belt, find out if it is slightly loose - there is no adjustment, tension is provided by replacing the belt with a new one.
Installation
10. On engines other than AHL, place the belt on the water pump pulley, assemble the two pulley halves together and install the mounting bolts. Press the halves together while turning the pulleys and gradually tightening the bolts. Do not allow the belt to become pinched between the pulley halves. Finally, tighten the mounting bolts to the specified torque.
11. Place the main belt on the pulleys, then pre-turn the tensioner clockwise and remove the locking pin. Release the tensioner so that the belt is automatically tensioned. Make sure the belt is correctly positioned on the pulleys.
12. On models with air conditioning, place the belt on the compressor and crankshaft pulleys. Move the tensioner pulley down and align the belt with the pulley grooves. Tighten the belt by applying 25 Nm to the hexagon on the tensioner housing. While maintaining this torque, tighten the pivot bolt and adjusting bolt.