
Table of contents: Front oil seal ↓ Replacing the front oil seal housing… ↓ Crankshaft rear oil seal housing ↓
Front oil seal
1. Remove the timing belt and crankshaft sprocket as described in paragraph 5.
2. The seal can be replaced without removing it from the housing. Drill two small opposite holes in the seal to be replaced. Screw a screw into each of them, pull them with pliers, and remove the seal. Be careful not to drill through the seal housing or shaft seal.
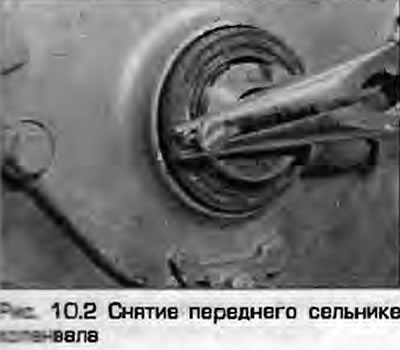
3. Clean the seat in the seal housing by wiping it with a rag, without leaving lint - do not use solvents that can get into the crankcase and damage the seals of the lubrication system. Remove any burrs to avoid premature damage to the seal.
4. Lubricate the oil seal with clean engine oil and install it into the housing.
5. Press the oil seal flush into the housing with the working edges facing into the engine using a mandrel or wooden block and a hammer.
Note: Select a head that rests only on the hard outer edges of the seal.
6. Install the crankshaft sprocket as shown in paragraph 5.
Replacing the front oil seal housing gasket
7. Remove the crankshaft sprocket as described in paragraph 5.
8. Unscrew the reaction bracket of the support at the front of the engine.
9. Remove the tray - paragraph 15.
10. Gradually loosen and unscrew the oil seal housing mounting bolts.
11. Remove the housing from the cylinder block together with the oil seal, turning it to remove it from the shaft.
12. Remove the old housing gasket, Clean the mating surfaces of the block and housing.
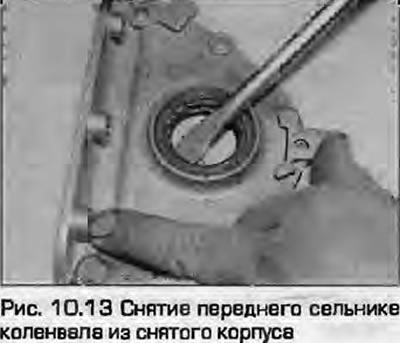
13. If necessary, remove the old seal by prying it off with a screwdriver (fig. 10.13).
14. Clean the seal housing and check for cracks and warps. Place the housing on a table with the mating surface facing down. If removed, press a new seal evenly into the housing.
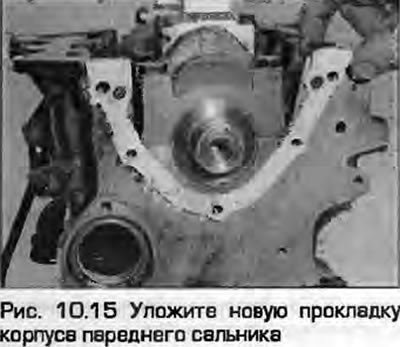
15. Lubricate the mating surfaces with multi-purpose grease and place the new gasket in place (fig. 10.15).
16. Wrap the edge of the crankshaft end with tape to avoid damaging the new seal during installation.
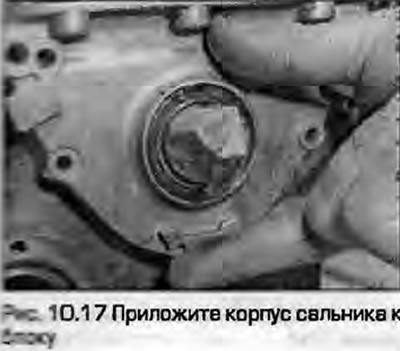
17. Lubricate the inner edges of the seal with clean engine oil and place it together with the housing on the crankshaft. Twisting, slide the housing along the shaft until it meets the block (fig. 10.17).
18. Screw in the mounting bolts and gradually tighten them to the specified torque.
19. Install the tray as described in paragraph 15.
20. Install the engine support jet bracket and tighten its mounting bolts.
21. Install the crankshaft sprocket as described in paragraph 5.
Crankshaft rear oil seal housing
Note: The seal is integral with the body and is replaced together.
22. Remove the gearbox - see chapters 7A or 7B.
23. Remove the flywheel (manual transmission) or faceplate (automatic transmission), as described in paragraph 13 this chapter.
24. Remove the intermediate plate from the cylinder block bushings.
25. Remove the tray - see. paragraph 15.
26. Gradually loosen and unscrew the oil seal housing mounting bolts.
27. Remove the seal housing from the block together with the seal, twisting it until the seal comes off the shaft.
28. Remove the old gasket from the cylinder block, wipe the block clean before installing the new seal and housing.
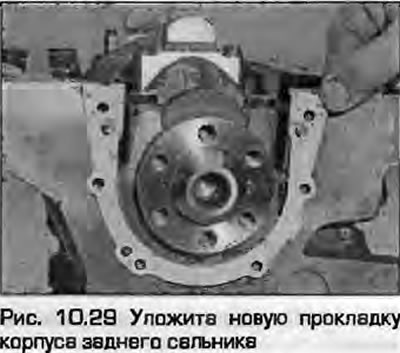
29. Lubricate the mating surface of the block with multi-purpose grease and place the new gasket in place (fig. 10.29).
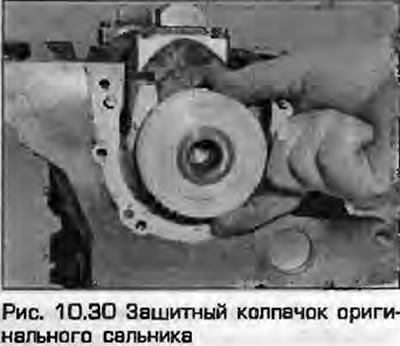
30. The original Audi/VAG oil seal is supplied with a plastic protective cap which must be placed on the heel of the crankshaft. The cap prevents premature damage to the working edges of the oil seal during installation (fig. 10.30). If there is no cap, wrap the shaft with tape.
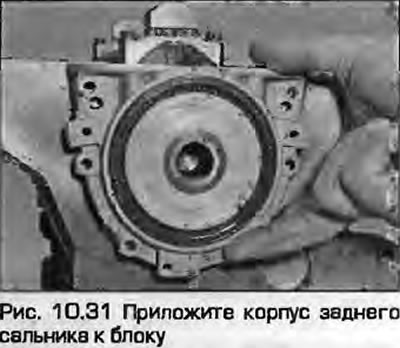
31. Lubricate the working edges of the oil seal with clean engine oil, install the housing together with the oil seal on the shaft, turning it until the housing stops in the block (fig. 10.31).
32. Tighten the mounting bolts gradually to the specified torque (fig. 10.32).

33. Install the tray as described in paragraph 15.
34. Install the intermediate plate on the cylinder block, tighten the mounting bolts and tighten them.
35. Install the flywheel (manual transmission) or faceplate (automatic transmission), as described in paragraph 13 this chapter.
36. Install the gearbox as described in the chapter 7A or 7B.
(Material republished from the website AUDIMANUAL.RU)